Description
🌞 Keep your space cool and bright with invisible power!
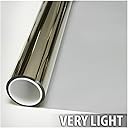
- CRYSTAL CLEAR VIEW - Very light tint ensures maximum visibility and natural brightness indoors.
- SUN SAFE STYLISH - Protect your interiors from fading with 99% UV blockage while keeping natural light flowing.
- STAY COOL SAVE BIG - Cut summer cooling bills with top-tier heat rejection technology.
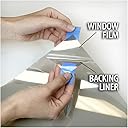
- EFFORTLESS DIY UPGRADE - Peel, stick, and install easily with free tools and a simple soap/water method.
- DURABILITY MEETS ELEGANCE - Scratch-resistant, metal alloy film designed to last without fading or oxidation.
The BDF NSN70 Window Film is a premium, very light transparent film that combines a durable nichrome-silver metal alloy for superior heat rejection and 99% UV protection. Measuring 24 inches by 50 feet, it offers scratch resistance and a strong adhesive for easy peel-and-stick installation, making it an ideal choice for energy-conscious professionals seeking to reduce cooling costs while preserving natural light and protecting interiors.