
DOWNLOAD THE APP


Customer Services
Copyright © 2025 Desertcart Holdings Limited
DOWNLOAD THE APP


🔥 Stay Cozy, Save Cash! 🔥
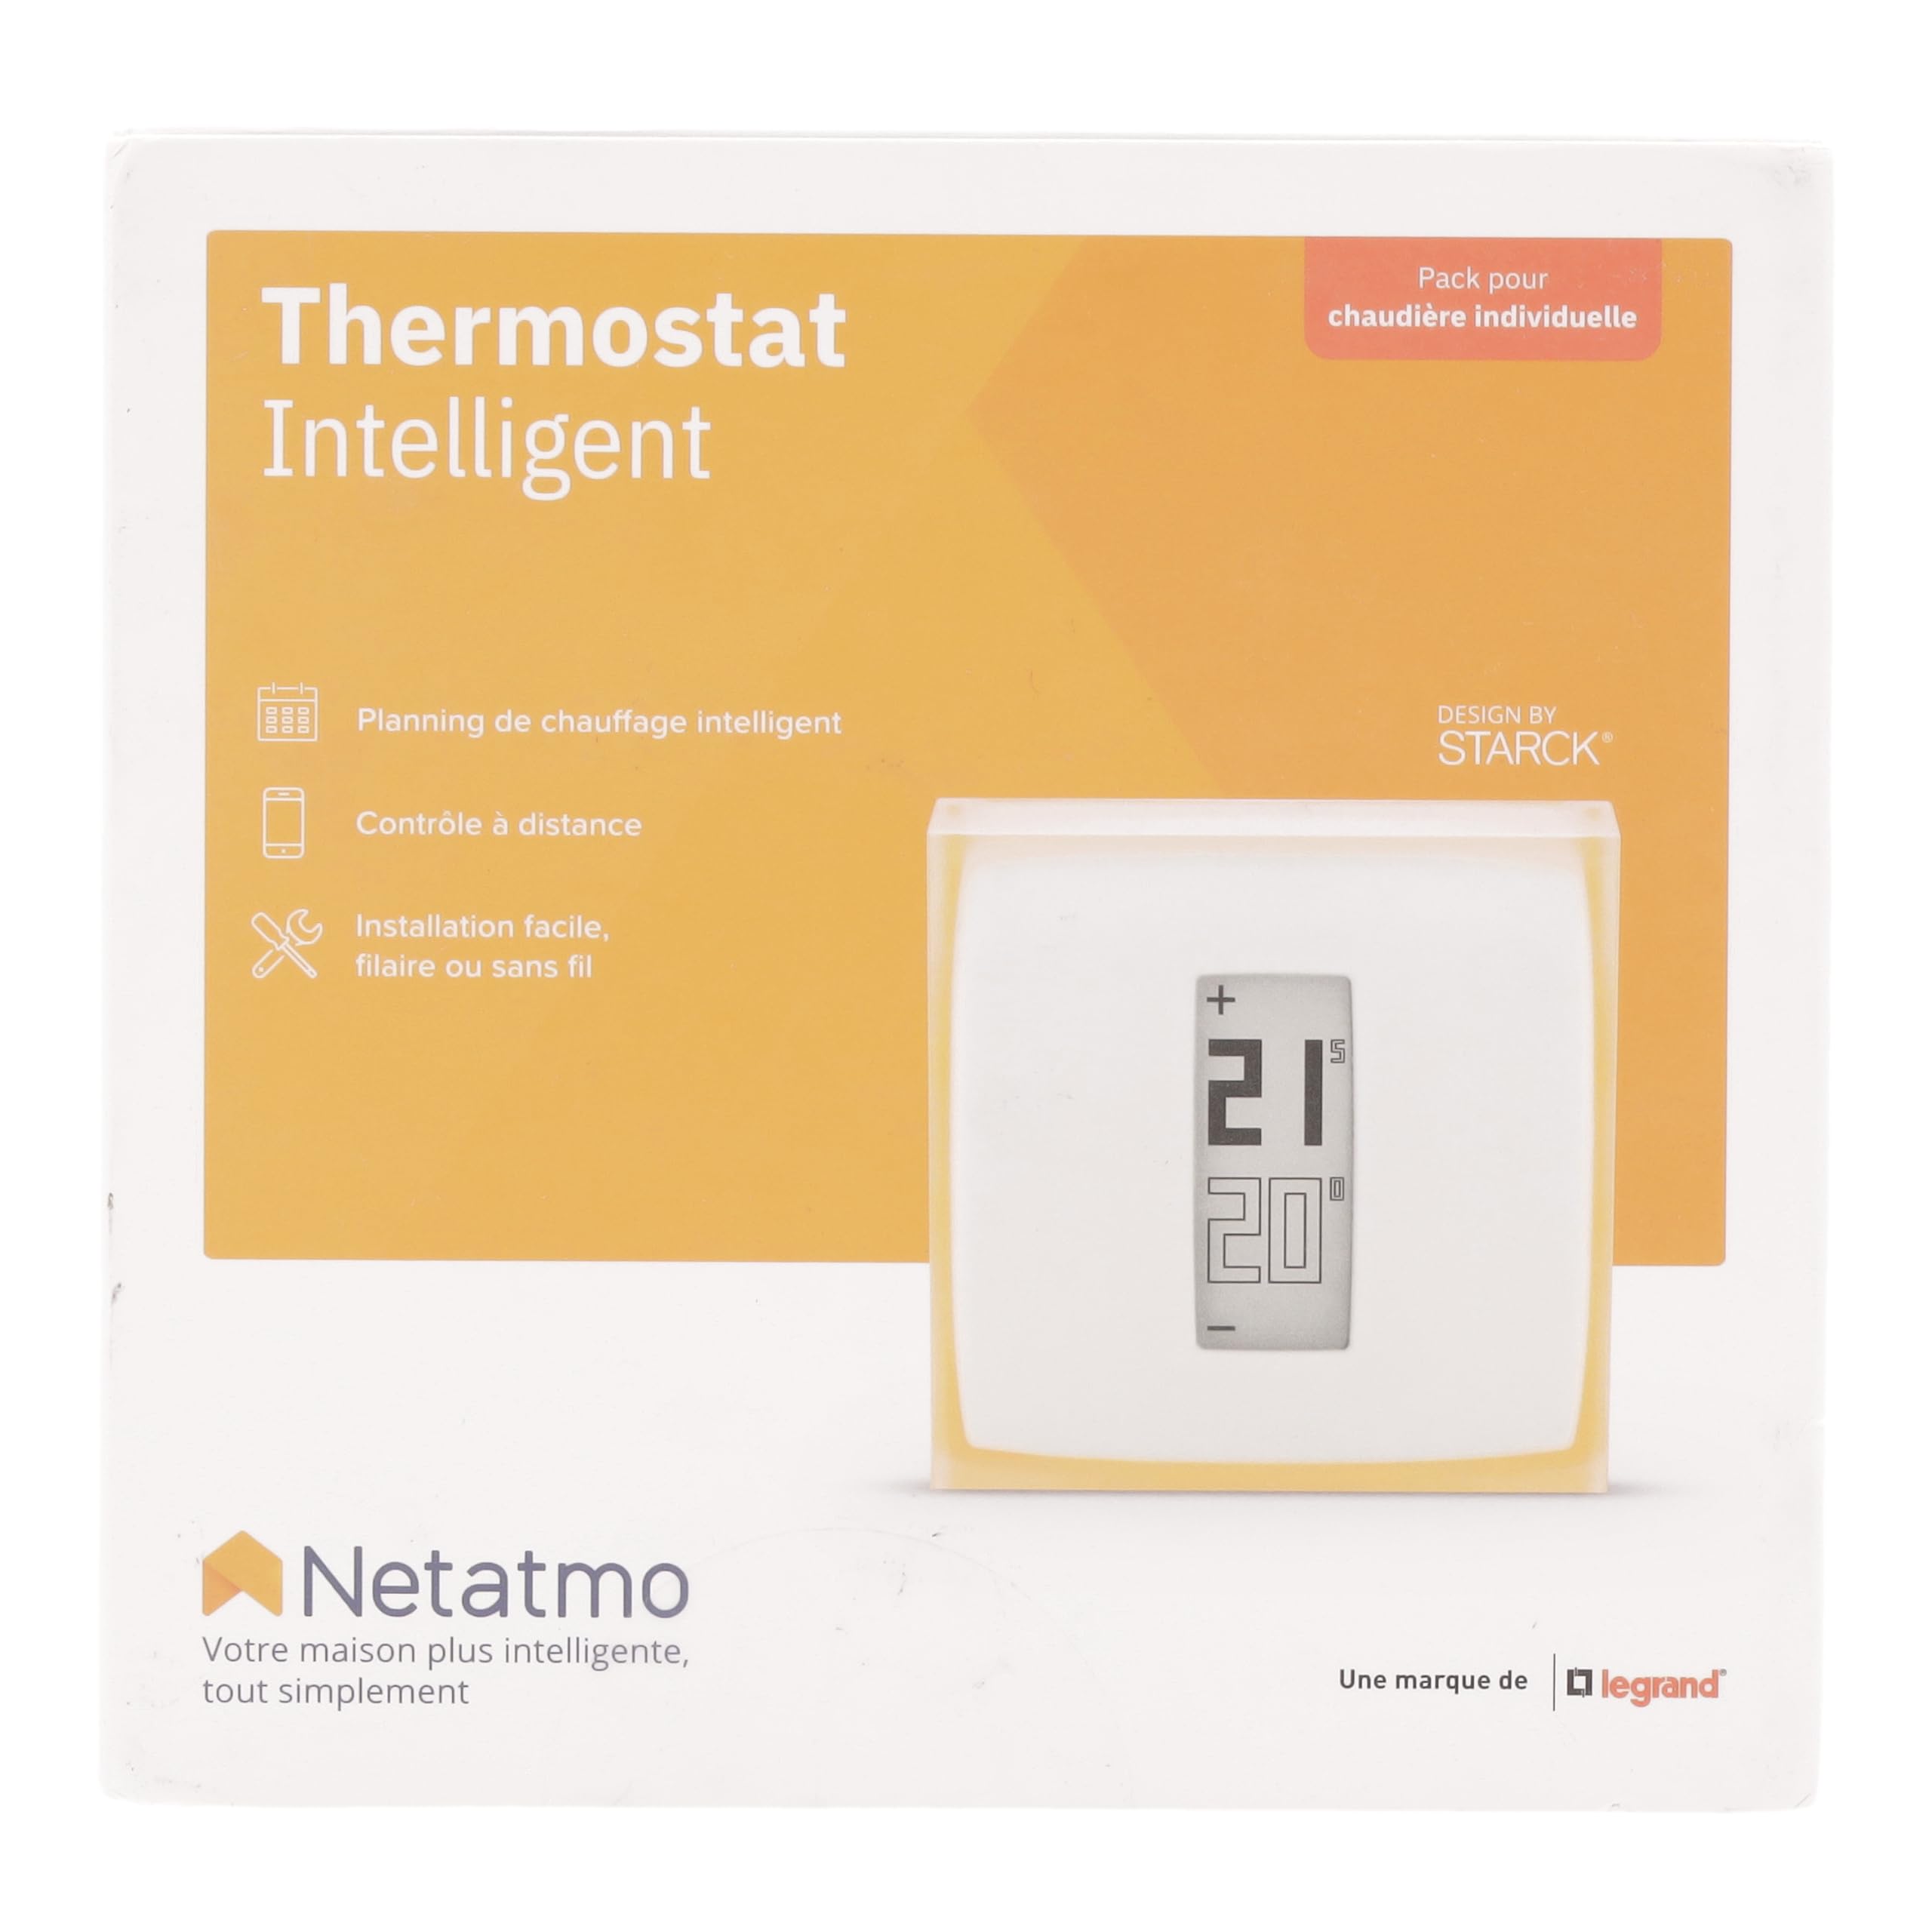
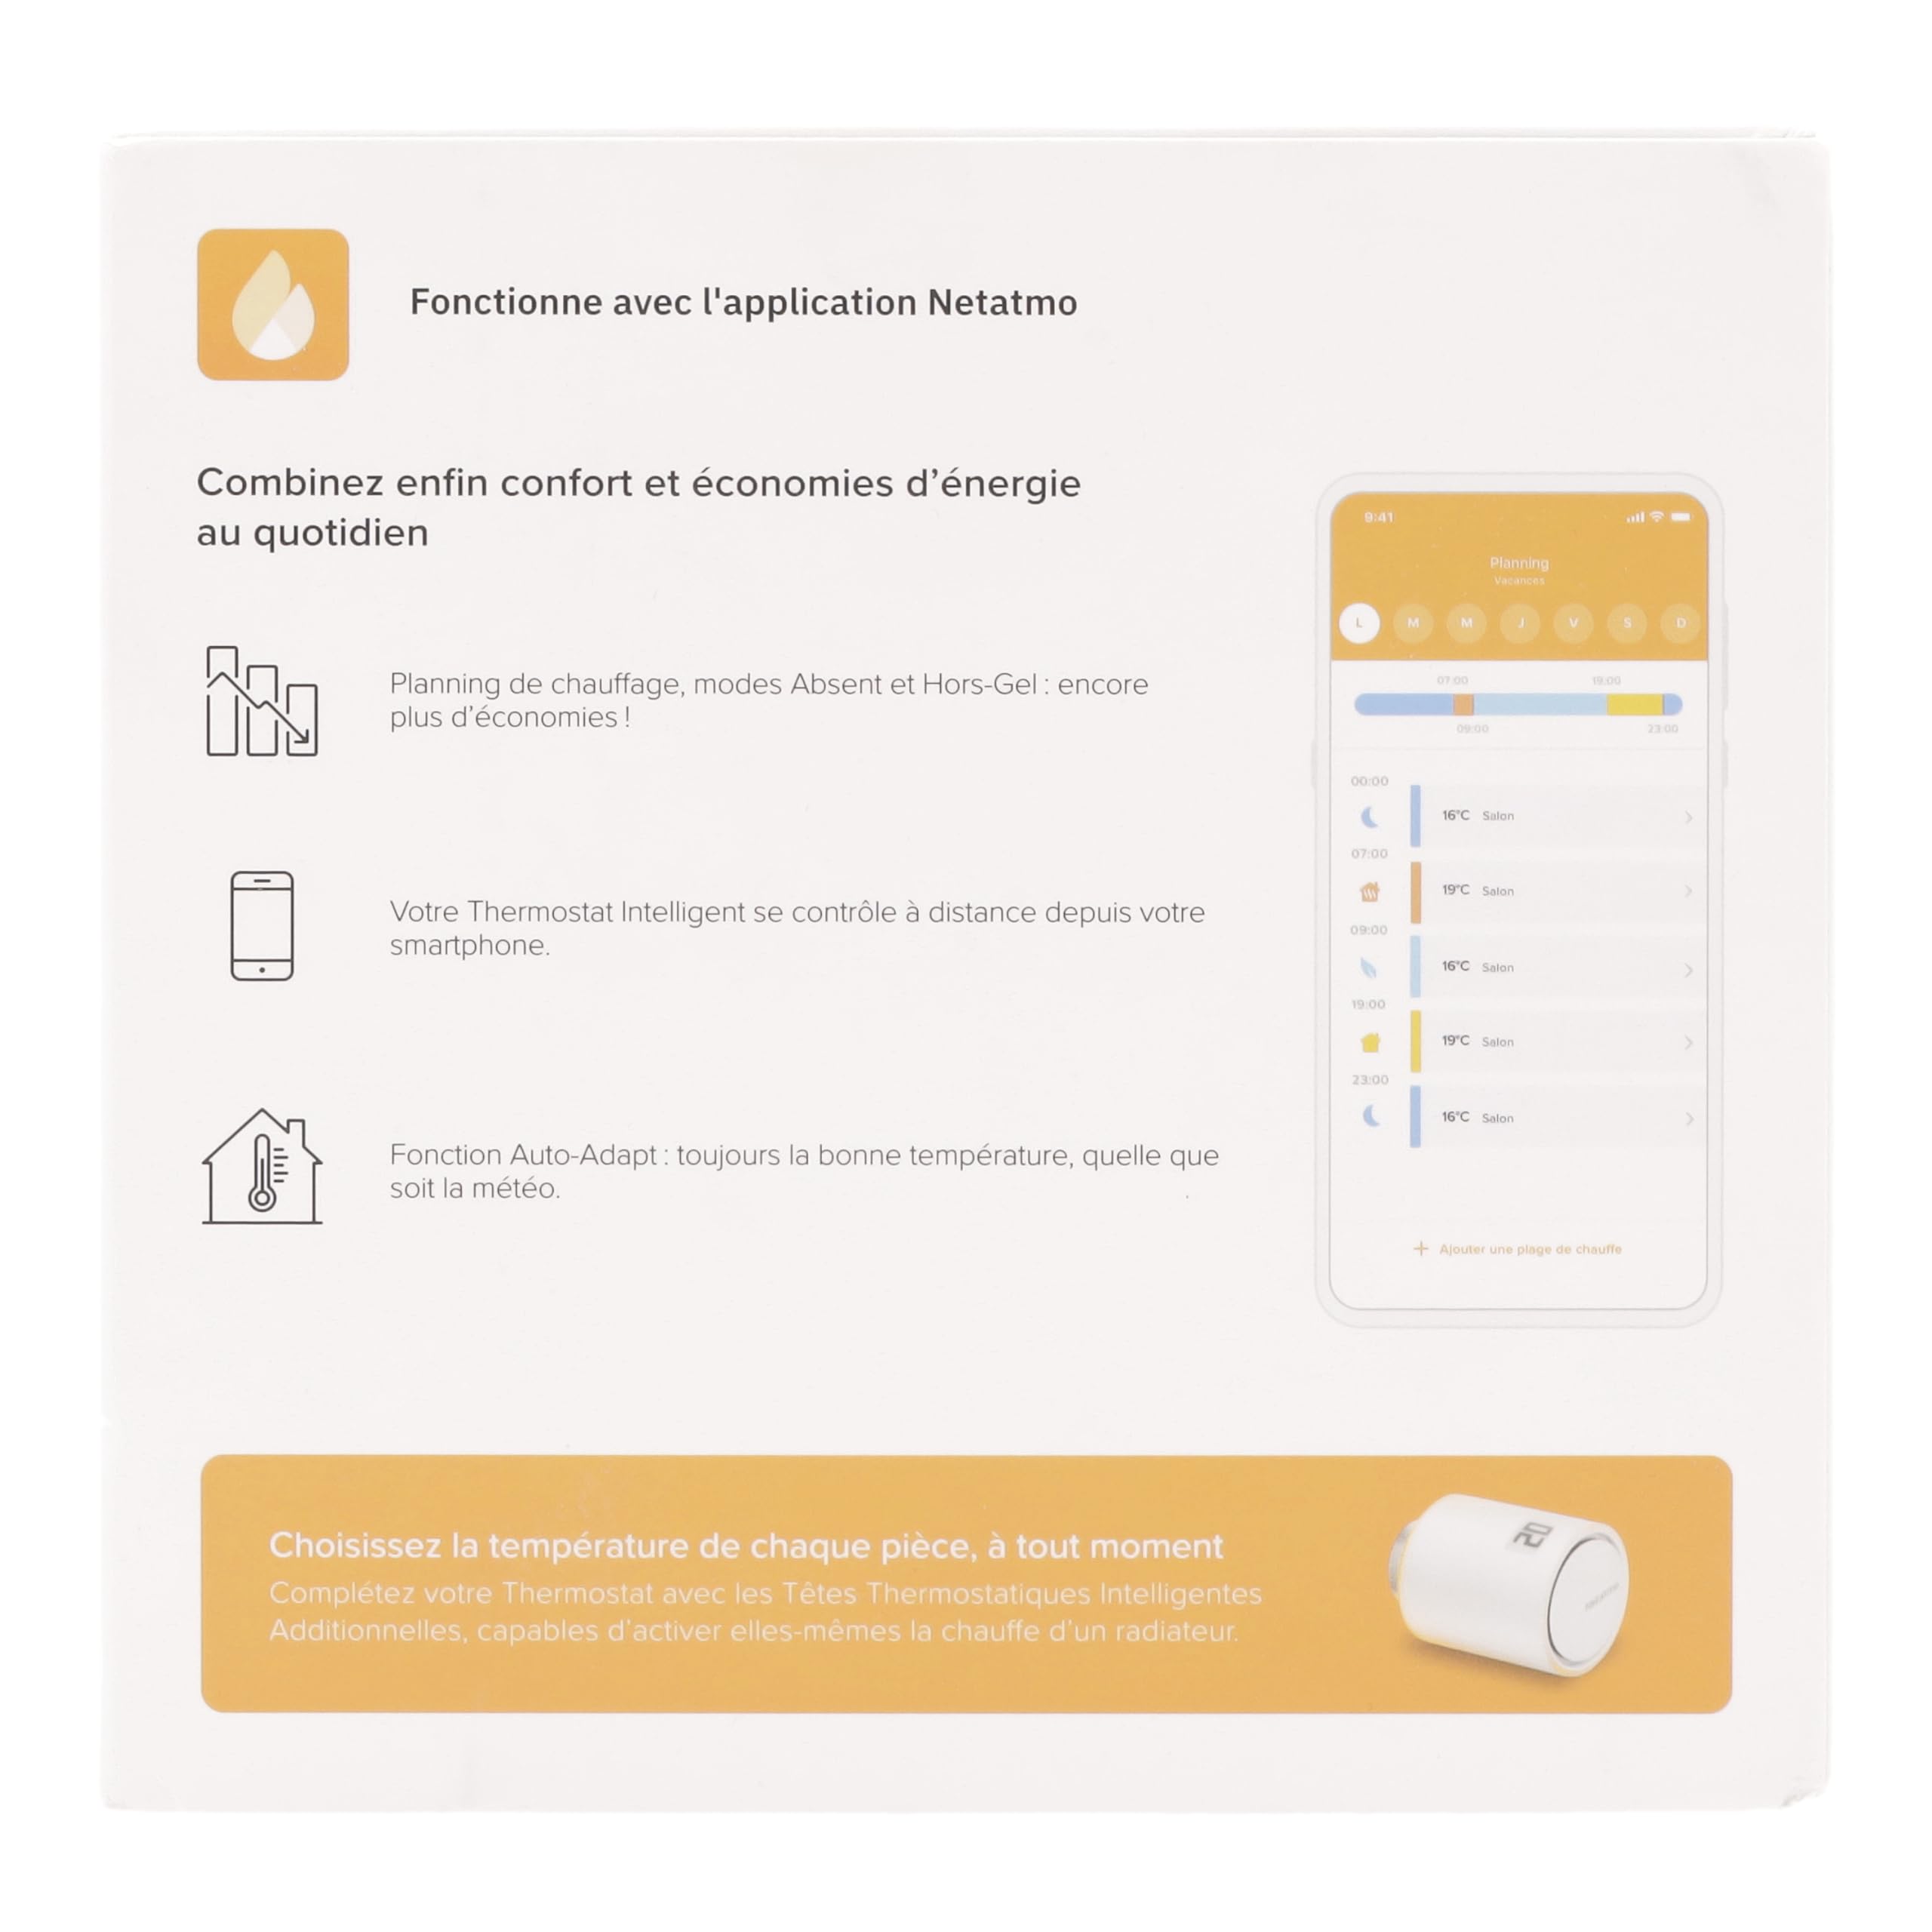
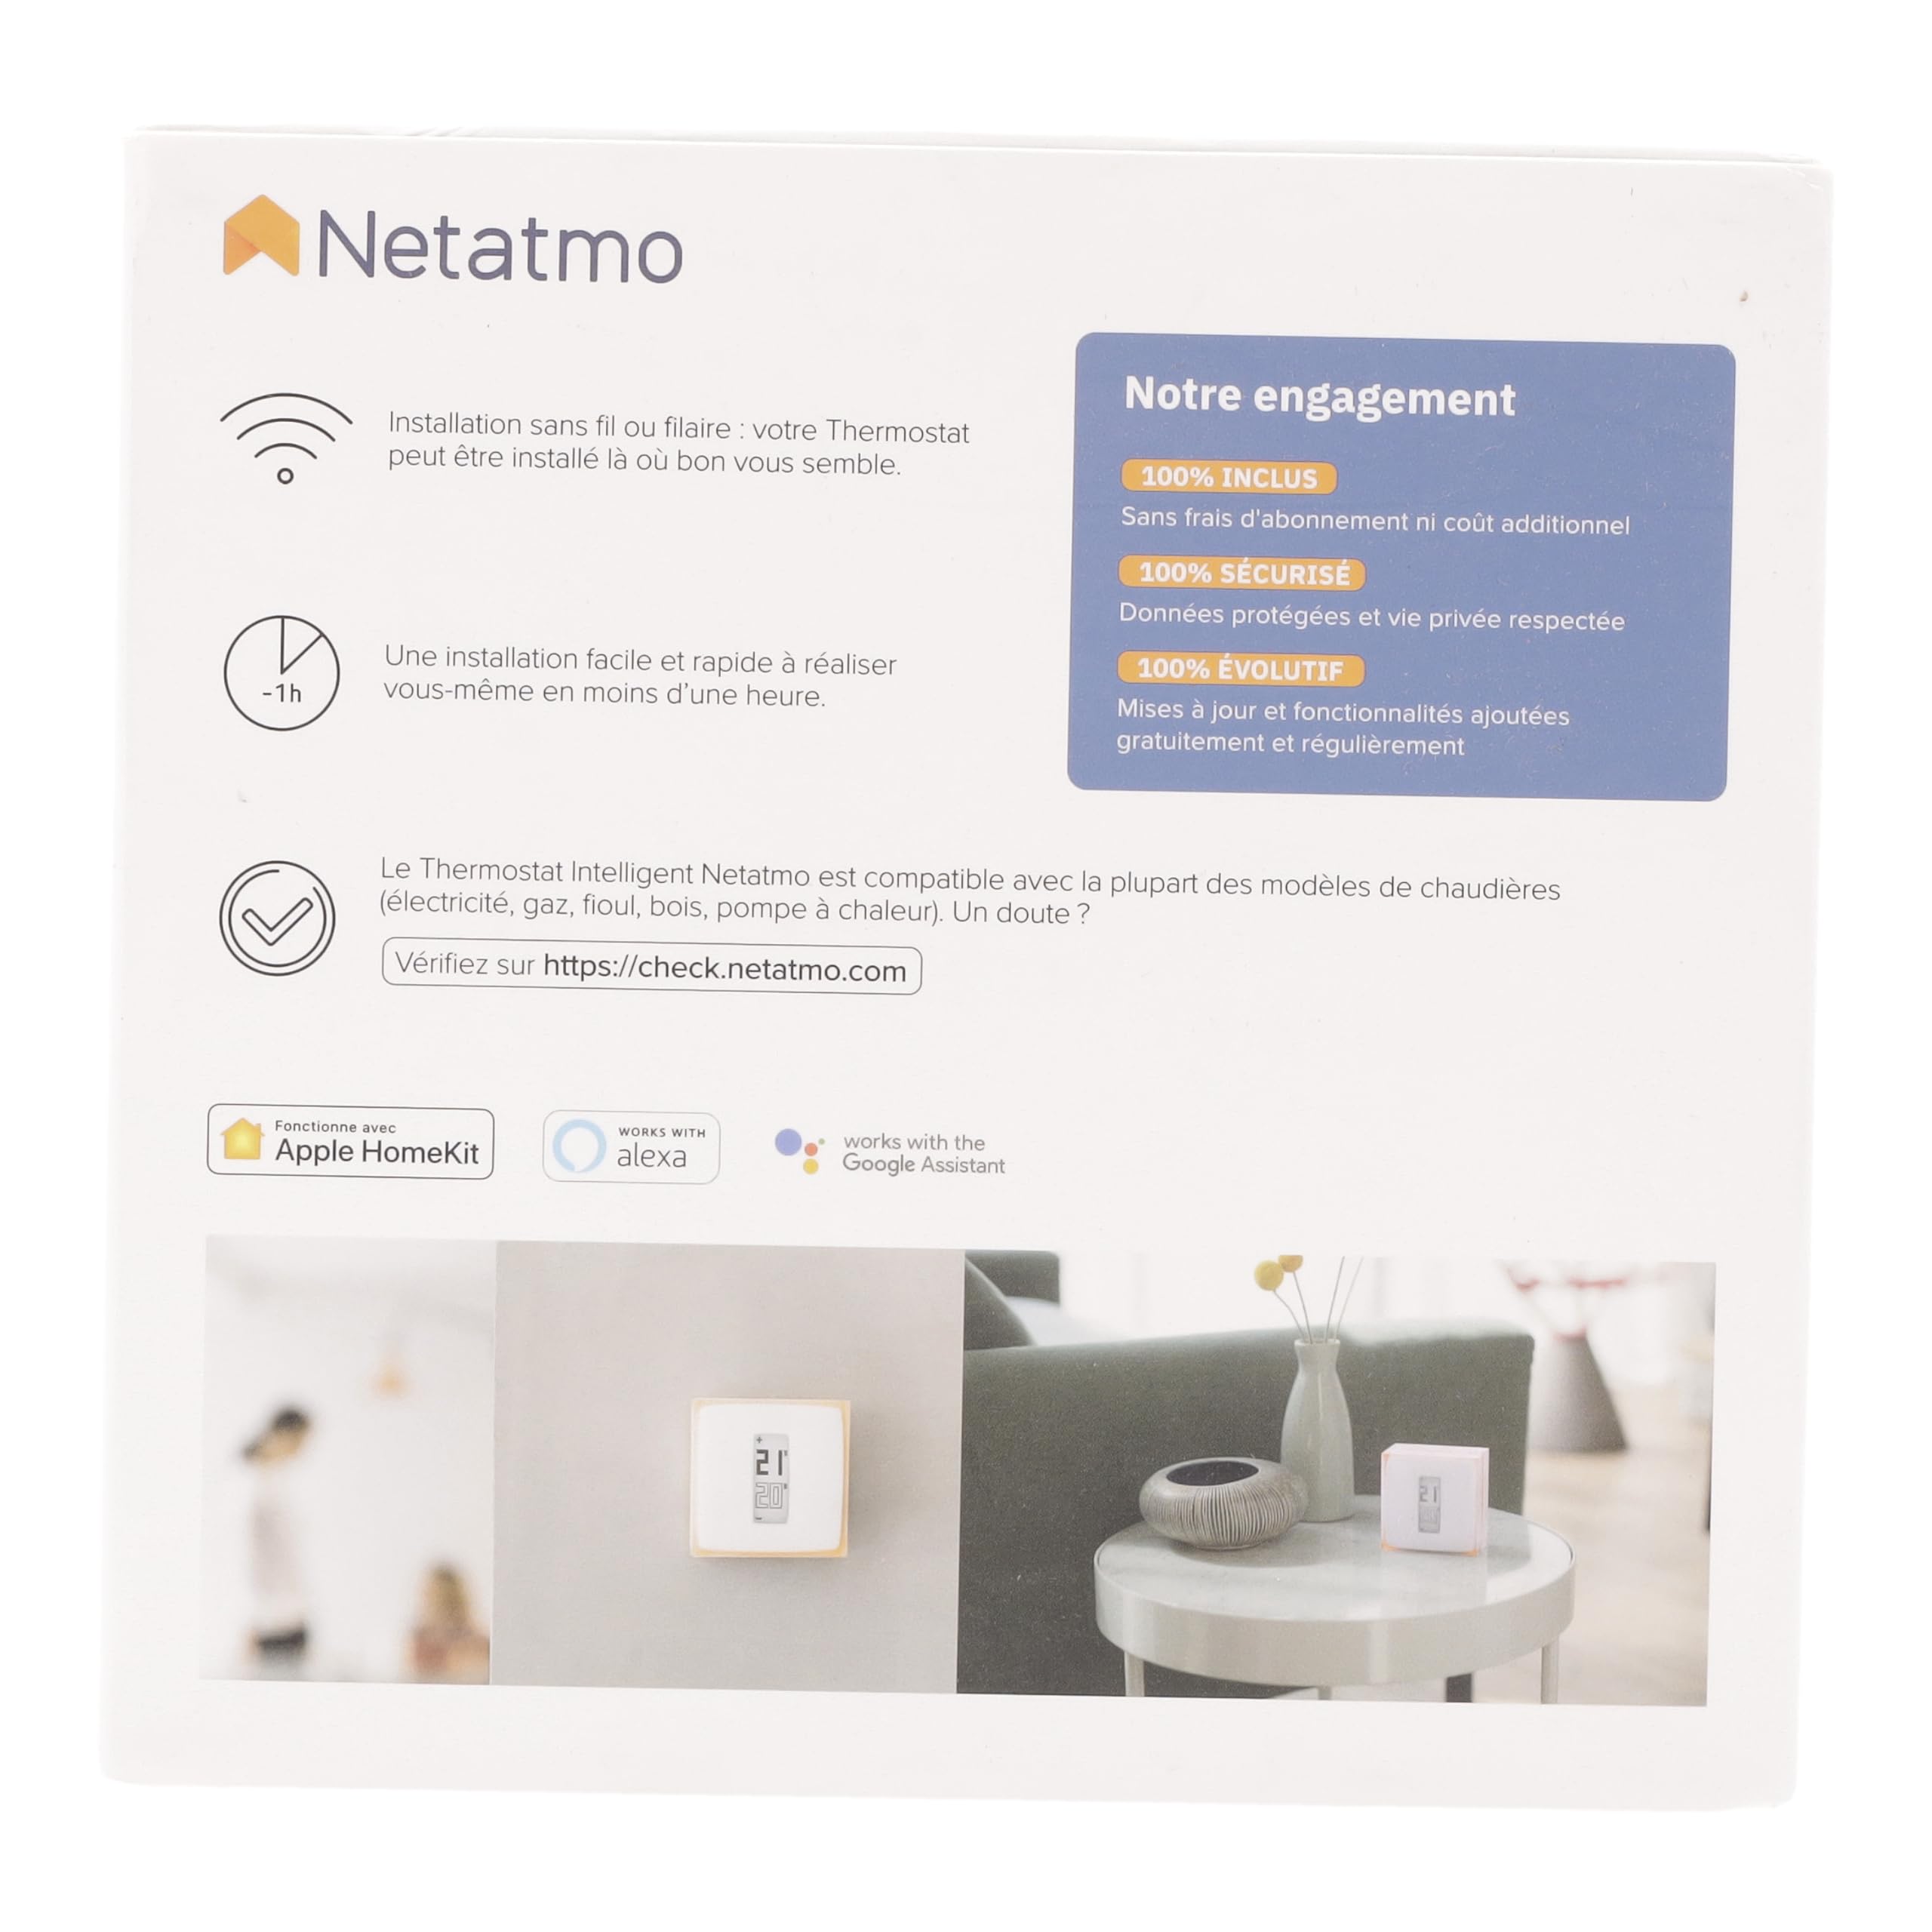
The Netatmo Smart Thermostat for Individual Boiler (NTH01-EN-EC) is a cutting-edge heating solution that offers easy installation, voice control compatibility, and energy-saving features. With a sleek design by Philippe Starck, it not only enhances your home's aesthetic but also provides valuable insights into your energy consumption, ensuring optimal comfort and savings.
| Product Dimensions | 8.3 x 2.2 x 8.3 cm; 400 g |
| Item Weight | 400 Grams |
| Specific uses | Furnace |
| Specification met | RoHS |
| Number of pieces | 1 |
| Batteries required | Yes |
| Included components | 1 x thermostat; 1 x mobile mount + wall mount; 1 x relay; 1 x boiler adapter; 1 x mains adapter; 1 x mounting plate; 4 x coloured stickers; 3 x AAA batteries; 4 x screws + 4 x dowels; 2 x installation guides |
M**S
Tout ce qu'il me fallait
j'ai acheter ce thermostat en reconditionné, le reconditionnement se fait par Netatmo, donc idem qu'un neuf.il est raccorde grâce à son relais sur ma pompe à chaleur Daikin Alerna 3 haute temperature, la connexion se fait sans fil via onde radio et se connecte sur mon réseau wifi.je l'utilise avev 8 vannes thermostatiques connectée Netatmo, ce qui me permet de contrôler la temperature à 0,5 degré prés de toutes les piéces de ma maison, grâce à l'application Contôle autant sur PC que sur téléphone portable ainsi qu'avec Home sur iphone.La selection des mode de temperatures et du planning est trés complète dés qu'on les maitrises.Il ne me manque plus que la station météo Netatmo pour completer mon installation.je recommande donc cet achat.
M**T
Perfekt
Ich bin begeistert von dem Thermostat! Habe keinerlei Kenntnis von Strom oder Heizungen, aber dir Installation war trotzdem kinderleicht. Ich habe ein vorhandenes Thermostat durch dieses ersetzt, da bei diesen Gaspreisen jede Stunde die die Heizung nicht laufen muss einfach viel spart.Die beiden Kabel in zwei vorhandene Anschlüsse zu stecken hab ich geschafft. Und dabei ist es egal welches Kabel wo angeschraubt wird. Beschreibung und Videoanleitung war top!Die App funktioniert auch gut, selbsterklärend und ohne viel unnötigen schnickschnack das eh keiner versteht, und trotzdem ausreichend Möglichkeiten zur automatisierung. Steuerung per Alexa funktioniert auch problemlos.Falls das Handy mal nicht zur Hand ist, kann man am Thermostat auch direkt die Temparatur einstellen.
B**E
It just works
Having researched all of the smart thermostats and valves that can connect to HomeKit it appears that Netatmo is the only system that doesn't try to charge you monthly subscriptions for "additional" features. You buy the kit, install it, and that's it. Before purchasing I sent a message to their technical team to ask a pre-scales question and received a response answering my question in full within 1 business day. Looking good. A product that gets good reviews, no extra monthly charges, technical support that seem to be on the ball. So I proceeded with a purchase of a thermostat and a single rad valve.Installation of the thermostat is a piece of cake. No more complicated than swapping a light switch. The unit itself seems well made and has a good quality feel. It looks smart, but not overly fussy and the display is clear and simple to read. A very nice touch is that you can orient the thermostat in one of two ways and the unit detects which way is up to rotate the display automatically. I like that. Good design.Setting up the hub is similarly a straightforward thing to do. Basically, just plug it in. Download the app, and you're done for a basic setup. All in all it took less than 1 hour including a basic software setup which is painless.I then installed the smart rad valve. Again, easy to do with clear instructions. It took just a few minutes to identify the correct adapter for my old thermostatic valve.Here's a tip: you'll probably find that your old valves have seeped a little and there may be some limescale or other general crud around the pin of the valve. I scratched this away with a screwdriver, brushed off the debris and then checked the pin movement. It wasn't completely stuck, but very stiff. A couple of squirts of WD40 and a bit of a gentle tap and the pin was free and moving nicely. If you don't check for this you'll find that your new smart valve might not be able to move the pin and open/close the actual valve.The whole installation of the TRV took about 15 minutes including valve cleaning. But that was my first time. Subsequent installs have speeded up - about 5 minutes per go. I've been impressed enough to go ahead and purchase another 12 valves to equip all of the radiators in my house.The system is very easy to use and setup and provides that rare thing: simplicity and yet the ability to create complex configurations if you need to. You can create multiple heating schedules, with different temperate bands for different time slots, and different temperatures for each room in a band. If you really want to. If not, let the built-in guide set it up for you and you're done.I have a 5-bedroomed house and work from home, so wanted to create a comprehensive setup, where some rooms are heated during the day, others not, all the rooms at night, but some, such as bedrooms, to lower temperatures. No problem. It can do all that.HomeKit linkage is fine - it just works. Siri can do her thing and you can remote control temperature in each room without any difficulty.The best feature in my option is the ability to have an individual radiator valve call for heat. That's something a traditional setup cannot do. For example, during the working week I can configure the rest of the house to run at a lower heat, and keep just the office at a comfortable level. When the temperate on that radiator gets low, the valve can open, call for heat through the wireless system, and have the boiler turn on. The other valves will stay shut due to their programmed temperature. The result: you heat the room you want, and not the whole house.That is the whole point of a smart system: fine grained control and accurate temperature setting. I have a smart meter and I've been comparing the gas usage from the heating system over the past few days. It's getting colder outside, but I can already see savings, and the house feels like it has a more comfortable even temperature spread.Like others have said - you need to let the system settle in. Firmware updates will need to be sent to each valve to give them all of the above features. It's fully automatic, but it can take a day or two. Most of my valves updated overnight, but some took a little longer. Be patient.All in all, for a setup with 14 valves and a thermostat it isn't cheap. But it is good quality, it works very well, and it very much does seem to save money and distribute heat much more effectively. In todays energy conscious and environmentally sensitive times, this seems like a very good investment.
D**E
Comodidad, conectividad con móvil y su estilo minimalista
Decidí comprar un termostato con conectividad con el móvil para poder ahorrar y por comodidad en su configuración y su utilización. Estaba harto configurar para cada invierno el que tenía original en el hogar, por muchas opciones que llevaba.Después de mirar y comparar diferentes termostatos con conectividad, compré este Netatmo porque la marca es conocida, porque es compatible con Home Kit de Apple y por su diseño porque soy amante del minimalismo.Ya teniendo en mano el dispositivo, me di cuenta que la calidad de los materiales era excelente y que en un principio pensaba que su instalación sería cosa de media hora. No fue así.El manual viene todo en inglés (al menos el que me llegó) y que no fue ningún problema pero lo aviso. El trabajo que se tiene es si no puedes aprovechar los agujeros de la pared del anterior termostato y que tendrás que destinar más tiempo en hacer nuevos agujeros y ajustar su colocación en la pared.Por lo demás, todo muy fácil. Conectar los dos cables al Netatmo y enchufar el receptor wifi en un enchufe que esté cerca del termostato y instalar la app en el móvil. No se si fui yo o bien por mi smartphone (un iPhone 6), pero la configuración para recibir acceso al termostato me costó muchísimo porque éste no encontraba el wifi de mi hogar y sí los de otros, por lo que no podía ponerle la contraseña y no acabar la configuración. Al final y gracias al móvil de mi mujer (un Huawei), le instalé la app y puede configurarlo. Después de esto en mi móvil ya tenía acceso y pude acceder.La app funciona bien y es senzilla. Configurar la temperatura y el temporizador semanal. Uno puede liarse pero se llega a entender bien.Por precio es normal la calidad y volvería a comprarlo sin dudarlo. El diseño es de la marca super conocida Starck.
G**I
Bello, funzionale e dal prezzo appetibile
Ho una casa a due piani, ne possiedo due e scrivo la recensione dopo un mese abbondante di utilizzo a pieno regime di riscaldamento (metà febbraio-metà marzo).Uno dei due è acquistato preso il produttore, l’altro presso Amazon. Tempi di consegna più rapidi (24h) per Amazon, prezzo equivalente.Ne installo prima uno al piano superiore, zona living/cucina, ne testo le funzionalità per qualche giorno.Dopo pochi giorni, convinto delle funzionalità di base, decido per l'acquisto del secondo e l'installazione nella zona notte (più critica) al piano inferiore.SCELTA: era da un po' che guardavo i termostati smart, ma non avevo una reale esigenza. Questo inverno l'esigenza è diventata reale e impellente, perché mancando spesso da casa, ho iniziato a voler avere la possibilità di non riscaldare a vuoto, cosa che mi era imposta dal termostato tradizionale che già avevo. Ho passato qualche settimana a leggere opinioni, prove, manuali e la scelta era fra Netatmo, Nest e Tado.Prima dell'acquisto ho visto e rivisto i video su YouTube che sono la guida alla installazione, ho letto tutta la documentazione possibile e mi sono anche schiarito le idee sulle mie esigenze, che riporto, perché sono personali:1) il termostato deve essere a batteria (come il precedente Siemens RDE10 che vado a sostituire) perché non ho cavi di alimentazione in zona termostato. Questa esigenza ha escluso Nest.2) non m’interessa che il termostato sappia se sono in casa o meno mediante un’applicazione che mi localizzi. Anzi, non voglio proprio essere localizzato. Questa esigenza ha escluso Tado.3) il termostato deve avere la possibilità di interfacciarsi con IFTTT ([...]) in modo da poter fare io degli eventi tipo "il mio telefono si collega al WiFi di casa -> togli la modalità ASSENTE" e così via. Questa possibilità è presente su Netatmo, anche se naturalmente non è obbligatorio usarla.Decido quindi per Netatmo, attirato anche dal prezzo, sensibilmente inferiore alle altre scelte (che erano state escluse per altri motivi, non per il prezzo maggiore).INSTALLAZIONE: ho letto e riletto tutte le guide, ho guardato e riguardato tutti i video di installazione, ho smontato il mio termostato per verificare i collegamenti, tutto PRIMA di ordinare. Non sono un professionista, ho solo una basica comprensione di come funzionano le cose ed un minimo di manualità con il bricolage. Come promesso dal produttore, l'installazione non è stata per nulla problematica. Si mette il termostato a muro e relativi collegamenti, poi si collega con un cavo USB (in dotazione) il relay al PC e si fa la configurazione per collegarlo al WiFi, poi lo si mette nella presa. Tempo totale installazione: 40 minuti per il primo termostato, la metà del tempo per il secondo.UTILIZZO NELL’IMMEDIATO: appena finita la installazione ho fatto le classiche prove per vedere se effettivamente comandava il riscaldamento, ho fatto una impostazione di base delle temperature e nelle successive 48h ho tenuto d'occhio. Tutto funziona bene, decido quindi per l'acquisto e l'installazione del secondo. Idem, tutto bene.UTILIZZO NEL BREVE: "naturalmente" il primo weekend che mi assento da casa, la applicazione mi segnala che il relay è scollegato dalla rete e quindi non è raggiungibile e nemmeno comandabile! Milioni di "riprova" e niente. Succede a singhiozzo su entrambi, generalmente quando sono fuori di casa, divento furioso! A casa verifico tutto, la vicinanza del termostato dal relay, il collegamento del relay al WiFi, e… niente sempre irraggiungibile a singhiozzo. Più quello del piano di sotto (più lontano dal router WiFi), che riposizione per un miglior segnale, ma non cambia. Decido di provare la assistenza tecnica, dove mi danno un generico consiglio di provare a cambiare il canale del WiFi. il consiglio è grossolano perché (di questo me ne intendo) il canale WiFi è stato scelto per non avere interferenze e poi vivo in campagna, non ho decine di altre reti WiFi vicino che possono disturbare. Prova che ti riprova, evito di riportare qui l’odissea di una settimana di ricerca problemi e salta fuori che il colpevole era il router WiFi (peraltro un router AC1900 di fascia casalinga alta)!Sostituito il router, mai più nessuna disconnessione, per lo meno sinora. Sono ragionevolmente certo che il problema fosse il router WiFi.Morale della favola, ho fatto bene ad aspettare perché se avessi scritto la recensione dopo due settimane, avrei scritto peste e corna per colpe esterne al termostato!UTILIZZO NEL TEMPO: risolti i problemi, che, ripeto, non sono imputabili al termostato, sono molto soddisfatto.L’utilizzo è semplice e intuitivo. Il termostato in se è gradevole da vedere (molto più bello del precedente) e personalizzabile con cornici di diversi colori. L’applicazione per smartphone funziona bene e permette sia l'interazione in tempo reale come alzare/abbassare temperatura, inserire modalità "assente" e toglierla, sia la programmazione settimanale. Idem via web. La app permette anche la gestione di entrambi i termostati.Dopo una settimana mi arriva la notifica che il termostato ha compreso la termodinamica della casa e quindi sarà più efficace con l'implementazione di un algoritmo più ottimizzato. Sia dall’app sia dall’interfaccia web si può verificare l'andamento delle temperature in casa e dell’accensione della caldaia. Alla fine del mese arriva un report dei consumi, che essendo il primo mese, non dice molto, ma è esattamente ciò che ci si aspetta da un termostato intelligente.L'aggiustamento delle temperature in casa si basa anche sulla temperatura esterna che proviene dalle previsioni meteo locali, oppure è possibile integrare il rilevamento della stazione meteo Netatmo (che io non ho).Ho anche provato la integrazione con IFTTT con delle regole di base: se il termostato viene messo in modalità manuale (es: qualcuno della famiglia alza la temperatura) a me arriva una notifica e l'evento viene annotato su un documento su Google drive. Questo mi sarà utile per capire se le temperature che ho impostato automaticamente sono spesso "aggiustate" e quindi fare una impostazione più realistica.Il prossimo passo - e qui siamo ad un utilizzo un po' più avanzato - sarà quello di installare la app IFTTT su tutti gli smartphone della famiglia e creare un evento "se non c'è nessuno in casa togli ogni eventuale aggiustamento manuale", o chissà cos'altro mi verrà in mente.GIUDIZIO GLOBALE: è presto per dire se ci sono dei risparmi in bolletta, dovrò aspettare almeno un anno per capire. Nel frattempo, il giudizio è assolutamente positivo: costa meno degli altri, è gradevole da vedere, non ha funzionalità "fronzoli" (ma si presta a un utilizzo avanzato con IFTTT). E' esattamente quello che cercavo.
Trustpilot
2 months ago
3 weeks ago