🚀 Elevate Your 3D Printing Game!
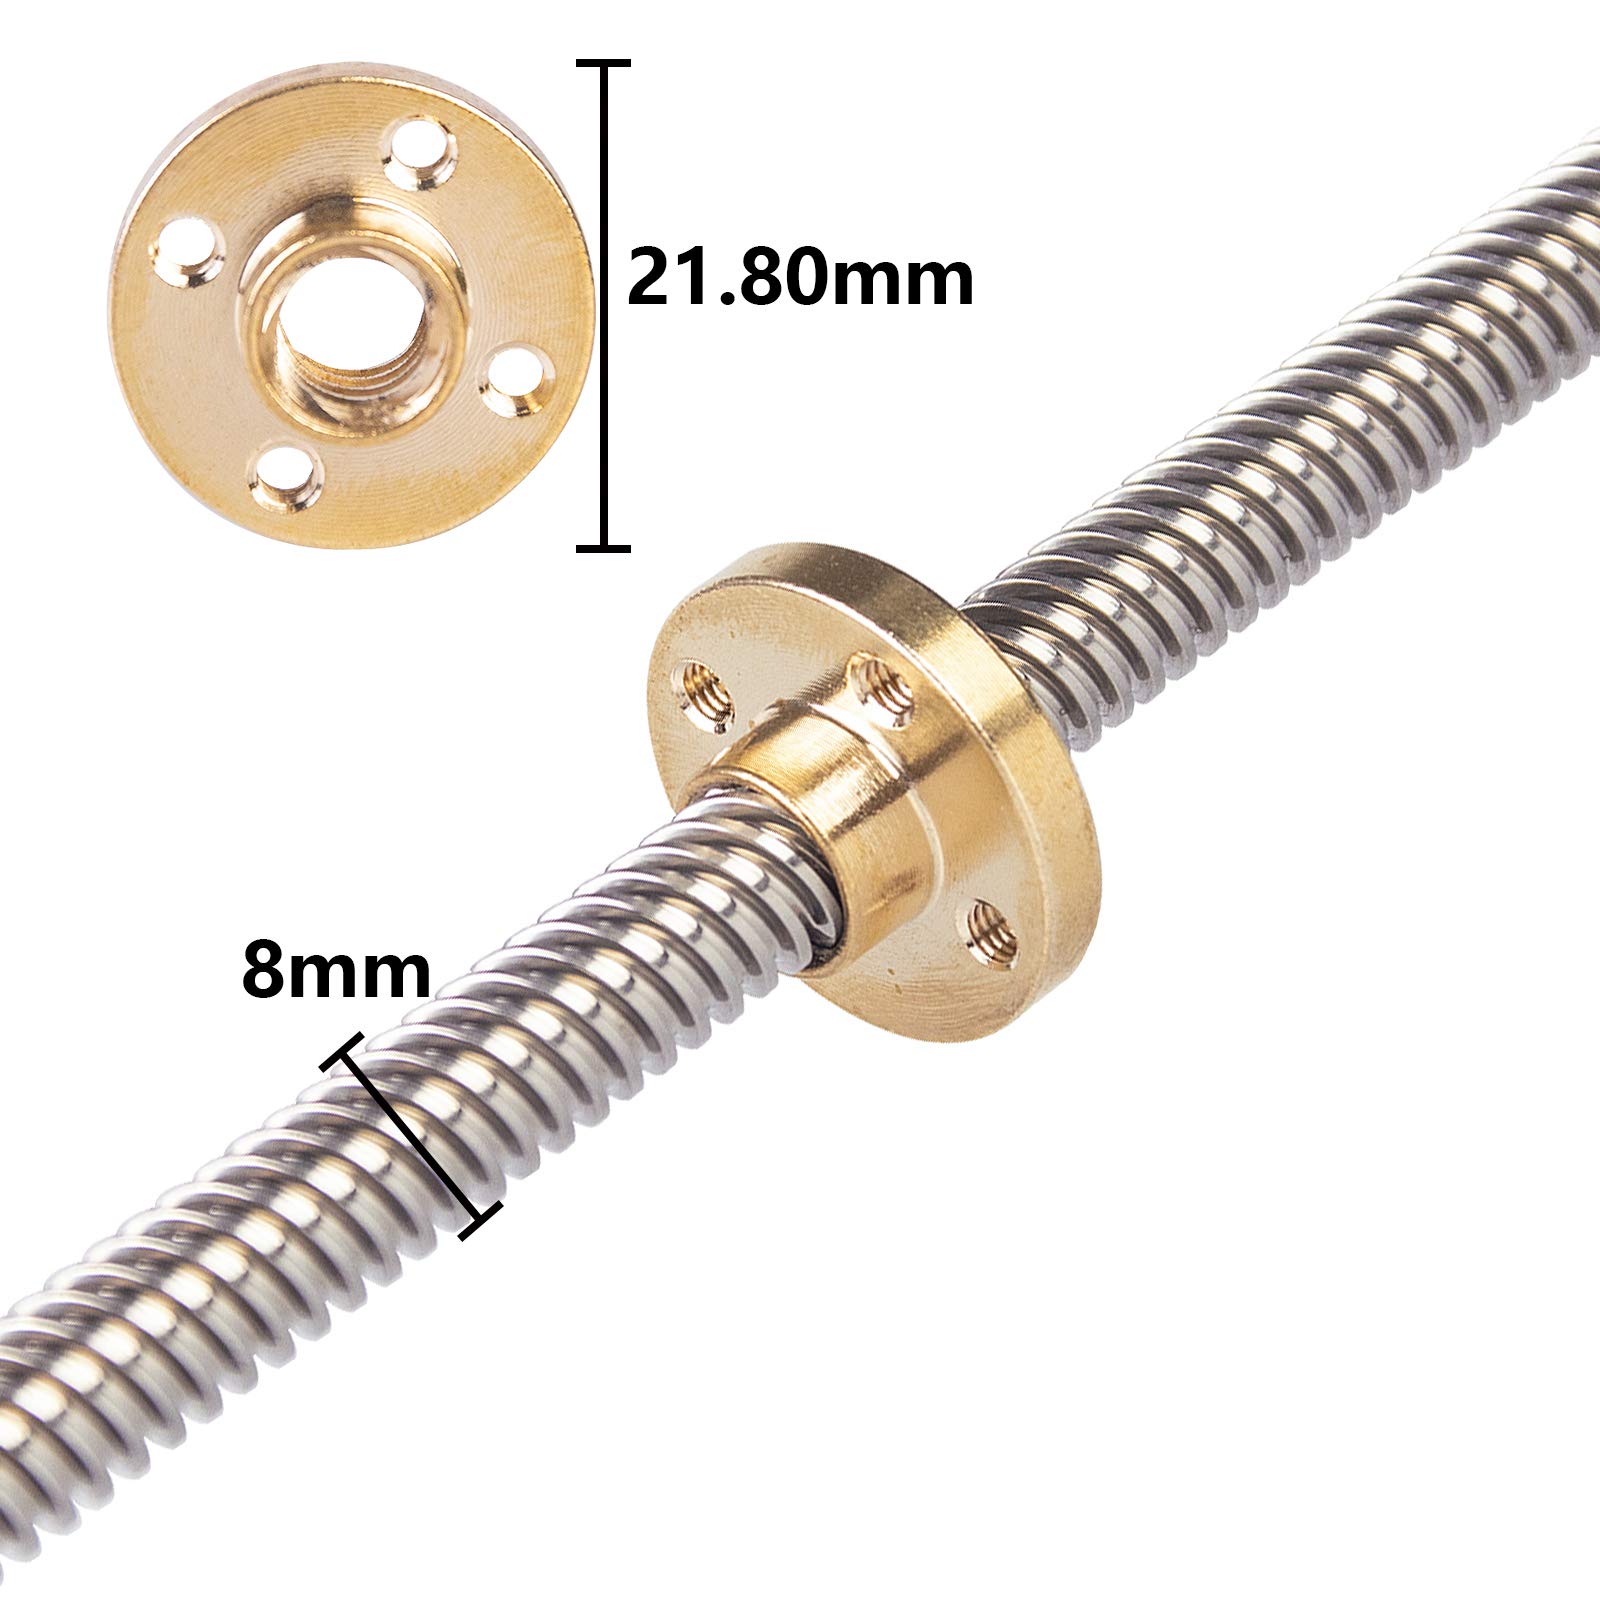
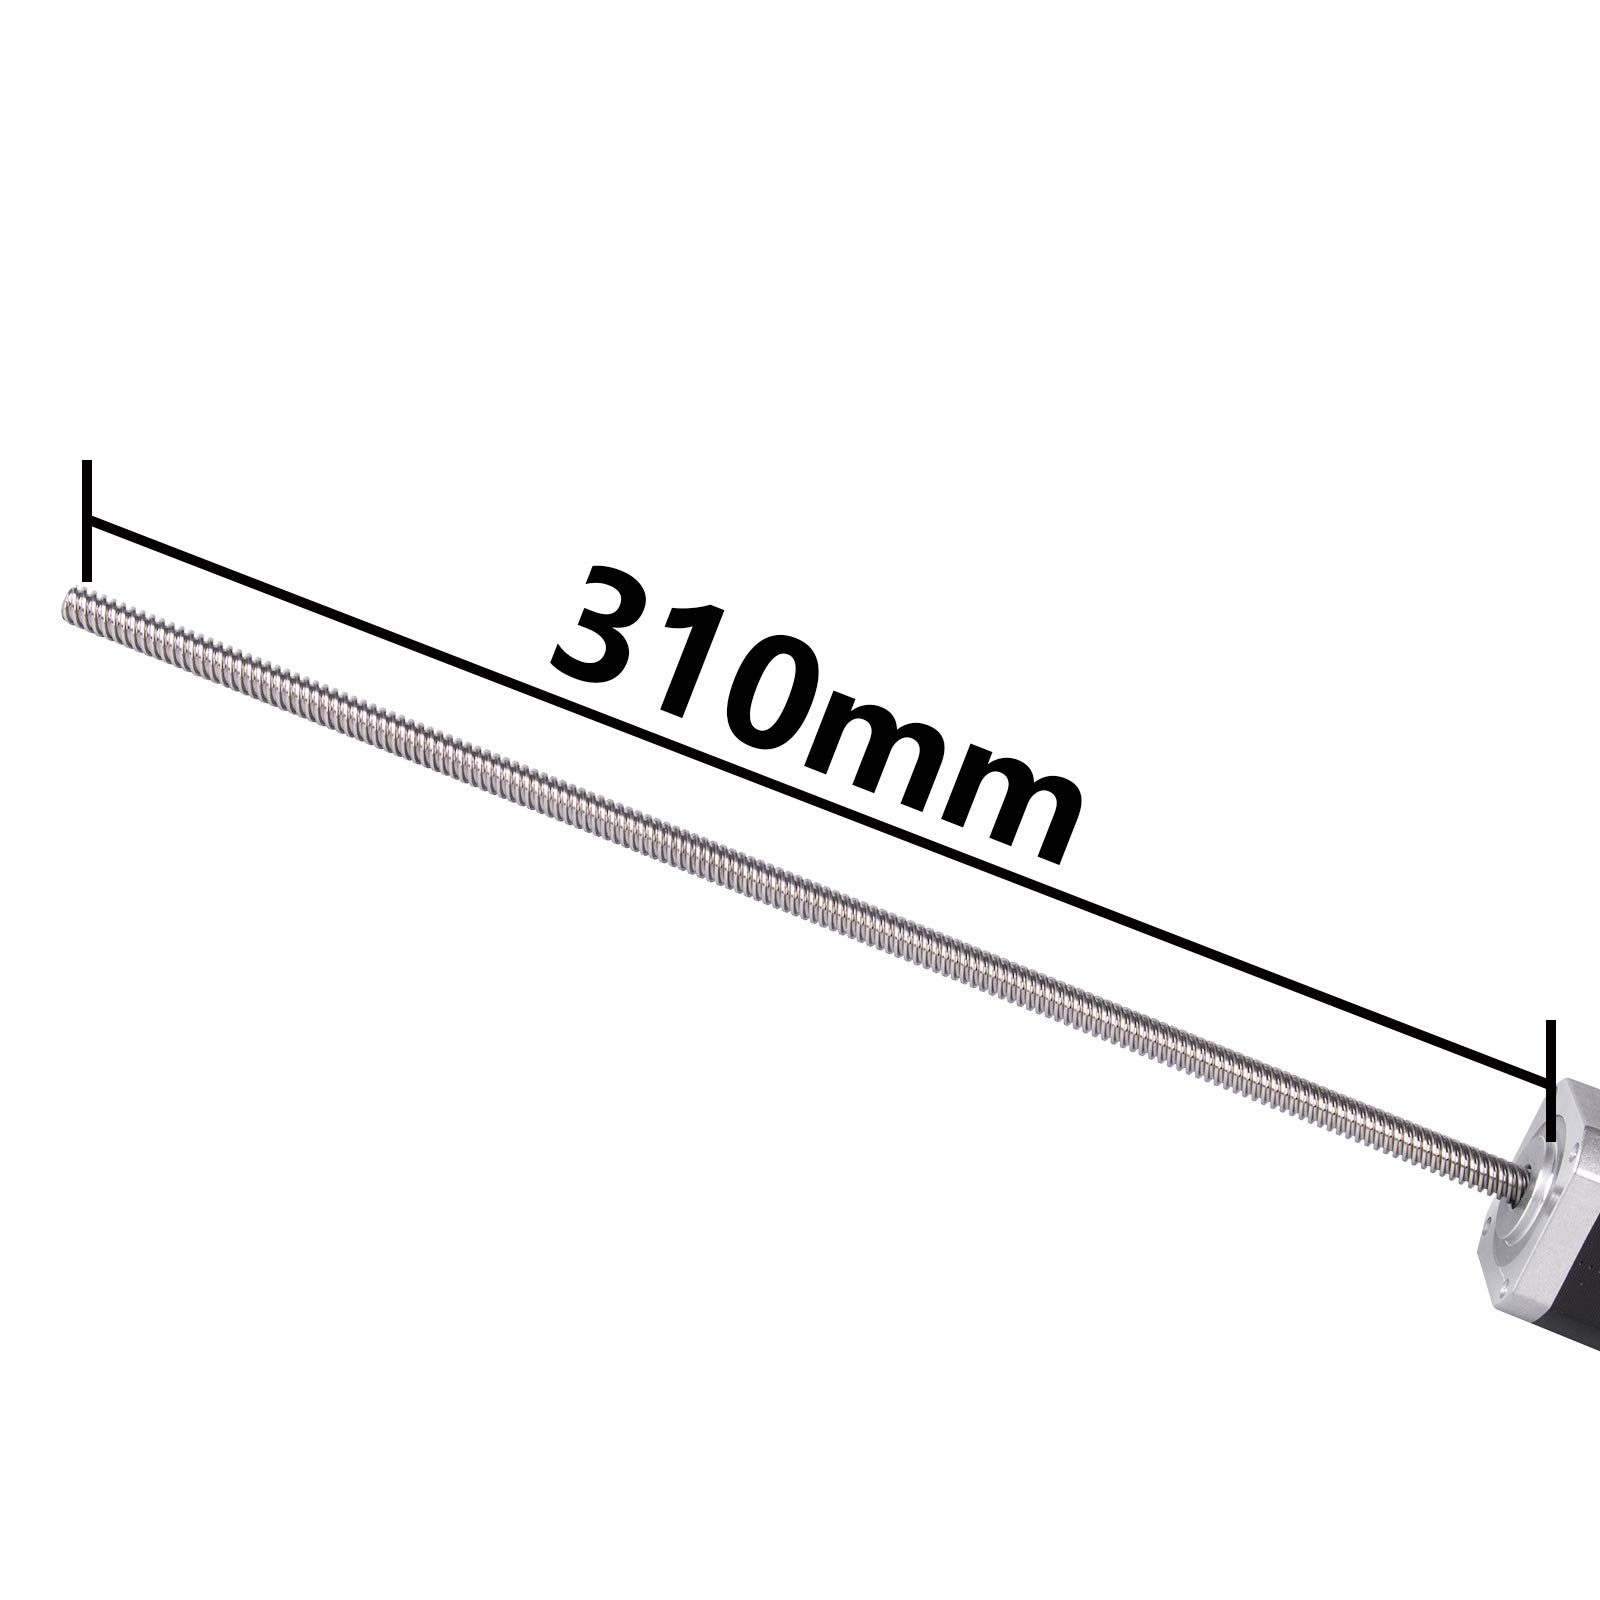
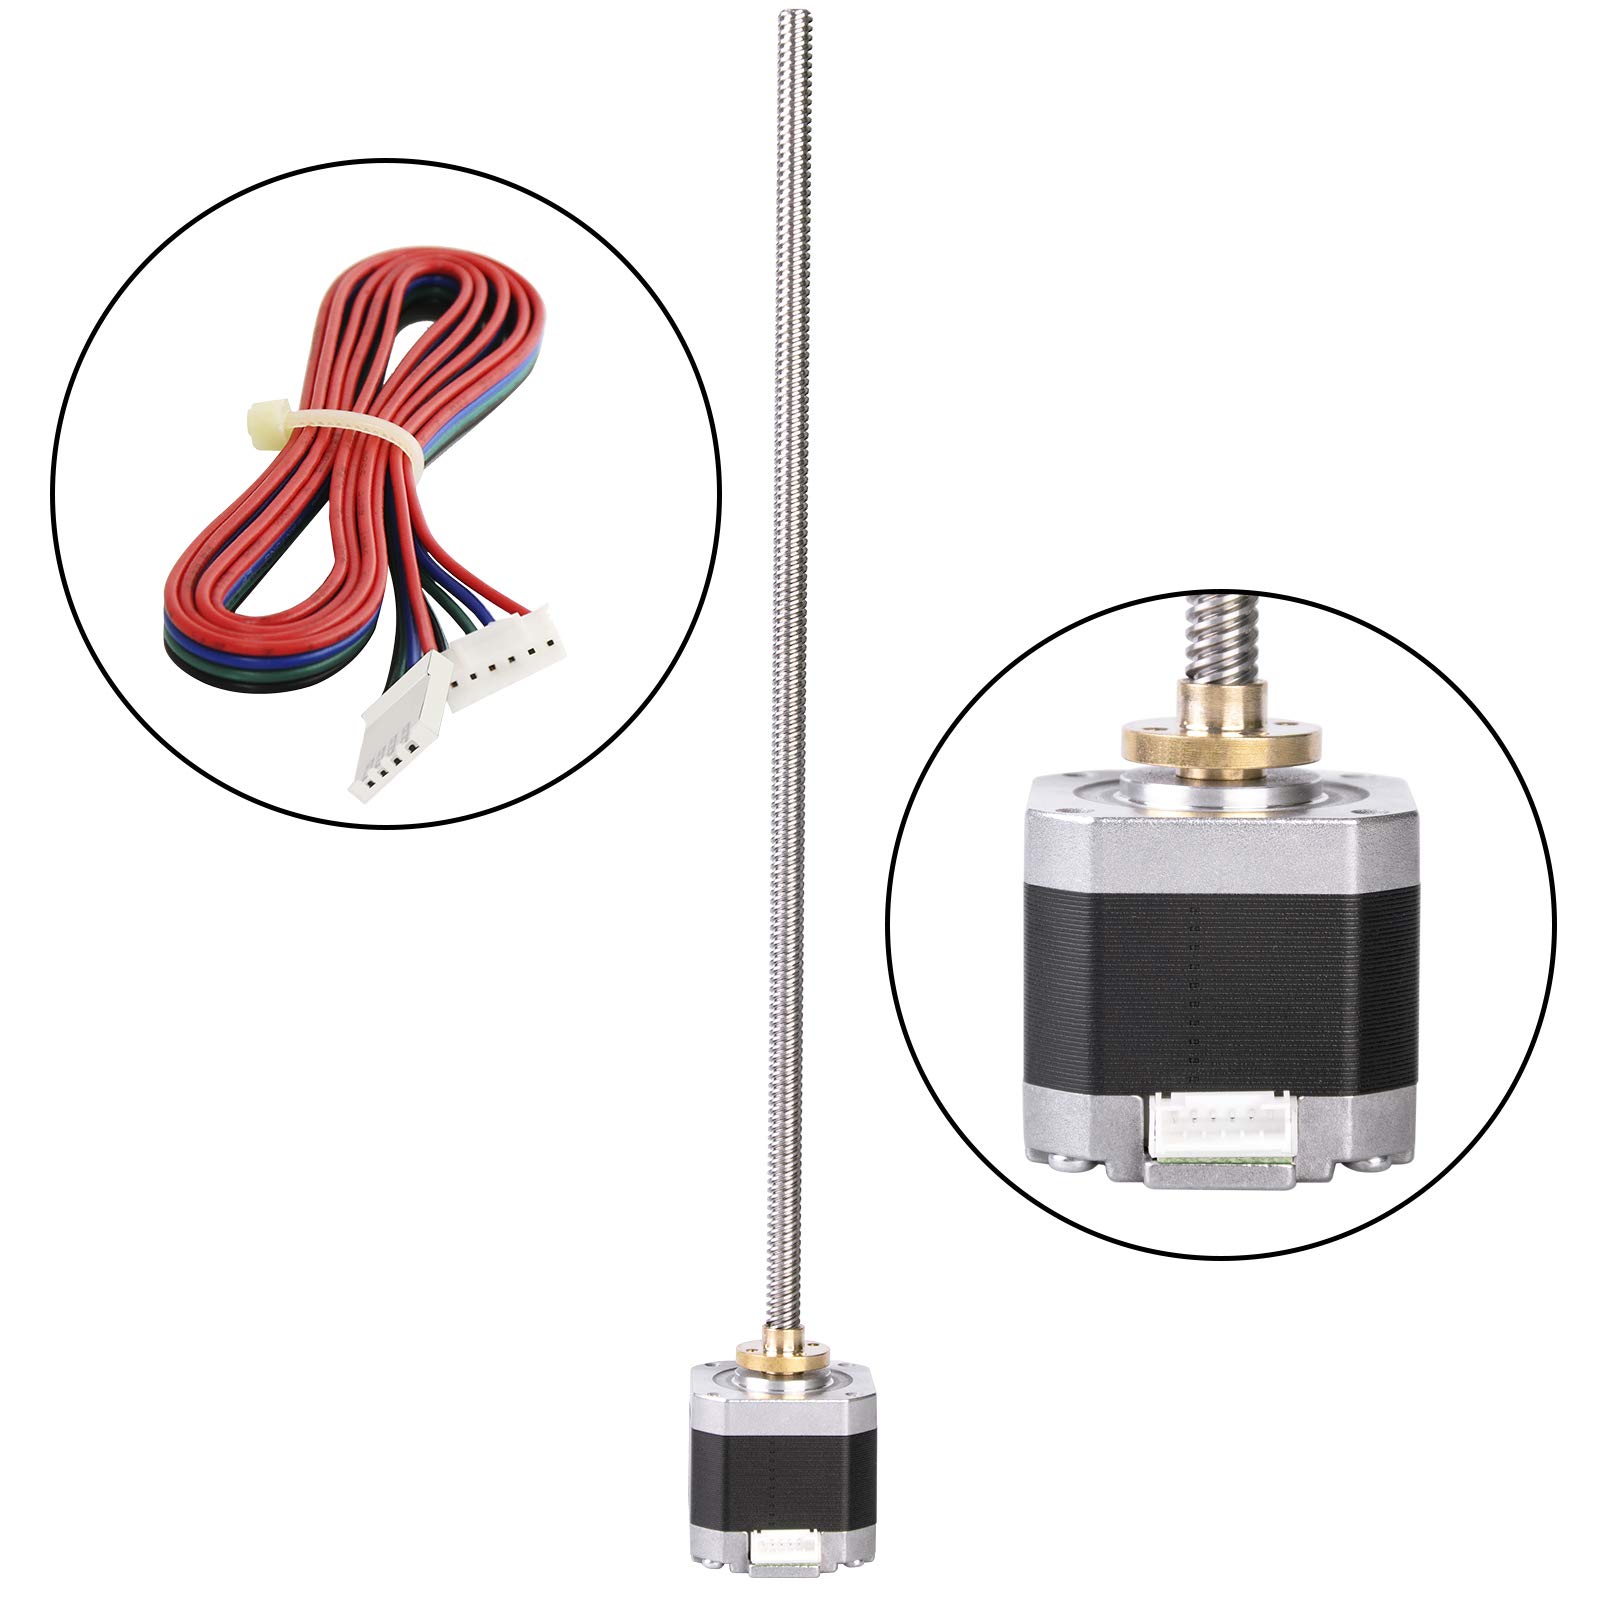
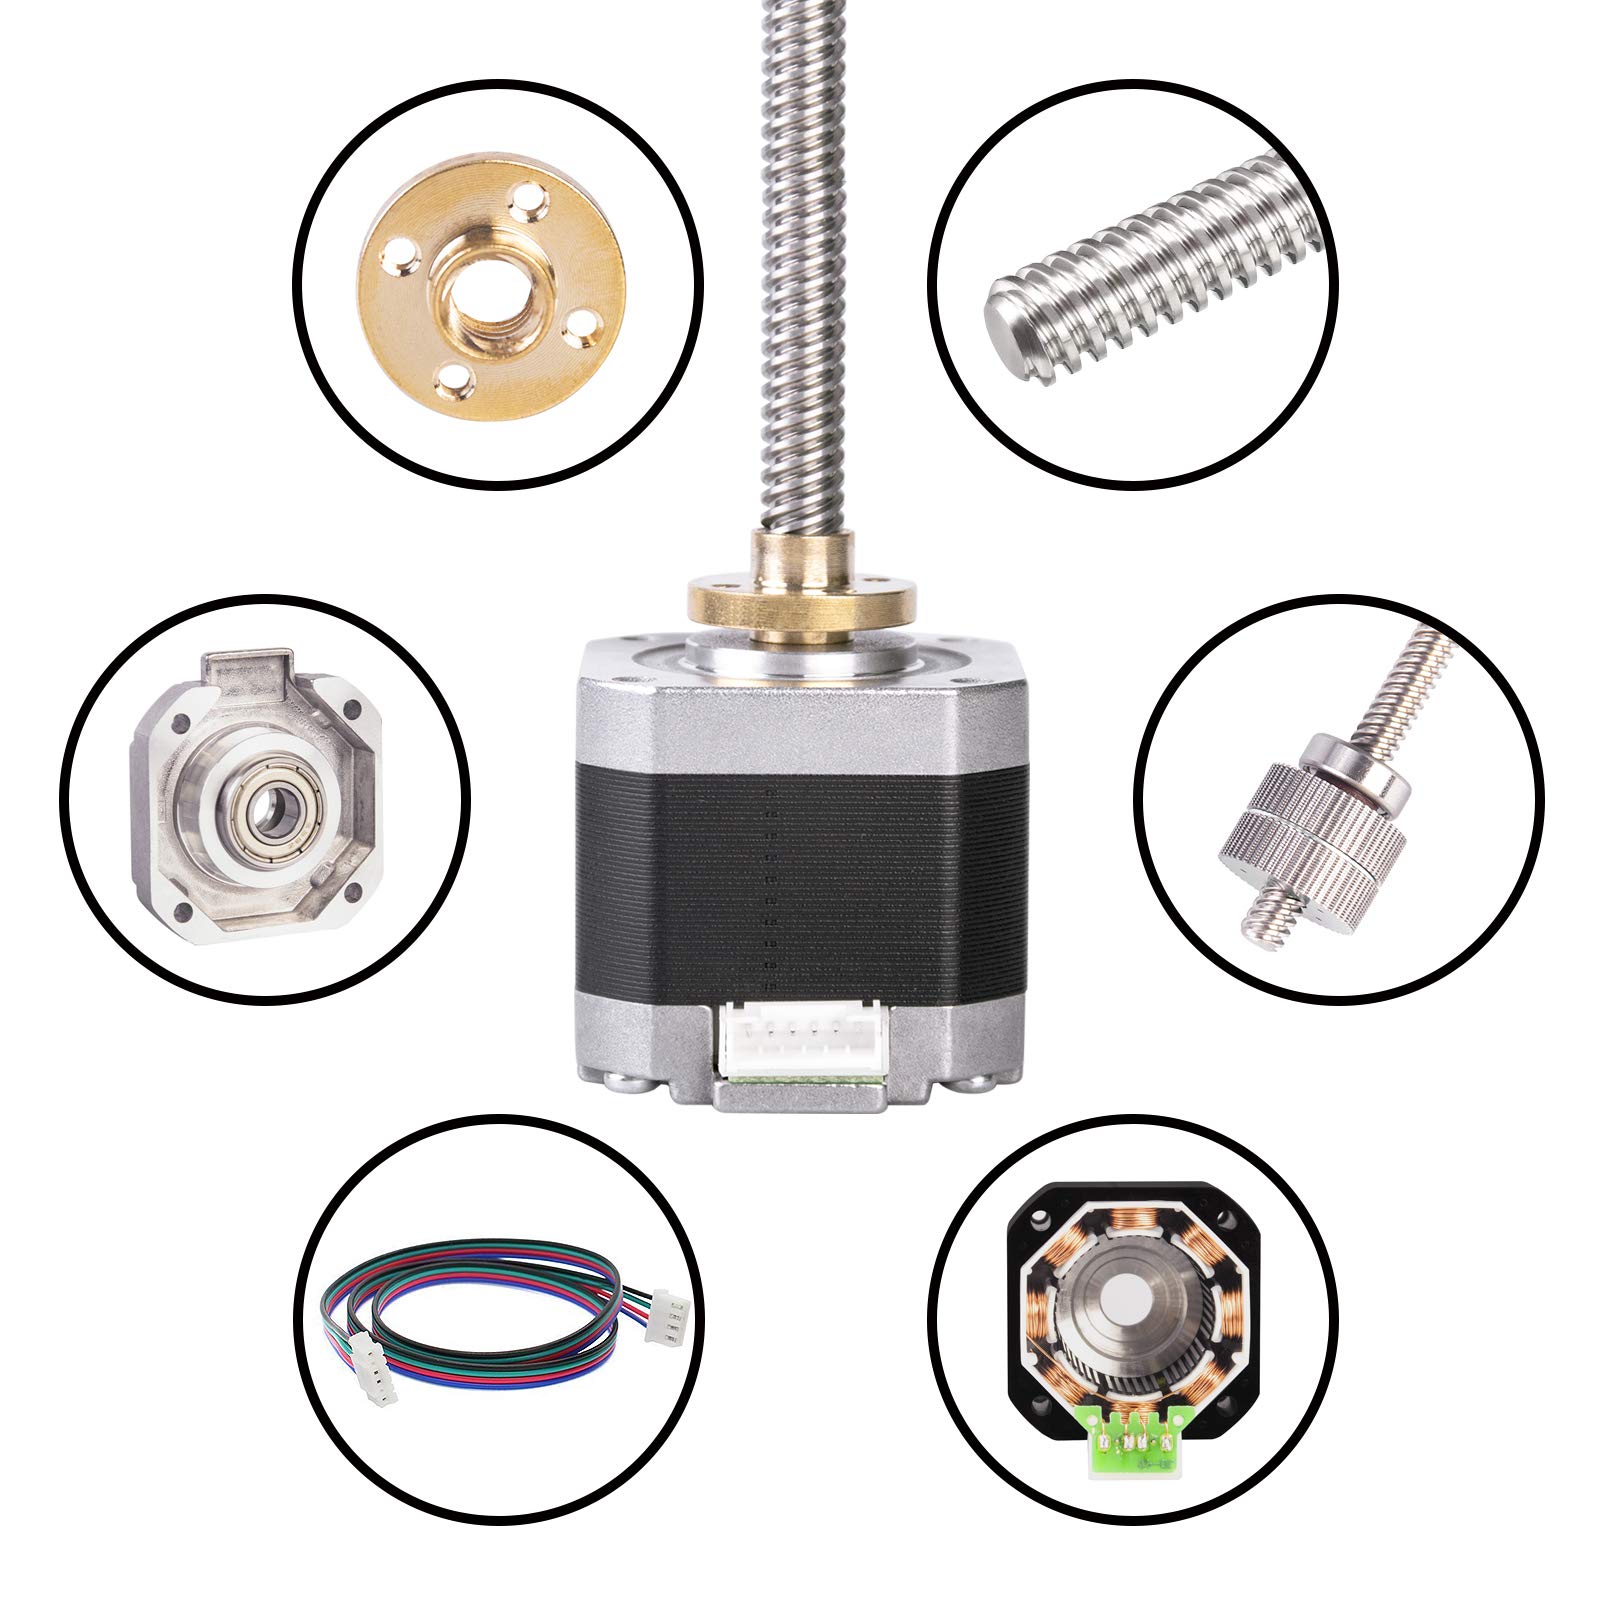
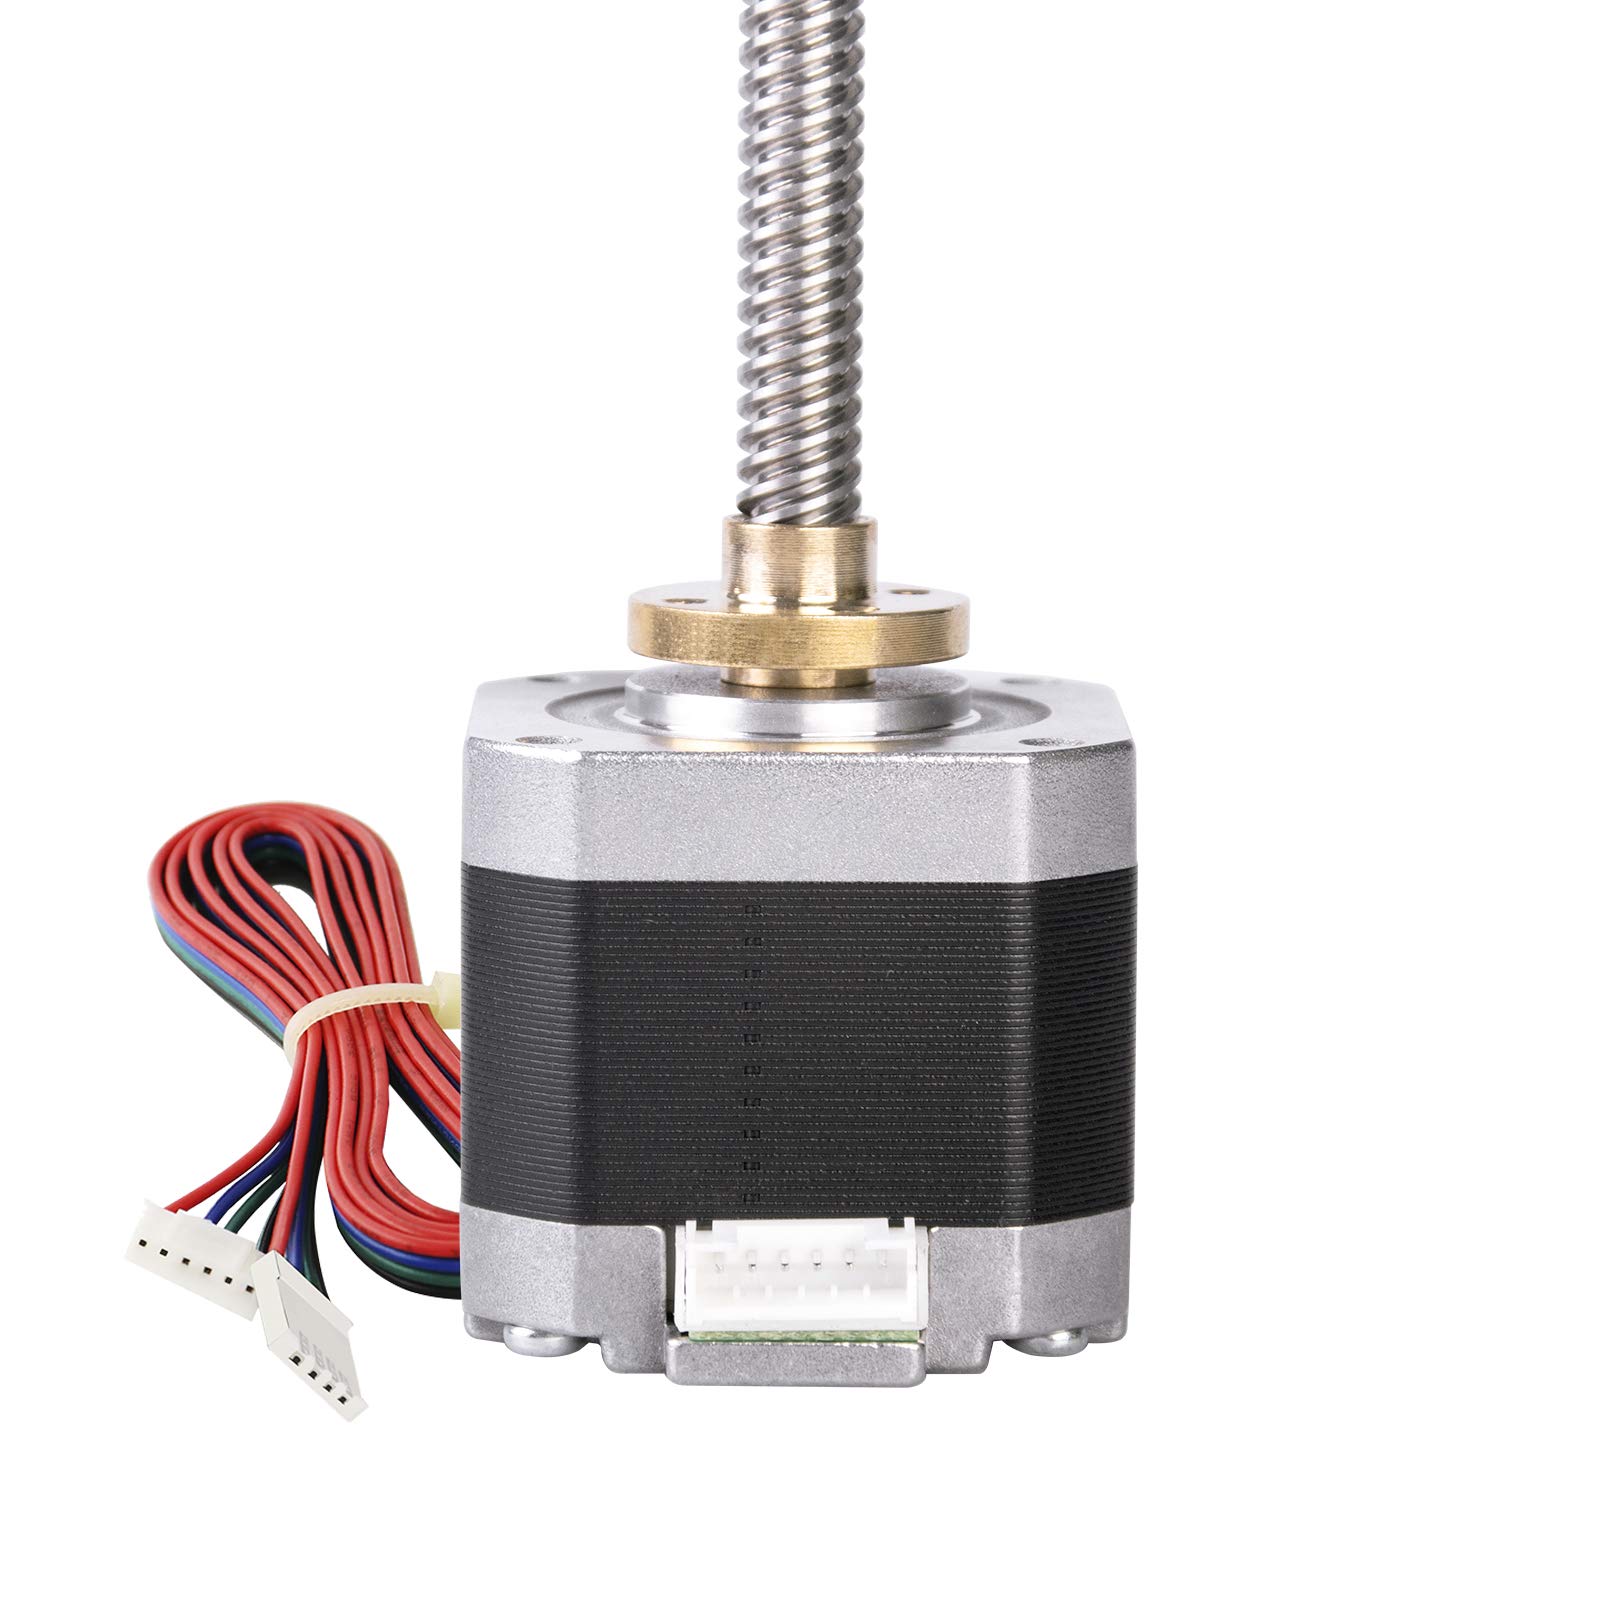
The Redrex Nema 17 Stepper Motor is engineered for high performance, featuring a robust 1.5A holding torque and an integrated lead screw that simplifies installation and enhances stability. Ideal for various 3D printers and CNC machines, this motor eliminates common printing issues like Z-wobble, ensuring precision and quality in every project.


M**P
Works great with the Monoprice MP Select Mini.
Works great with the Monoprice MP Select Mini.I purchased to swap out the Z-axis threaded rod of the Monoprice MP Select Mini. I have many 3D printers including 5 Select Mini's which I try to keep mostly stock but I wanted to give the lead screw upgrade a try. Works great and is a fairly easy upgrade.The integrated lead screw makes the install ever easier instead of having to use a coupler. The nut shown in the product picture also was included. You will need to get your Dremel or similar rotary tool to cut the lead screw to length.It comes with the cable that connects directly up to the motor and the Z-axis header on the mainboard. The wire is a bit long but that is to be expected being this is a universal upgrade product not intended specifically for the Select Mini. You'll probably need to either swap the two middle wires on the plug at the stepper motor side or if you don't want to mess with that you can instead invert the direction using the gcode command "M562 Z" and follow with "M500" to save. After sending those two commands and it still doesn't turn the correct way, trying turning the printer off and back on. You only need to do one of these methods to change the motor direction not both. So either physically swap the two wires or use the G-code commands.Make sure you change the steps per unit (mm) to either 400 or 200. To do this use "M92 Z400" or "M92 Z200" followed by "M500".This will depend on whether your mainboard has 1/16th stepping (400) or 1/8th stepping (200) stepper drivers.To determine which value to use:1. Send command “M503”2. Look for:• “Steps per unit:”• “M92 X93.00 Y93.00 Z1097.50 E97.00”Or• “M92 X46.50 Y46.50 Z548.75 E48.50”“Z1097.50” in the first example above are the Z steps per mm“Z548.75” in the second example above are the Z steps per mmIf the current value is "Z1097.50" use "M92 Z400", followed by "M500".If the current value is "Z548.75" use "M92 Z200", followed by "M500".(You may need to cycle the power before the change takes effect.)Now I will have to fight the urge to upgrade a couple of the other Select Mini's because I want to remain as stock as possible but that is only because I like to have reference machines to help other's troubleshoot. I am thinking of using two of these to upgrade my original Robo3D R1 that currently has 8mm threaded rods.
M**B
Great for MPSM v2
Works great with the Monoprice MP Select Mini v2.I purchased this to swap out the Z-axis threaded rod of the Monoprice MP Select Mini v2.The brass nut shown in the product picture was included, as in the cable/wire. You will need a Dremel tool to cut the lead screw to length, and to cut the old nut off the carriage.I cut off the plastic bolt holder and sanded it flush. I then used a drill bit a made a hold to fit the included brass nut. I actually drilled it a bit small and reassembled everything to make sure the hole/nut was perfectly centered. I then took it back apart and finished mounting the nut. I also drilled 4 small holes and used 4xM3 screws to secure it.It comes with the cable that connects directly up to the motor and the Z-axis header on the mainboard. The wire is a bit long but that's fine. The two middle wires are already swapped, but you'll probably need to swap the two outer (black/red) wires as well. It literally just made a really loud noise when I plugged it in, and after Googling a while I found out I needed to swap the two outer wires.Make sure you change the steps per unit (mm) to either 400 or 200. To do this use "M92 Z400" or "M92 Z200" followed by "M500".This will depend on whether your mainboard has 1/16th stepping (400) or 1/8th stepping (200) stepper drivers.To determine which value to use:1. Send command “M503”2. Look for:• “Steps per unit:”• “M92 X93.00 Y93.00 Z1097.50 E97.00”Or• “M92 X46.50 Y46.50 Z548.75 E48.50”“Z1097.50” in the first example above are the Z steps per mm“Z548.75” in the second example above are the Z steps per mmIf the current value is "Z1097.50" use "M92 Z400", followed by "M500".If the current value is "Z548.75" use "M92 Z200", followed by "M500".(You may need to cycle the power before the change takes effect.)
J**R
Well Packed! Good quality overall
Ordered two of these (1 extra by mistake) but not unhappy as this will give me a chance to build another printer. Packed in a nice box with cutout foam. The cable is well made except taht the two middle wires are swapped. Checked with a meter and verified the correct coil positions and just pulled and swapped the pins in the connector. It baffles me why these were put together this way as every driver I have used is A+ A- B+ B-. Easy fix and smooth running on my Hypercube.The lack of a coupler added a fair increase in my Z travel and I will use these from now on.
L**E
MPSM V2's need a little more modification to fit this one, but it works!
So for my particular unit, I had to do a little more modifications. the X-axis gantry had been redesigned at some point to no longer require screws to secure the z-axis rod. Instead, a little press-fit nut was used inside a plastic housing that was a part of the gantry itself. I had to cut off these two parts and drill holes in order to install the guide for the new motor. it was kind of tedious, but it worked out in the end. The rest of the installation guide, (USWaterRockets, thank you for the guide!) follows as normal. I did run into an issue where the motor was reversed, but a simple M562 command fixed that problem.The modifcation works, and my printer is much more stable and accurate. no real complaints here
B**R
Did not come with wires.
I received the motor with attached lead screw but no wires to hook it up. The shaft appears straight but I have no idea if the motor works because i can not wire it up. I guess now I have to spend more money to buy the wiring harness that was supposed to come with it.UPDATE: Installed this in 3d printer and it doesn't work. All I get is a grinding noise from the motor while the shaft doesn't spin. I know the stepper driver is good and I tried adjusting the potentiometer with no change. Unfortunately my return widow closed so I am stuck with it.
Trustpilot
1 month ago
1 day ago