
DOWNLOAD THE APP


Customer Services
Copyright © 2025 Desertcart Holdings Limited
DOWNLOAD THE APP


🔥 Stay warm, stay ahead — heat your space with smart power!
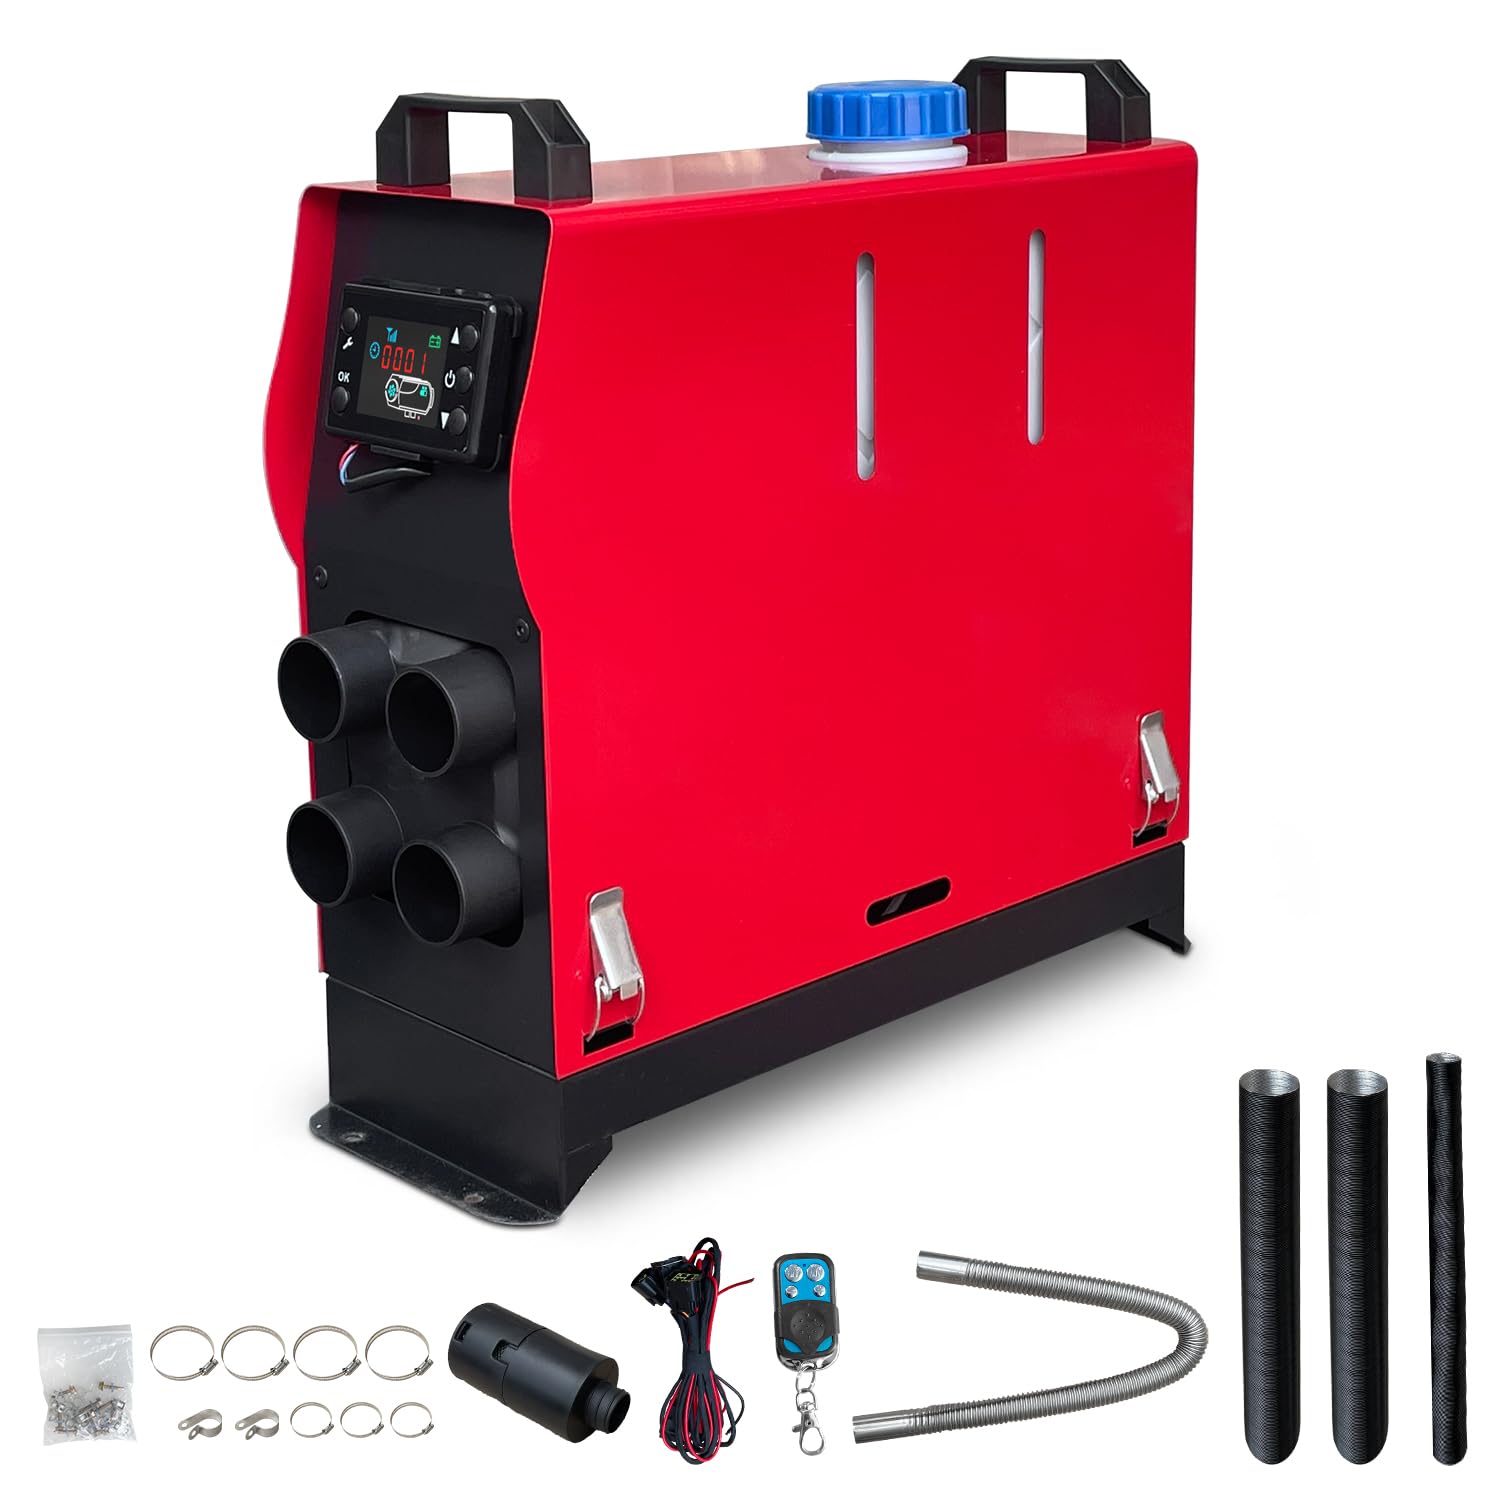
The Triclicks Diesel Air Heater is a versatile 12V 5-8KW all-in-one heating solution designed for vehicles and indoor spaces. Featuring remote control with LCD display, rapid heat output, and ultra-quiet operation, it delivers efficient warmth with low fuel consumption. Its compact, easy-to-install kit suits campervans, trucks, boats, and more, making it the go-to choice for professionals seeking reliable comfort on the move.


| ASIN | B07V72XZV8 |
| Batteries | 1 AAA batteries required. |
| Best Sellers Rank | 2,551 in Automotive ( See Top 100 in Automotive ) 3 in Car Ignition & Heating Systems |
| Brand | Triclicks |
| Customer Reviews | 4.1 4.1 out of 5 stars (2,050) |
| Date First Available | 12 July 2019 |
| Delivery information | We cannot deliver certain products outside mainland UK ( Details ). We will only be able to confirm if this product can be delivered to your chosen address when you enter your delivery address at checkout. |
| Heated | Radiant |
| Item Weight | 8.61 kg |
| Item model number | Diesel Heater 010207 |
| Manufacturer | Triclicks |
| Manufacturer part number | AIRHEATER-1 |
| Model | Diesel Heater 010207 |
| Product Dimensions | 41 x 16 x 40 cm; 8.61 kg |
| Special Features | Remote Control |
| Voltage | 12 Volts |
M**S
Much better than I thought, really happy with the heater!
So there are loads of these heaters around on the internet and I thought I'd do some research before purchasing. I bought the Triclicks as it seemed to be just a little bit better that the others that were offered with the remote control key-fob and the better heater housing. I'll start with the bit of info that you want to know; this heater is brilliant - works very well indeed with plenty of heat produced with minimal usage of fuel. It warms up quickly and has a protective cool down cycle to keep the heat exchanger cool when switching the unit off. (good for longevity) If you want to use your main fuel tank to supply this thing then firstly buy a fuel tank pickup straw kit, this includes a tank adapter connector and a pickup straw – essential and not expensive from amazon or the van manufacturer service counter. If you want to use the included tank then ignore the bit about fitting the fuel pickup pipe below. Everything else you need is included in the supplied kit that comes with the heater. Right, so what is it like to fit? I bought this to heat the load area of my transit van, I’m a site fitter so have to work out in fields in all weathers whereby my clothes and tools get wet and muddy – so a decent heater was essential so help dry my workwear between jobs. Firstly I found the place I wanted to fit the heater, for me it was just in-front of the drivers side rear wheel arch as this happens to be right in between a major load bearing crossmember and the sill underneath the van. I drilled a 4 inch diameter hole right through the floor using a hole saw – very well measured and marked off first so as not to land in a stressed member. Drill a pilot hole from underneath (where you can see the chassis etc) then the big hole from above to keep things tidy. Assemble the heater inlet, exhaust, fuel pipe, fuel pump wire and included carrier plate and put plenty of high temperature silicon down on the van floor so form a seal – you don’t want carbon monoxide poisoning do you! (or ingress of water). Plonk the lot through the hole and secure the mounting/carrier plate to the van floor using bolts or even just tec-screws will be fine (use silicon underneath to make sure everything is sealed up against the weather and give a good bead around the holes for best protection. So now there is a heater in the van with a load of tubes sticking out underneath. Lets fit the fuel pipe. Fuel pickup pipe: This is the pain part – support and unbolt the fuel tank (make sure to have about ¼ to 1/8 of a tank of fuel – having no more fuel than this in the tank is absolutely essential), pull the wiring off from the connector and unbolt the fuel filler tube bracket, this will just slide out of the bit where you fill the van with fuel when you lower the tank – lower the fuel tank, you need to get it down by about 8” (200mm) or more to enable you to get the fuel pickup onto the tank. The van fuel tank is already fitted with an aux fuel take-off union on the top at the rear – newer fords have two, one located at the fuel pickup end and one at the opposite end of the tank on its own (RH top drivers side). Use a sharp knife and cut the very end of the aux take-off pipe off – this will form an open tube into the tank. Fit the pickup straw that I mentioned at the beginning of this review as it saves a lot of pain! Put the pickup tube into the hole you’ve cut and pull it back out, cut the tube off to shorten it just below the point that you see the fuel on the tube – you are doing this so that you can’t run the heater so much as to completely drain your tank of fuel – you should always be left with ¼ to 1/8 of a tank for driving etc. So once your done this, fit the take-off tube and the included elbow connector along with the included small bore fuel pipe. From here I ran all the fuel pipe back to the heater inside spiral wrap tubing to essentially give a tube inside a tube for extra protection. Re-fit the fuel tank and fuel filler bolt, ensure its very secure and located correctly. Route the fuel pipe across the underside of the van using clips to secure where you can. Find a suitable place to fit the fuel filter and bolt this to the chassis – ensure it points mostly upwards to allow air to escape, continue routing the pipe until you reach a point that the fuel pump wire will reach, at this point fit the fuel pump in the same way to point upwards towards the flow (again for air removal), continue routing the pipe all the way to the heater pickup tube that you previously fitted through the floor. I routed my pump wire in with the small bore fuel pipe spiral wrapping to give it as much protection as possible. The exhaust is a bendable stainless corrugated tube, unfortunately for me it exists the heater from at the front rather than the rear (as my heater faces intake to the rear, heat output to the front – the exhaust is at the front of the heater). I mounted mine really high up between the chassis crossmember and the load area crossmember in front of the wheel arch – aim it downwards to ensure that water can’t gather in the tube and secure using a riv-nut or tec-screw into the crossmember. Do the same with the intake but route it well away from the exhaust and remember to aim to downwards to ensure no water can gather in the tubing. Make sure to seal everything underneath, especially around the 4” hole in the floor that you’ve cut – it’ll stop your van from rotting and also ensure you don’t poison yourself with exhaust fumes. Right, now the easy bit. The Wiring and Controller: Fitting the wiring is easy, you ‘ve probably already worked out that the supplied fittings are different shapes so that you can only connect the fuel pump to the …. Fuel pump and the controller to the … controller etc. At this stage you’ve already connected the pump so that is out of the way. Connect the controller to the triangle connector and locate it away from the heater outlet – this contains the thermostat so locate it mid height in the van and at a easy to view location. Next connect the live and neutral wires – I cut off the included the inline fuse on the live wire as my van is fitted with a fuseboard near my aux battery, but however you connect this be it to an aux battery or a primary battery – fit a 30amp fuse somewhere to protect the heater and battery. The heater only uses 30 amps on immediate start-up and quickly reduces to next to nothing – it is the heater plug using power to initially ignite the fuel but once it is lit then …yeah… it self-ignites using next to no power except what the fan draws (which isn’t a lot at all) Fit the hot air tube with jubilee clips to a location in the van that you like and bob is your uncle, nearly done. Here is where I slipped up, the included instructions are not correct: You first have to prime the pump, go and fill your fuel tank first. Press and hold the settings button (the spanner button on the controller) and then press the down arrow button – you should see a setting appear on the controller screen of 020 or similar – set this to 050 or 060 (this is 50 or 60 seconds) and press ok - you will hear the fuel pump clicking very rapidly until it starts pumping fuel where it will slow down. Other models to prime you have to hold the ‘ok’ and down buttons or settings and up button. (yes this isn't clear in the instructions and they contradict the information). This is done only once, once primed press the power (middle) button and glorious heat will soon start to flow from the vent. Press and hold the up and down arrows to cycle between auto mode (set the temperature on the screen) and pump/manual mode (set the pump frequency on the screen). I usually use manual mode on P01 for just ticking over in the middle of a field somewhere which gives a nice warm background heat at maximum efficiency – if I want more then hole up and down arrows and set it to 16 degrees which is my personal comfortable level (or more if you like). CONCLUSION: Loads of heat at minimal cost. Installation is not difficult as you can fit it as well as you are capable – either use the included external tank (easiest way) or plumb it into your van main tank, gives great heat output and I honestly have not noticed any draw/use of fuel using my van fuel gauge between filling the van up. It’ll run all day with little to no impact on fuel from the van tank – run it for three or four days on the trot and it’ll show – but it is really efficient and consumption is not to be worried about too much. The remote control is basic with just on, off, heat up and down – but does the job. I would certainly recommend one of these heaters, the cost of purchase is minimal and the heat output is just lovely. The inlet and exhaust ports will rot off in the end and you will have to replace the whole unit – but it’ll last three years or so in UK wet weather. Given the cost it’s a bargain – just get one!
C**E
Fantastic
bought 3 of these over 4 years, 1 lasted 2 years-after a easy rebuild kit about £15 its still going strong, bought the others about £79 as a spare so I could change them over in about 1/2 hour to keep the heat coming, I would reccommend these without a doubt-excellent heaters-heating a large 4 bedroom,4 bathroom house-please note closed doors on the living room and the rest of the heat goes up the stairwell but combined with a woodwarm multi-fuel burner stops any cold spots and is toasty
M**N
Overall good value
My application was for a brick built workshop. The heater was to be mounted inside . Please note these are my personal views and findings based on the actual unit supplied. PACKAGING:- The unit came well packaged. Everything was supplied in the kit. Some extra items were needed. KIT QUALITY:- The Jubeliee clips were of poor quality so I decided to replace the exhaust and inlet with decent ones. I did not replace the fuels ones. The pipes seemed a good fit so I trusted these would be OK, and they were. The rigid fuel pipe was supplied which is the best type. The controller looked like it had been used as the front was all scratched and it had no protective cellophane on it. One big downfall was the oval gasket between the heater and the mounting surface. Mine was the black one, made of some sort of rubbery compound, which is the cause of the horrible odour ( I only discovered this after installation ). I the found that the RED silicon one is really what is needed so had to purchase this. It did stop the smell. I check the fan was not catching the side of the case . I did remove the heater fromt the casing ( It comes out easilly ) , Just to check all the screws were done up Ok as I had seen reports of loose screws in some units. Mine were OK. INSTALATION INSTRUCTIONS:- The instructions are pretty much usesless and seem very generic . My main gripe was pairing the remote control to the unit and performing a priming function, neither of which corresponded to the user manuals instructions. Support were contacted but no reply. I ended up solving the problem thanks to a youtube vid. There seems to be different firmware fitted to the same type of controller. So don't think your controller is not working should you have this problem. I ended up printing pictures out as to how how people had installed it, and in addidion did some research , mainly youtube to see any potetial pitfalls. ASSEMBLY:- Everything went together OK. I did have to purchase a right angled bracket to mount to the wall , you could of course fabricate your own mounting method. Just make sure you have the RED silicon gasket. I did use Holts Gun Gum paste on the exhaust as the unit was in the workshop so really wanted to avoid any nasties. A long overdue combined smoke alarm / Carbon Monoxide detector was also fitted. As the air intake was outside i fitted a plastic cover with holes in the bottom over it to stop rain entering . POWER SUPPLY:- I opted to use a car battery as the power supply, as failure of the supply while the heater is running could lead to damage of the heater. The battery was trickle charged from a a small charger to keep the battery topped up when not in use. The units current was measurements were taken and as follows:- Standby (Controller display off 30mA) Standby (Controller display on 60mA) Glow plug operating during startup and shutdown (8-10A) Normal running current and minimum and maximum output (Power level 1 = 910mA ) (Power level 10 = 4.12A) OPERATION:- Operation was fairly straightforward ( once I had found the correct instructions for my controller) NOISE:- The noise level from the exhaust was the most concerning. The silencer was of the straight though type. I did purchase an aditional silencer but after some research decided not to fit as the noise reduction was negligible and there were reports the it effected the running mixture and caused coke up of the burn chamber. The constant clicking of the fuel pump can be quiet down by careful mounting and replacing with a less noisy pump. I intend to encapsulate mine suspended in an enclosed box. Plenty of info on YT to show different methods. PRODUCT SUPPORT:- This was next to useless . My main problem was the controller operation . I emailed Triclicks with no reply and the phone number given on the Triclicks site was not being answered. CONCLUSION:- The unit was certainly worth a punt for £65 . At this price it's' good value for money. The extra Items do bump it up, but were needed. It's a shame the support was so poor , I do think the Triclicks site would benifit from some Q&A on this heater, and in particular instructions to the different controller operation. There is so much info in the domain about these heaters some not so good , so its just a matter of doing your research. The extra Items purchased were:- Mains Trickle battery charger. Right angled mounting bracket. Holts Gun Gum paste. Silicon gasket. Jubilee clips. Plastic box cover for Air intake Carbon monoxide detector
T**N
Diesel heater
Works great arrive on time should of started it up out side as it blew a lot of smelly smoke out. My son got it to work properly and did use it for camping said it worked great
S**Y
Dangerous risk to life.
dangerous On being fitted we put diesel in it. The tank had not been fitted correctly by the manufacturer which sent 2litres of diesel all over the painted floor exhaust and electrics. Terrible quality control. A dangerous product. I would like to recommend that the company check their units before sending them out as this is not just a nuisance it is genuinely a very real risk to life.
M**K
Funkar bra med variabel fläkthastighet
R**N
Comme annoncer Hyper content. Par contre, la traduction du chinois à l anglais a été traduit par un mec qui parle aussi bien le Mandarin que moi le "klong" A revoir mais plein de tuto sur youtube Rien a redire
H**G
Sehr pünktliche Lieferung und die Heizung funktioniert einwandfrei.
M**R
Chauffage pour usage quotidien pour bateau, donc très sollicité. Semble faire le travail.
I**S
Después de un tiempo de uso, quiero añadir que hace mucho ruido la bomba toc, toc, toc... Parece que no pero de noche se escucha Mucho. Y cuanto menos revolución sople más se escucha.... Calienta Mucho! Llego rápido y bien embalada.
Trustpilot
5 days ago
1 month ago