


🚀 Elevate Your Mac Experience with Transcend's JetDrive 850!
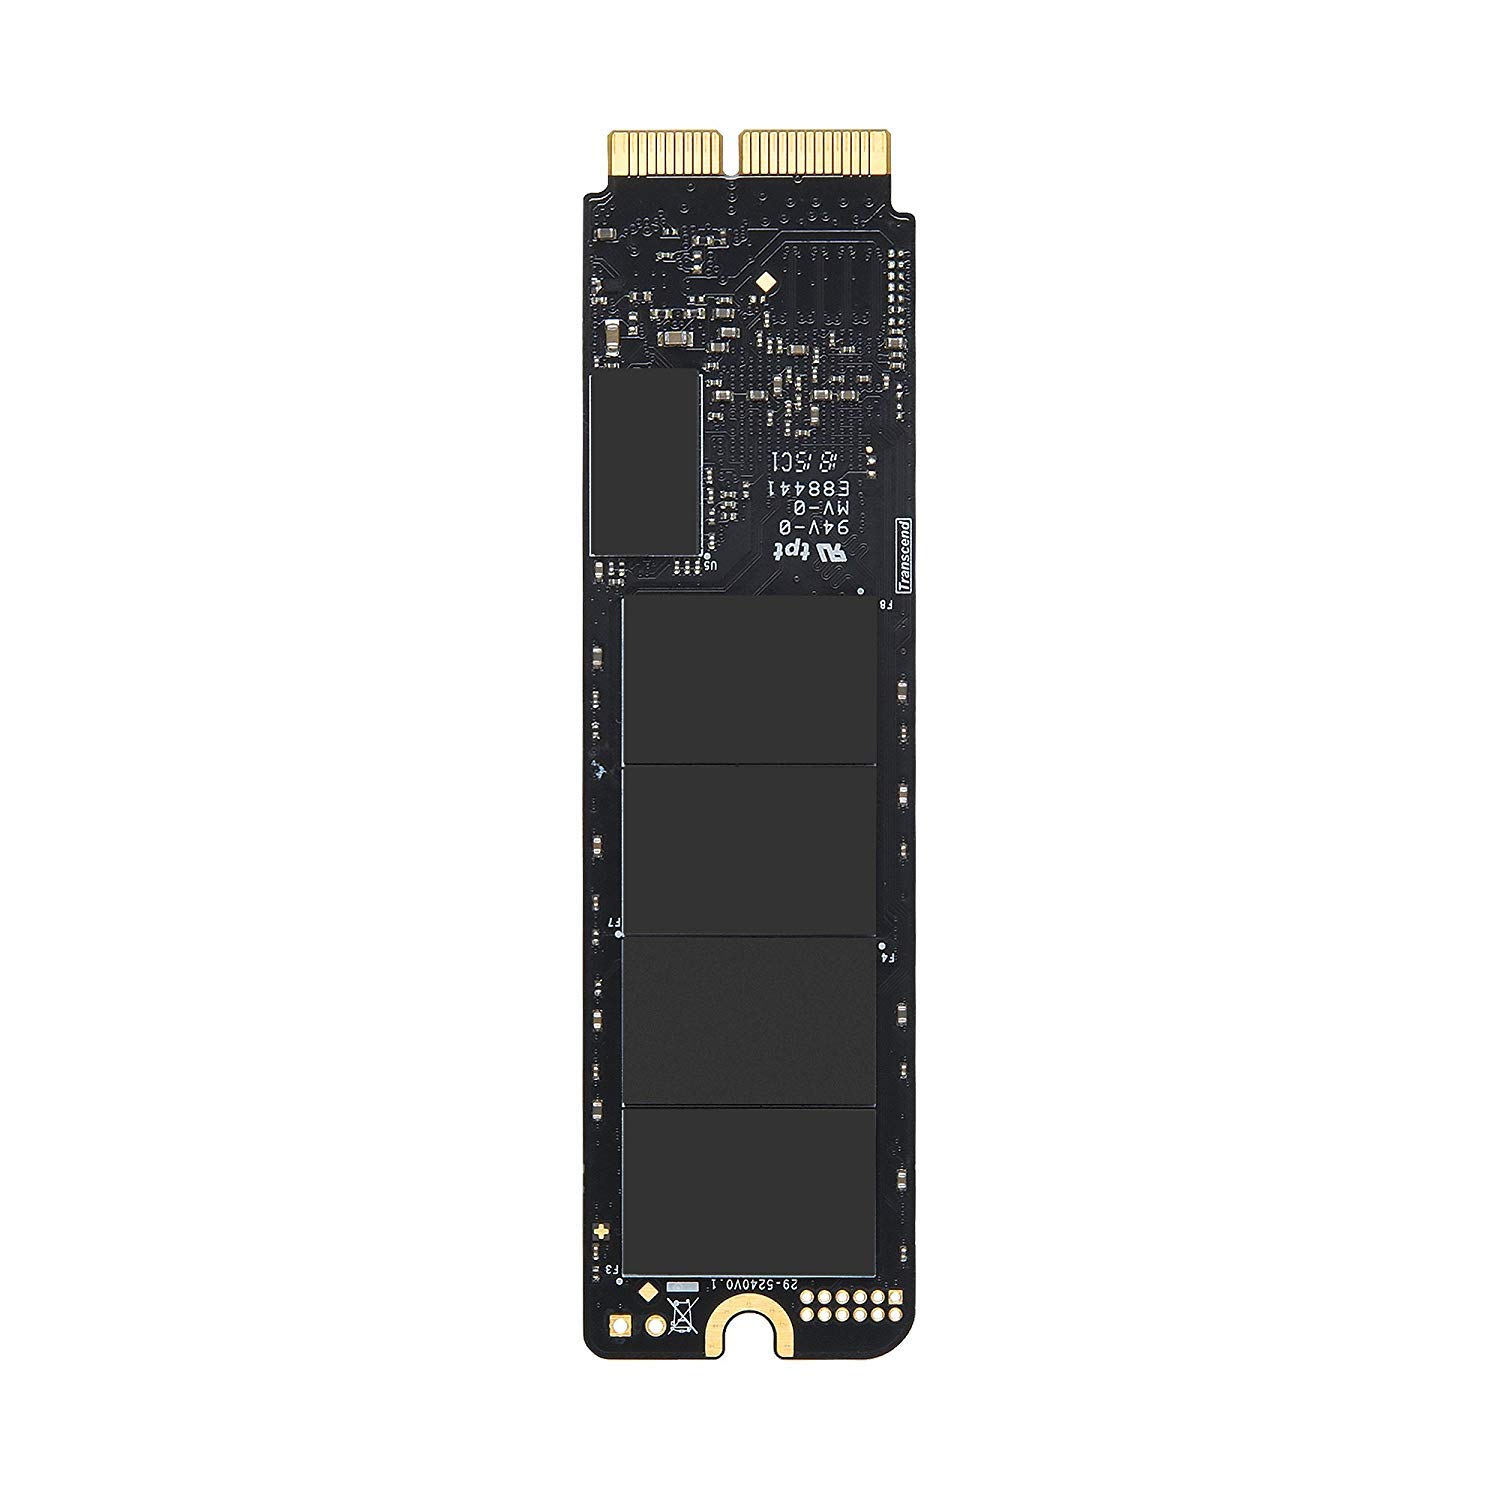
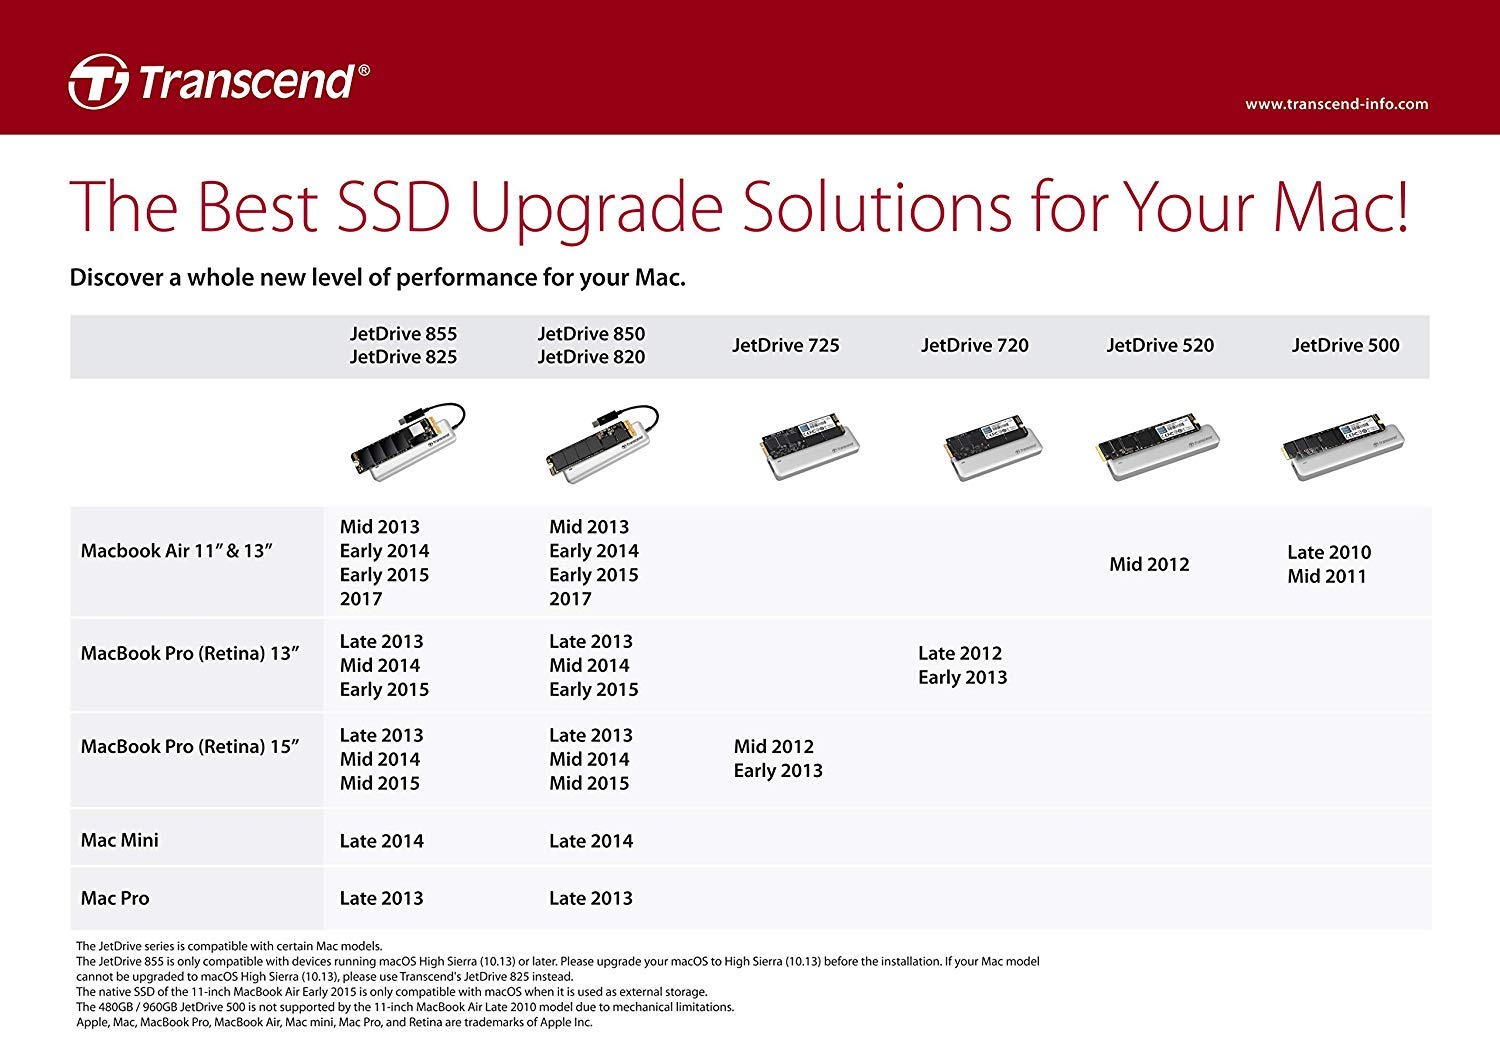
The Transcend TS240GJDM850 240GB JetDrive 850 is a high-performance PCIe Gen3 x4 solid-state drive designed for MacBook Air and Pro models from 2013 to 2017. With lightning-fast read speeds of up to 1600 MB/s and write speeds of 700 MB/s, this SSD enhances your device's performance while offering a compact and lightweight design.
| Brand | Transcend |
| Manufacturer | Transcend Information,Inc., transcend |
| Series | JetDrive 850 |
| Colour | Black |
| Item Height | 0.3 Inches |
| Item Width | 0.94 Inches |
| Product Dimensions | 8.92 x 2.39 x 0.76 cm; 9.98 g |
| Batteries | 1 Lithium Ion batteries required. |
| Item model number | TS240GJDM850 |
| Processor Count | 1 |
| Hard Drive Size | 240 GB |
| Hard Disk Description | Solid State Drive |
| Hard Drive Interface | Solid State |
| Wattage | 6 |
| Hardware Platform | Mac |
| Operating System | mac os |
| Are Batteries Included | No |
| Lithium Battery Energy Content | 2 Kilowatt Hours |
| Lithium Battery Weight | 2 Grams |
| Number of Lithium Ion Cells | 5 |
| Number of Lithium Metal Cells | 5 |
| Included Components | ssd |
| Manufacturer | Transcend Information,Inc. |
| Country of Origin | Taiwan |
| Item Weight | 9.98 g |
C**N
Buon prodotto
Pro: Buon ProdottoContro: il libretto di installazione semplificato è "troppo" semplificato. Mancano passaggi per l'inizializzazione disco che consenta il trasferimento tramite backup
R**5
Calidad
Justo lo que necesitaba, un buen producto a un buen precio.
C**.
Works
Works well. Was a real bitch to get it to work with Apple Mac. Transcend should document the tricks needed to install. but persevered and got it to work.
W**L
Fast but power hungry. Instructions lacking.
Fast. Amazing upgrade for the mid-2013 Macbook Air. Gives the laptop a new lease on life in 2019.Install is straight forward if you are a versed computer person. Included instructions are missing some key steps. I needed to install Transcend's SSD utility, make a bootable clone via superduper!, install drive, boot from clone, format SSD and enable TRIM, reboot to clone, copy clone to SSD.Be aware this SSD is very power hungry. My Air still had decent battery life until I installed this drive. Approximately cut battery life by 20%. One star off for this.
R**Y
You CAN restore files from Time Machine with this SSD given the right steps
I decided to switch to this brand of SSD after having the same PANIC NVMe issues with the OWC Aura Pro as others have mentioned in their reviews. I would like to add that it's nice the two screwdrivers needed to remove the MacBook Pro cover and T5 screw on the motherboard are included with the drive. I'll do a follow up review in a few weeks after observing performance and general use.I would like to comment on how others have mentioned they can't use this SSD out of the box or do a Time Machine restore and they only method to get this SSD functional is to clone the original volume. While cloning one volume to the other is ONE effective solution. I would like to offer another solution that DOESN'T require cloning and will allow you to restore your macOS Time Machine Backup. First off, it's important to note fresh drives from the manufacturer are not formatted and do not have any sort of partition scheme. Hence, why you can't just place this SSD in your MacBook and boot it up and expect it to work. The macOS recovery partition would need to be installed in order to get any boot options and since this drive out of the box is bare, I will walk you through the steps I took to get it to a functional state and a successful Time Machine restore.Step 1) You'll need to create a flash boot drive with the applicable macOS install files. There are two methods for doing so: A) Download the "Diskmaker X" Application, which is a GUI interface for creating a bootable USB flash drive with the macOS install files.B) If you comfortable using the terminal command line, there's a simple one line command you can copy and paste from the following Apple Support article: https://support.apple.com/en-us/HT201372** It's important to note, you must download the "installer file" from the App Store onto your machine in order for this to work. And once a previous macOS version is no longer supported, you will have a hard time finding it on the App Store since Apple will remove it.Once you have your macOS Bootable USB Flash drive created, you are ready to proceed with the next step.Step 2) Provided you have installed the new SSD in your MacBook, you can now boot up your MacBook with the bootable USB drive also inserted into a USB port. Power on your MacBook and once you hear the Apple boot chime, press and hold the "option" key which will bring up a prompt to allow you to boot from the USB flash drive. You should see an icon with the application macOS version (i.e. Install macOS Mojave). It will take a few moments to load the applicable installation files and then launch the macOS utilities menu. Important!: You will first need to prep your drive with Disk Utility.Step 3) Open Disk Utility app. By default, Disk Utility only lists Volumes. You will want to see all devices by selecting View on the upper menu bar and select "Show all Devices". This will now display the hardware ID for the SSD "TS480GJDM850 Media" in the left column. Highlight this hardware by selecting it and then click the "Erase" button. You will then be prompted to give the SSD a name (i.e. Mac SSD), select the macOS partition type (Mac OS Extended Journaled) and change the Scheme from Boot Record to GUID Partition Map. Click Erase. After a few minutes this should prep the SSD for installation of the macOS. When complete, exit Disk Utility.Step 4) You are now ready to install the macOS Operating System. Select "install macOS", review the licensing agreements and proceed. You should be able to select your newly formatted and prepared SSD drive.After a while, the base operating system files will be installed on the SSD and you will have an option at that point to restore your files from time machine. There is an option to restore from Time Machine from the Utilities Menu at the completion of Step 3 above, but I elected to install fresh new operating system files first. Simply technique.Step 5) Your Time Machine files will be restored from backup after several hours and you should be good to go at that point!Hope this new information helps others.
Trustpilot
1 week ago
2 weeks ago