


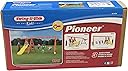
Swing-N-Slide Pioneer Custom DIY Play Set Hardware Kit (wood not included) Beige
Product ID: 767248
Details
- BrandSwing-N-Slide
- ColorMulti/Other
- Frame MaterialWood
- Item Weight18 Pounds
- MaterialMetal Plastic
✅Safety Certified
🏗️Customizable
🛠️DIY Kit
🏡 Create Your Backyard Oasis!
The Swing-N-Slide Pioneer Custom DIY Play Set Hardware Kit is your ultimate solution for crafting a personalized playground experience. This kit includes everything you need to get started, from illustrated plans to essential swing components, ensuring a fun and safe environment for your children. Note that wood and slide must be purchased separately, allowing you to customize your playset to fit your backyard perfectly.


| ASIN | B00076OC1K |
| Best Sellers Rank | #719,105 in Toys & Games ( See Top 100 in Toys & Games ) #4,242 in Play Sets & Playground Equipment |
| Brand | Swing-N-Slide |
| Brand Name | Swing-N-Slide |
| Color | Multi/Other |
| Customer Reviews | 4.5 out of 5 stars 335 Reviews |
| Finish Type | Unfinished |
| Frame Material | Wood |
| Global Trade Identification Number | 00032866044331, 00032866443301 |
| Included Components | hardware, installation manual, swings |
| Item Type Name | Swing Set Hardware |
| Item Weight | 18 Pounds |
| Manufacturer | Swing-N-Slide |
| Manufacturer Maximum Age (MONTHS) | 120.0 |
| Manufacturer Minimum Age (MONTHS) | 36.0 |
| Manufacturer Part Number | NE 4433 |
| Manufacturer Warranty Description | Manufacturer's 5 year limited warranty. |
| Material | Metal, Plastic |
| Material Type | Metal, Plastic |
| Maximum Compatible Number of Seats | 2 |
| Maximum Weight Recommendation | 15000 Hundredths Pounds |
| Model Number | WS 4433 |
| Required Assembly | Yes |
| Set Name | Pioneer |
| UPC | 032866443301 032866044331 |
| Unit Count | 1.0 Count |
M**E
Best value for the money, assemble in an afternoon
I'll start by saying that we've built one of the kits that include wood and hardware before. We paid a LOT for that kit. It was flimsy and poor quality. Within 2 years the wood was cracked and the entire swing set creaked when even my 2 year old was swinging. The all inclusive kits are not worth the price tag. This thing is built like a tank. My 8.5 year old swings as high as he can and it doesn't move. It's extremely sturdy. The instructions were pretty well written and it was less frustrating to put together than the all inclusive kits. Cutting the wood was time consuming, but from start to finish it took two of us four hours to complete. You could assemble this solo but it's much easier with an extra pair of hands. Not pictured is a rope swing we ordered to place on the other side of the slide. My 3.5 year old also wanted a rock wall, so we modified the slide's ladder to include one. I'll either be painting or clear coating the wood to seal it, too. As for the cost: This kit: $75.00 Lumber and hardware: approx. $200.00 (We went to a building supply company which was a fraction of the cost of the big box stores) Rope swing: $18.00 Climbing rocks: $25.00 Slide: free secondhand Paint/clear coat: free, leftover from other projects Total: $318.00 Most importantly, the kids love it! Anything that gets them outside is worth the time and money in my book.
D**N
Great do-it-yourself project
Our kit arrived on Friday. We read through the directions and made our wood order list. We decided to use all pressure-treated wood for durability. Once we had the wood, we started to build the A frames for the project. The directions are very clear, and the A frames went together perfectly. The next step was drilling the holes in the top beam. I had a thinner drill that I thought I could use to make a tunnel through the wood and then follow up with a 5/16 drill from each end (saving the money of buying a long 5/16 bit. Big mistake. The drill holes from each side didn't always align, and we ended up having to buy the longer drill bit anyway. Save yourself the aggravation and buy the long drill to begin with. At any rate, we had the swing-set up by Saturday afternoon and spent two hours Sunday morning putting in the last of the swing hooks. It is VERY solid and looks great. Our grandchildren will love it! We did buy the optional brackets to stabilize the swing set from left to right. It was an additional $45, but we think it was worth it.
B**T
Great set! Sturdier than more-expensive alternatives! Good-looking, too!
This should have a 5 star rating, but I took one off because a hanger guard (little useless metal plate) was missing and the instructions could have been a little more detailed. All in all, though, this is a great set of hardware, definitely worth the investment. It looks wimpy in the stock pictures, but man, this thing looks (and weighs!) like a Mac truck compared to those lousy prefab sets from big warehouse stores. Tips and details: - lumber cost was $320 with $80 to have it delivered from the Big Orange. - I mostly got cedar due to concerns with kids chewing on pressure treated wood (although arsenic is no longer used in pressure treated wood) and leaching into my yard. Plus I like the look of cedar. You're not a bad parent if you get pressure treated. - I got a 4x6 pressure treated 16' cross beam. The wood doesn't match, but they didn't have long enough cedar 4x6's (even by special order) and 2 cedar 2x6's would mean more work (and twice as much $$$ as the pressure treated 4x6). I figured it's off the ground, would rarely be touched by kids, and the color difference isn't too wonky... - The Big Orange folks at the pro desk are very helpful, I just handed them the instruction manual and they ordered all the lumber and arranged delivery. The 16' 4x6 took about a week to come in by special order. I got delivery mostly because I didn't want to heft that thing around. Not to mention how uncool/unsafe I'd look with 11' of tree-trunk-sized lumber sticking out of the back of a pickup. - the instructions call for 1 2x6x8' and 2 2x6x10's. Those can be reversed to save a few bucks, as you cut 3' off a 10-footer. Although it's always nice to have scrap if you screw up... I definitely wouldn't know from experience though... - the instructions also call for 3 lbs of 2.5" and 2 lbs of 3" screws. I got 4 lbs of 3" screws and that was all I needed. I would recommend good-quality screws, double-dipped to avoid corrosion. You will be drilling and screwing A LOT (ahem..), so spending a little extra $$$ here will help with assembly time and overall longevity and sturdiness. Screws cost about 25 bucks (Do It Best). - a 6" long 5/8" drill bit cost about 8 bucks, as did the 1-1/8" spade bit from the local hardware store (Do It Best). - I found a slide a neighbor was throwing out. Saved me about 100 bucks. - the useless metal guards that they gave me one less of than they should've? Yeah, those go perpendicular to the cross-beam (in terms of their long axes). Not parallel. Woops. Too late, and not worth the energy to fix. - if you want to hang something on the end, you'll need to buy an extra hanger set (8 bucks on Amazon). - I MAY get the extra outside brackets. There's just a slight lateral wobble, but it's barely noticeable now. If it gets worse, I'll splurge for those brackets. Always nice to keep an option in the back pocket. - all in all, start to finish took about 6 hours. I worked on it alone, but it'd help save your back to have a helper. Those A-frames get HEAVY. - I found it easiest to lay out an A-frame, screw the bracket on, then lay the next 4x4s on top of the one I just assembled to use as sort of a template. Worked like a charm. - Total cost came to about $540. Worth every penny. This is sturdier and cheaper than most of the lowest end sets available. It's customizable and you can build on it and add to it over the years. Plus, it's such a great feeling to build it yourself!
A**S
Great swing kit!
This was purchased as a birthday gift. For the price it is a wonderful set, and because it's able to be customized it makes for a much nicer set than the $99 A frame two swing kit from Home Depot. Things to Know: We purchased the lumber the night before we started the project and then cut everything ourselves the day of assembly. The biggest complaints about this set are that it does not come with the 2 1/2" and 3" screws needed to assemble the decking and frame (and it is not mentioned on the page for the lumber required) so we didn't find out about this until after we had started cutting the boards. Also, at least at our local Home Depot, they do not readily carry the 4x6x16 top beam but do have the 2x6x16 beams available for lamination (attaching the boards together with screws per instructions.) Because we were not aware of this before purchasing the lumber, we did do the 2x6x16's which so far has been perfectly sturdy even when there are two adults swinging. A heavy duty drill will be needed, there's a lot of drilling and screwing needed for this project and a little 9-12v home drill won't cut it. This project did end up taking one person about 12 hours to complete, and from the looks of the instructions a second person is really only needed for putting the pieces upright. I recommend putting this together in the place you'll be using it, it is not something you want to be moving as it is really heavy. Finally, one of the boards is supposed to be used as stakes to hold the swing on the ground. Even though we assembled this set after a solid week of rain, there was no way 2x4's were going into the ground as stakes. We bought some large eye bolts and some railroad ties to stake the set to the ground which are working just fine.
S**H
Evolving Review
Special ordered the 4x6x16 beam at Home Depot. Cost was $33 for that one beam. However, the beam arrived with bark on it and I got the beam for $11. SCORE So I bought the screws, drill bits, Lumber and a few lag bolts for a used slide that I got (a few bucks). Total spent on extra parts: $178.49 + kit cost of $70.99= $249.48 Total cost. That is several hundred cheaper than a set with junk lumber included at Home Depot or even Walmart. I only have a few hours this Saturday, so I'll likely just make as many cuts as I can using the handy guide. From there, I will drill the holes. Then, I will begin assembly and get my friends to help as needed. Should be a fun project. More details to follow. Finished that Sunday. I did the whole business by myself. You can do so if you have a sturdy step ladder. It is a little dangerous so keep kids far away while you're hoisting and resting the big beam on the ladder. The set is almost 6 months old now and shows zero wear. I have 6 kids plus neighborhood kids are always over making it typically 10-15 kids using the set and it has held up very well. The slide was installed later and is good and sturdy AFTER I installed a brace in the middle. We also purchased another set of swing hooks for the baby swing and put the baby on the end to the left of the platform to keep him from getting hit by children swinging crazily on adjacent swings ;)
J**D
Excellent when assembled!
This is more of an "our experience building this" than it is a review of the kit. The kit came and was as advertised, all needed parts were included. -highly suggest buying treated lumber. Buying cedar lumber, while it will look better, will be $300+ -suggest upgrading the top beam to 6x6x16 as opposed to either buying or building a 6x4x16 -you will indeed need a LONG drill bit. You'll be drilling through 6" of wood several times -you will need a GOOD DRILL. My cordless one couldn't make it through one hole using both batteries. -a hand-held compound miter saw, while it will work (as it did for us) is not the best tool for the job. An actual circular saw / radial arm saw will be much better. Most of my cuts look like garbage - but it's assembled! -you will be asked to counter-sink some of the holes in the main beam with a spade bit. We found the recommended depth to be a bit too shallow, and 1" to be too deep. -if you counter sink too deep, as I did, you will need a deep socket (1/2"). A standard socket won't work. -the instructions guide you to cap over the counter-sunk holes with little steel covers and 4 screws. Two screws work just fine - I don't see a need for all 4. Plus, if you have to remove the caps to re-tighten the nuts, it's less work. And less wood you're chewing up with the screws - should you have to re-align and use new screws. -if you're using brand new treated lumber, I suggest pre-drilling all of your screw holes when you're assembling the frame of the swing set. I cannot tell you how many splits I got in the ends of the 2x4s I was using. Taking the time to pre-drill would have eliminated this, I believe.
C**H
It's OK but the price is a tad bit high for the finished project.
Ok...so you are looking for a swing set and see this puppy for $69 or so dollars and think...Wow, that's cheap. Well, think about this. 1) the slide does not come with the swing set...you get to pay more for that later, and 2) All that wood, well that's extra too!. So my cost was around $69 for the basic swing seats, chains and hooks, $175 for the wood, $12 for a bucket of 3 inch screws, $24 for two sets of stabilizing brackets (highly recommended) and $0 for a slide....I ran out of money and opted to not put a slide in. Instead, I created a lower deck and left it for a play house/platform. You won't need to stake this thing down because it is so heavy. Best part of the experience was when the granddaughter ran outside and seeing for the first time said with a stutter "Amazing". Not bad for a 3 year old. Make sure you have someone to help you lift, screw and bolt the project together. I also recommend drilling and counterboring the main beam and installing the swing hooks before you put it all together.
G**M
Great Gift for our grandchildren
We purchased this and shipped it to our son's house in GA then bought the wood when we arrived . It took two afternoons to put the swing set together and it was very easy assemble and the instruction were easy to follow. We built it out of treated lumber which can be stained at a later date. My granddaughters love the swing set and they can eventually add on to it. This is a Great Buy, well made parts, and very sturdy.
@**E
Nearly perfect kit - Amazing customer support by manufacturer!
So I was shopping around trying to find a swing set for my daughter (she's 12) and there aren't too many for her age group and weight. Most are for toddlers or you're forced to buy this MASSIVE set with slides, climbing bars, and the whole shabang! I just want a couple of swings, why is this so hard? Anyway, this kit solved my problem. In the end, I spent quite a bit of money (because I bought cedar wood) but I still saved in comparison to premade/whole sets. After wood and screws, stain/sealer, I spent probably about $500-$600 dollars. That's including the cost of this kit. I built mine to be about 10 feet tall (used 10' 4x4's as opposed to 8' like the instructions say) so I ended up having to buy extra chain too (for the swings). So there were places to save but I, again, went the extra mile. So let me list some of the pros and cons here. Pros: - It's a custom kit so you can build just the swing set portion like I did, you don't have to build the entire set - The instructions are easy to follow and straight forward. I DID NOT have that issue that other people are saying with the bolts being too short with the 4x6's. The bolts the kit came with were spot-on / perfect. I'm in Canada though so maybe our measurements are different? Or maybe the manufacturer heard the complaints and fixed it since? Again, everything measured up perfectly so as long as you adhere to the instructions properly. - The manufacturer's Customer Service (Swing-N-Slide) is EXCELLENT. I ended up having a stripped bolt, I told them over the phone and without even hesitating, they offered to send me a new bolt for FREE. In fact, they shipped me an entire bag of them and it cost me nothing. - Again - their customer service is AWESOME. I had a complaint about this kit not having any support braces for the main beam to prevent lateral swaying (just Google - "Swing N Slide EZ Frame" to see an example of what I needed). Immediately they said "sure we'll send you some" at NO cost. Wow. That saved me $60. Now I can't guarantee everyone will have the same luck as me but I can't remember the last time I had support this good from anyone. Cons: - As I mentioned above - this kit did not include the "Swing N Slide EZ Frame" braces to prevent lateral swaying of the set. The set would still work fine without the braces, but it's unnerving to see it sway like that and these braces prevent it. Anyway, their customer service fixed me up. Also, keep in mind, my 12-year-old is using this. If you have toddlers, then you probably won't have the same issue as me with the swaying. - This set does not include the necessary deck screws (2-1/2" and 3" screws). - There are no extra parts at all (unless you decide not to build the entire set, like me). So if anything is stripped or damaged then you're out of luck -- until you call their amazing customer support, that is. You don't have to be too handy for this project, just have a power drill and circular saw at the least (you'll have to do some cuts). It's pretty straight-forward otherwise. I think I rambled on enough.
B**E
Good product
Great kit. Only took an afternoon to put everthing together and the kids love it
L**K
Makes a sturdy swing set
Sturdy parts, good instructions, just add lumber.
C**S
Amazing Solution
What a great solution. When the parks closed during COVID I was able to get a load of lumber and use a slide I found in my neighborhood to make a backyard park for my kids. Only flaw was the markings for drilling into the 16" beam were off and I had to adapt at the final stages. If I was doing it all over again I'd drill in place rather than pre-drill the holes on the ground and hope they line-up.
A**R
Five Stars
This kit is awesome, for any one building a swing set. I would definitely recommend it. Great buy
Trustpilot
4 days ago
2 weeks ago