


Buy anything from 5,000+ international stores. One checkout price. No surprise fees. Join 2M+ shoppers on Desertcart.
Desertcart purchases this item on your behalf and handles shipping, customs, and support to USA.
🧲 Elevate your workspace with the magnetic glass board everyone’s talking about!
The Quartet Magnetic Glass Dry Erase Whiteboard (36"x24") combines a sleek frameless tempered glass surface with stain- and ghost-resistant technology for a pristine writing experience. Certified GREENGUARD Gold for low emissions, it supports healthier indoor air quality. Featuring a magnetic steel-backed surface with powerful magnets included, it’s designed for heavy use and backed by a 15-year warranty. Easy to install with pass-through mounting, this board is a sophisticated centerpiece for offices, schools, and homes aiming to impress and perform.


| ASIN | B00H2XMIX0 |
| Additional Features | Dent Resistant, Dry Erase, Magnetic Surface, Scratch Resistant, Stain Resistant |
| Best Sellers Rank | #7,040 in Office Products ( See Top 100 in Office Products ) #70 in Dry Erase Boards |
| Brand | Quartet |
| Brand Name | Quartet |
| Color | White |
| Customer Reviews | 4.4 out of 5 stars 2,795 Reviews |
| Frame Material | Alloy Steel |
| Global Trade Identification Number | 00034138201145 |
| Included Components | Removable Accessory Tray, Marker, High Power Glass Board Magnets |
| Item Dimensions W x H | 36"W x 24"H |
| Item Weight | 18.2 Pounds |
| Manufacturer | ACCO Brands |
| Manufacturer Part Number | G3624W |
| Material | Alloy Steel, Glass |
| Material Type | Alloy Steel, Glass |
| Model Number | G3624W |
| Mounting Type | Wall Mount |
| Number of Packs | 1 |
| Occasion | Birthday |
| Orientation | Vertical |
| Product Dimensions | 36"W x 24"H |
| Recommended Uses For Product | Community Center, Home, Office, School |
| Target Audience | Business Professional, Parent, Student, Teacher |
| UPC | 034138201145 |
| Unit Count | 1.0 Count |
| Warranty Description | Standard |
| Writing Board Type | Whiteboard |
E**G
Beautiful but installation requires 3 people - here's some tips
The board is beautiful, and we bought the 6X4 which has 6 mounts. It's very heavy and is a 3 person job minimum to install (don't even try with 2, it's not worth the risk of dropping). I followed the review by John B. Hartleb, who explained some tips on how to install, and took a lot of his tips in mind to install the board. Here's my findings and some tips from installing it in our conference room. 1. 3 people - 2 to lift, one to mark the wall and drill. 2. Pro tip: get a table and stand it against the wall. Use a level to get the table level as possible. To get the height right, use 12 packs of soda to rest the board on so your 2 buddies won't get tired, and the board will still be perfectly level! (see pic) (the blue tape is to catch the dry wall when drilling so as not to make a mess) 3. One the board is lined up with the wall, mark the top 3 center holes to drill, then move the board away. Drill with a 11/64" drill and the anchors will go in perfectly into the wall. The screw in the 3 back anchors. Then have your buddies hold the board up as you screw in the top anchors for the top 3 anchor holes. 4. Top anchors: John's review said to lubricate, but this was not necessary. If you need a little more torque I put blue painters tape on the top of the top anchors to get some more leverage to turn them. This made it way easier. Don't turn too much as you're literally screwing into glass. Just tighten until it's snug. 5. Now the board is hanging by the top anchors only and the bottom is free swinging. You can get rid of the table and cases of soda to continue the remainder of the installation. Lift the bottom edge of the board so it's about the same distance away from the wall as the top. Mark the direct center of the hole in the wall (don't get lazy about lifting the board because if you mark the hole when the bottom is closer to the wall, the center won't be dead center and your anchors will be off). Now drill the holes and repeat installing the anchors. 6. Bottom anchor points: so as you will need a little bit of play, install the bottom anchors first for all 3. Once they're all aligned up and poking through the board, then screw in the tops anchors. Now you're done! Other notes: like others said the magnetic surface on this because of the thick glass vs. thin iron sheet requires to have VERY strong magnets to have anything stick on. As you see in my first pic, There is a dry erase cubby and dry erase erase that are magnetic that are on a metal rail. These did not stick on the board. The board comes with 2 very strong magnets so you can hold up paper on the board. I guess if you want more, you will have to order from Quartet. Dry erase markers: The pen that the board came with is really high quality stuff. We have other dry erase pens from "that brand that everyone associates with" and on glass it's a little wet. Note if you try to erase it while it's "wet" it will streak and be hard to wipe with a dry erase eraser. It's much easier to erase after it's dried. If you do have issues because you tried to erase it while it's wet, the good news is that because it's glass, a simple wet paper towel will wipe it right off, no ghosting!
N**E
Nice quality board, with a few install issues
I read a lot of reviews on this product before purchasing. A lot of people complained about the mounting hardware, so I bought my favorite anchors from Home Depot in advance. I also recently bought a $30 Tacklife laser level from Amazon and used it. After it arrived I wondered if some of the reviews were out of date. The mounting hardware looked pretty solid to me. It was also the kind that can be installed without a drill, so that would be nice for some. I used my anchors, but I would think that the factory ones would work as well. The box also comes with a piece of car board to make a template. They call it a template, but it has you mark the drill holes, so it’s not a complete template. When hanging I placed the laser crosshairs where I wanted to top left mount. Then installed both top mounting anchors and the bottom left on the laser lines. I mounted the board loosely on the top two and then drilled the bottom right. I did this all by myself and had help a room away if I wanted it. I’m pretty handy and a bigger guy, but it really wasn’t hard to install by myself. If you can comfortably lift the full box by yourself you can probably install without help, if not, a second person is needed. The glass itself takes special markers that work slightly better than the regular dry erase markers. All do work though. There is a quartet magnetic eraser as well That Is recommend if you get the magnetic version of this board. The bottom tray does not hold on well by itself. Any adhesive that is rated for glass and plastic will work fine attaching. I used some putty epoxy, but if I had clear gorilla glue or super glue, that would have been my first choice. The only other drawback is that the board flexes a little bit. It’s noticeable when you are writing, but is not hard to work around. It makes it feel a little cheaper to me. If it bothers you a spacer could be installed behind the board to reduce it, but I have not done that. Overall, I would recommend, because the look is great when it is up, and I think this will hold up well over the long run.
J**F
Good value, shipped very well.
Looks great, sturdy, high quality, and not too difficult to install. Like other reviewers, I recommend using the cardboard box to create a template of the board, tracing out the hole locations, so you don't have to hold the heavy board in place to mark the holes. In addition, I recommend drawing a straight line between the center of the top two holes and using that line to level the cardboard. My only complaint is that 1 of the 4 anchors fell through the drywall as I tried to tighten the screw on the standoff, leaving a 1/4" hole in the drywall. That was super easy to fix, just by backing out the screw and buying a toggle bolt at Home Depot. I used at 3" long x 1/8" toggle bolt, and just pulling back on the offset while screwing eases the screw into the toggle and opens it up. I would suggest to actually start with the toggle bolt instead of the plastic drywall anchors since it's easy to make tiny adjustments to the position in case the holes don't line up perfectly the first time, and it should hold a lot more weight. Like others, I noted that some markers barely mark the board. For example using my pack of thin expo markers, the Red marker hardly marks the board at all, but in the same pack, purple looks pretty solid. I'll experiment with a few marker types, but I don't think it will be a problem. [Update: Bought a third board, and after accidentally breaking one of the stand off posts (with a hammer), I was able to get a hold of their customer support and they shipped me out a new set of posts for free. Also, don't use a hammer.]
M**M
Great high-quality glass whiteboard. A pain to install.
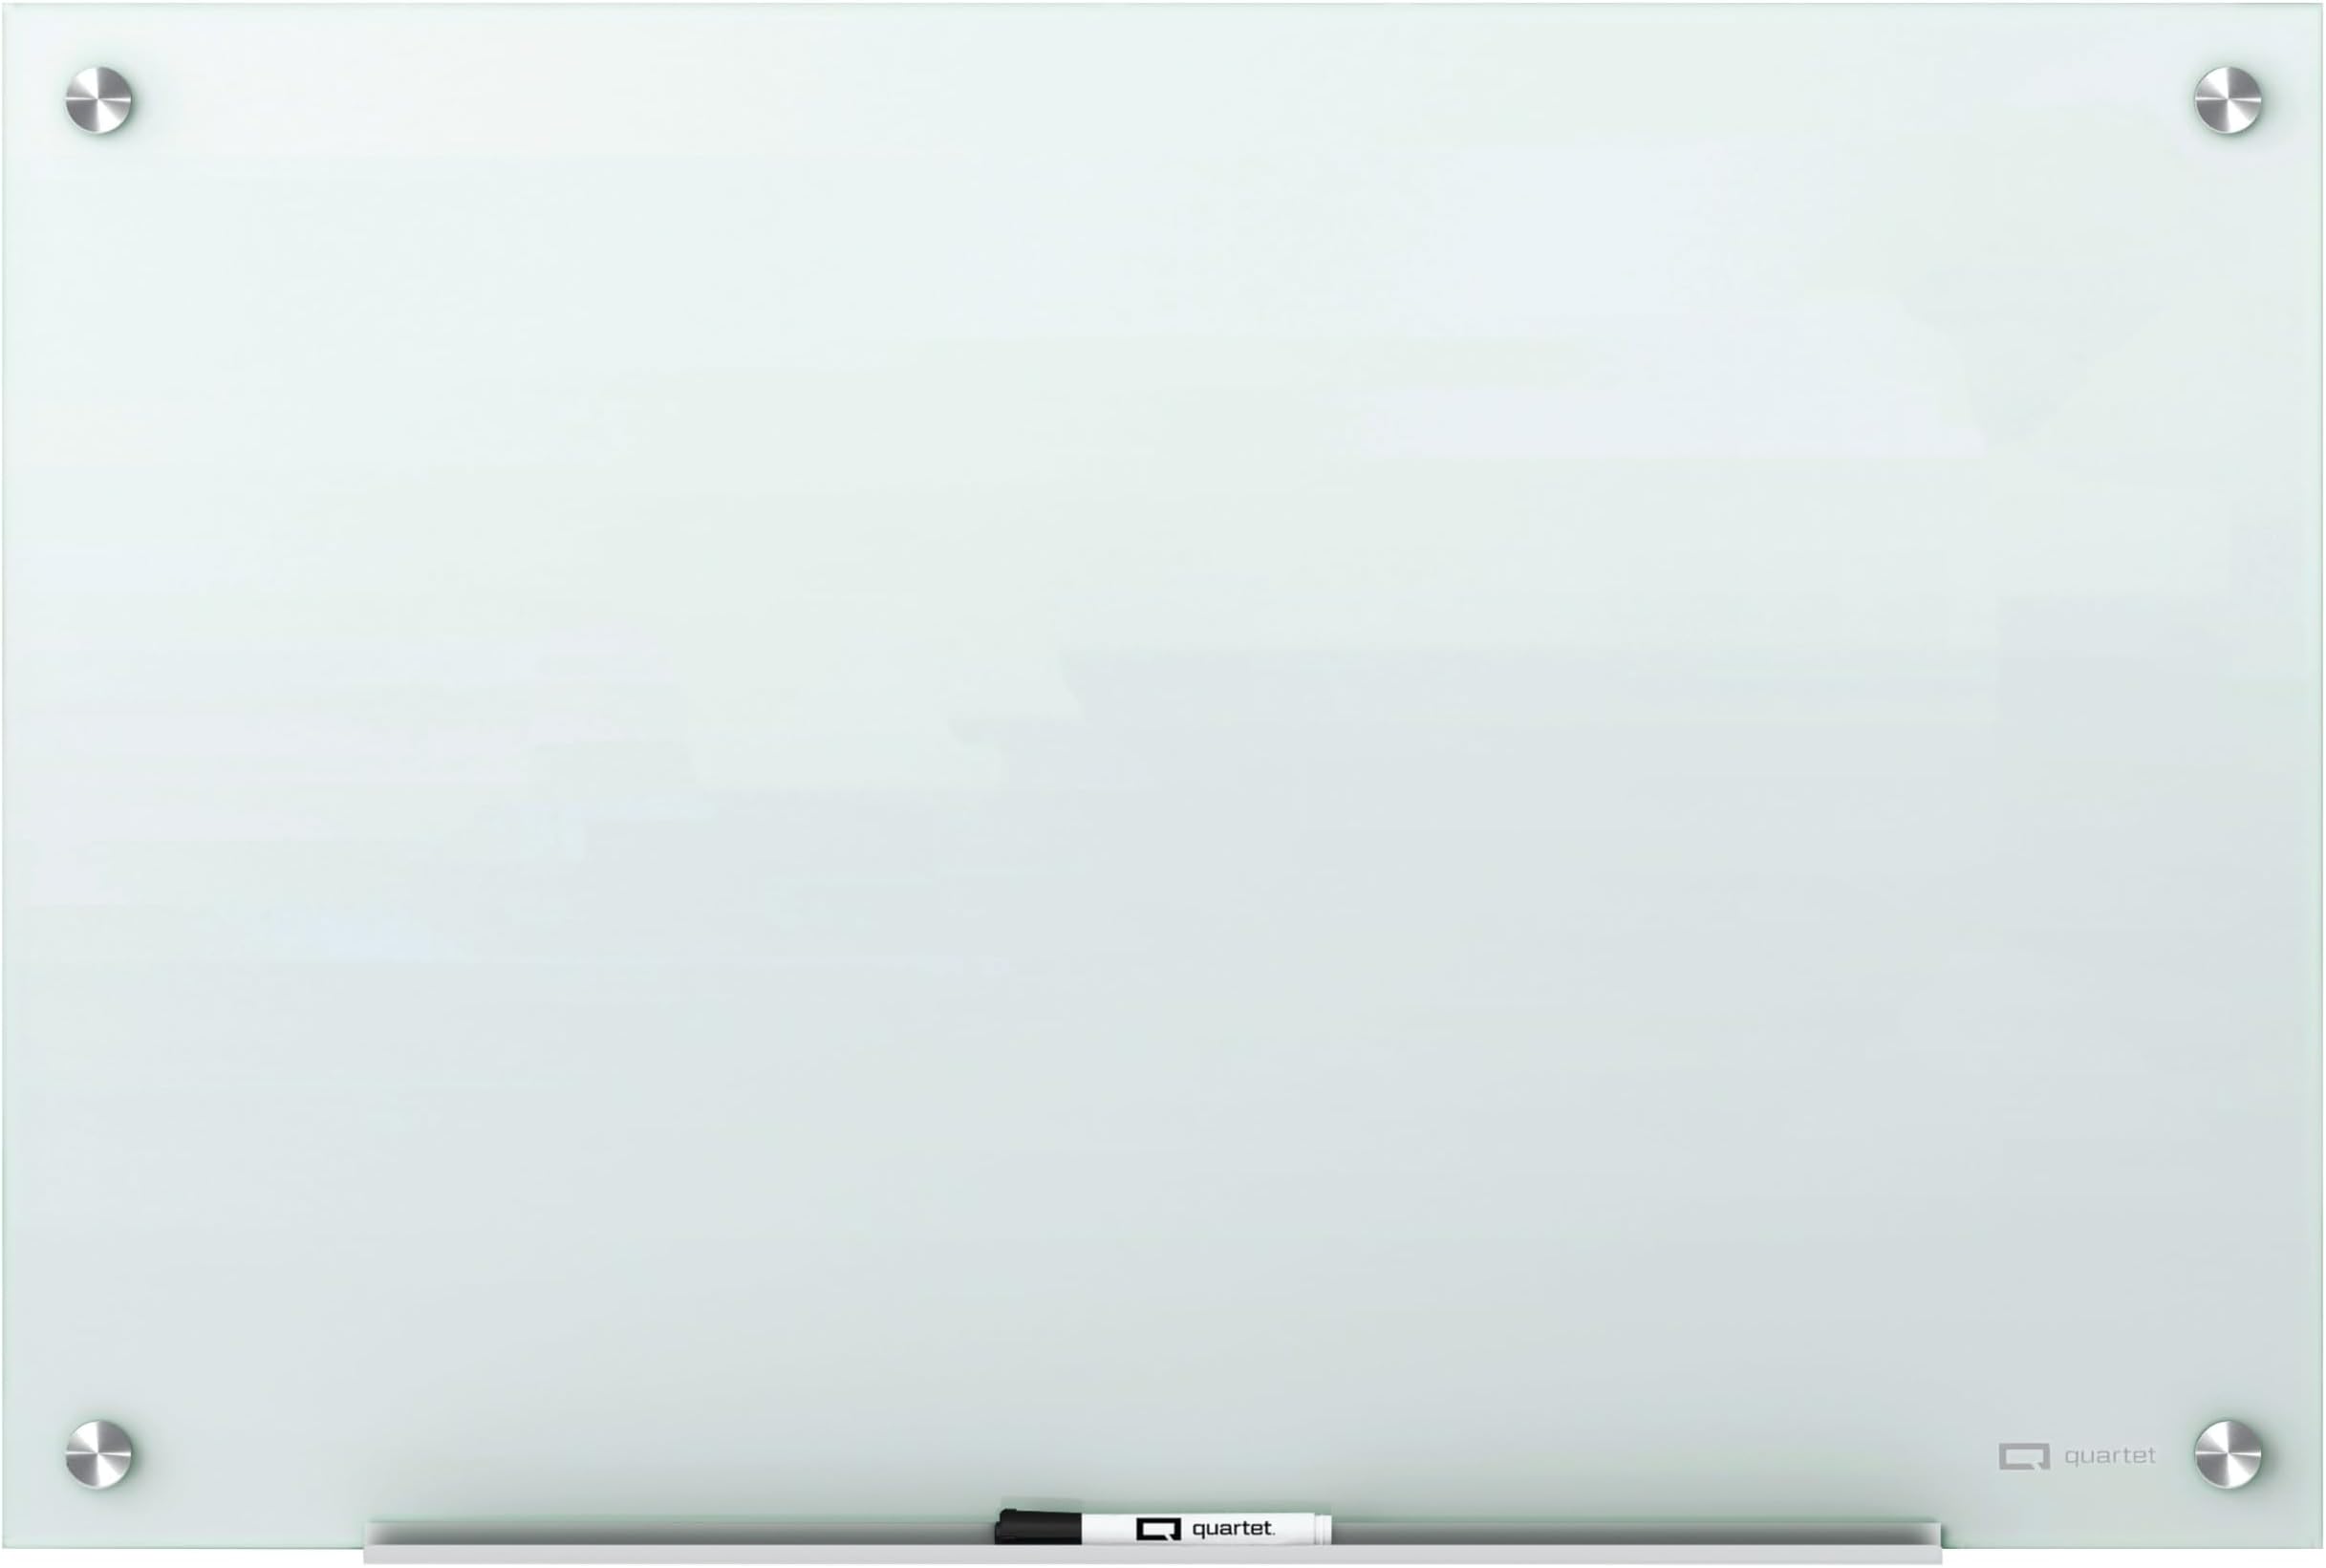
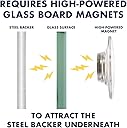
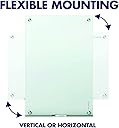
I have the 6-foot by 4-foot version of this. As for the whiteboard itself, I am extremely happy with it. After it's been mounted, the glass is beautiful, looks almost stately on the wall. As advertised, the marker erases completely without a hint of staining. My biggest issue is keeping the kids from drawing all over it and my work notes when I'm not in the room, lol. A few notes, and the main reasons it gets 4 stars instead of 5: 1) Quartet, would you PLEASE include paper mounting guides with your larger whiteboards. All 6 holes need to be drilled in the wall EXACTLY where they need to go--within 1-2 mm in all directions--or it won't mount on the brackets. The instructions say "hold it up to the wall, and draw Xes inside the holes", but this thing is so heavy (60-70 lbs of glass) that even with me and my two large teenage children, we had a LOT of trouble holding it steady & flush against the wall--tightly gripping a quarter-inch of glass pressed flush against drywall--while my wife tried to guide us in leveling it and drawing the hole-marks. It took us several attempts and a lot of marks on the wall to get the job done (we'd have it half-done and then one of my kids' hurting fingers would let it slip 1-2", and we'd need to restart while everyone's fingers are in pain). You say that you include a paper guide with marked holes in your smaller, lighter boards, but it begs the question why your larger boards don't include this when they are (otherwise) so much harder to mount than the smaller ones. For anyone reading, I highly recommend having at least 3-4 strong adults present, plus one to measure, to position this thing on the wall while you figure out exactly where the holes need to go. Plan ahead for it. Also, use large butcher paper and make your own paper guide underneath the glass in order to drill the holes in the wall and set the anchors before drilling. Check-and-recheck the measurements on the wall against the whiteboard itself before drilling. (One can try to just use a tape measure and position the holes based on spacing between them, but this is dangerous, drilling holes based on such measurements if you're not 100% sure the whiteboard will perfectly match them at every single mount-point). Wall anchors are tough to adjust just 3-4 mm in a given direction, so there's a lot of nervousness about "did I get them all exactly right?" before placing the board on its anchor brackets. If Quartet can figure out an easier system for reliably putting this on the wall, customers would be grateful. I managed to do it first-try without needing to adjust anchors, but it was a pain with both my teenage kids complaining about hurt fingers, with a ton of re-checking & re-measuring between marking and mounting. Even then I only *barely* got it onto one of the brackets, came close to needing redo it. 2) The board is "magnetic", I guess, but only just barely. You need very strong magnets for anything to stick to this. I have small hard peg magnets that stick like glue to the fridge upstairs, but gently slide down this thing under their own weight... it is "barely" magnetic at all, basically just enough to let the magnetic-eraser stay up there and not much else. Thankfully, my main uses don't use magnets, so it's a minor issue for me, but annoying when they advertise it as "magnetic". Don't expect much. 3) While any whiteboard marker will technically write on this thing, it works best with "glass board markers", such as those provided by Quartet (more $$, unfortunately). Generic whiteboard markers tend to put fainter lines on glass and while you can see the lines, they don't show up nearly as clear or bright. This is just an FYI, in case you're buying one of these and simultaneously buying a pack of markers for it. 4) The included marker tray is pretty flimsy. For all the care that went into creating a beautiful high-quality thick-glass board, the marker tray is a very-thin aluminum that can bend easily if you aren't careful. It feels akin to installing a dimestore plastic license-plate cover on the bumper of a Ferarri. It does the job though. Despite these complaints, it really is a beautiful whiteboard, and I'm glad I have it in my office. I would buy it again. I'd give it 5-stars if Quartet could work out some of these minor issues listed above.
M**S
Appears Quartet has listened to customers and made some improvements for install
I recently bought and installed this whiteboard, and I wanted to provide some feedback on some apparent improvements Quartet has made for customers. First, Quartet provided a large "template" sheet for marking hole locations. I say "template" because it doesn't have preset mark points. You still have to lay the whiteboard over the paper and mark the centers. Special note, when marking the center, the true center, use additional lighting to cancel out the shadows. This is a recess, so light from a side will cast a shadow and make it look like center is in a different place. Even a phone LED camera light will do well for mobile lighting to find the actual center. I marked my holes and taped the big paper to the wall. I used nothing else to align or check fitment and just YOLOed it. When you tape, make sure you spend the time to level it and have it nice and flat. I taped the 4 corners plus the 4 centers and made small adjustments until I was happy. I drilled 7/32" holes through the paper, then removed the paper, and installed the drywall anchors provided. Two, the drywall anchors appear to be improved. These are the same style but appear to be a heavier duty version, metal I believe. Past reviews showed white plastic anchors. Mine were silver and appeared to be a cast metal of the same "screw" style of anchor. It went in well, no complaints. Three, there were complaints about the threads being bad. Quartet shipped the mounting hardware threaded together. I don't know if this is how it's normally shipped, but this choice does mean someone is hand threading and checking the threads during final assembly. This might be a choice to self QC these parts by forcing pre-assembly at the factory. When I got my parts, I had to unthread the two metal halves. The threads seemed good and worked fine with no anti-seize required. Final thoughts So how'd I do? Well, I just went for it just to see how things would turn out. It turned out good. Everything aligned well, assembled easy, and I can't really complain. It was not a hard one person job and all of 10 minutes of work. It probably took longer to unpackage than install, and the only thing that took time was taking some care to mark the true centers and to lay the big paper on the wall well. Alignment options Let's say you mess up a little bit. What are your options for alignment? There is a small amount of wiggle room in two places. There is some wiggle room in the hole for the small, long screw going into the drywall anchor. You should be able to loosen this and move the metal cylinder part around a small amount side to side to gain a small amount of extra clearance if needed. It's not a lot of play, but it's some. There's also a little bit of wiggle room in the hole of the whiteboard, so the whiteboard does have a little play in the design. Combined, it might be able to compensate + or - 1/8" or so. For the most part, just take your time marking the center well and use a secondary light source that you can move around. This will probably take care of most of the fitment problems people have. Also spend time getting the paper nice and flat, both underneath the whiteboard when initially marking centers and when taped on the wall. Take a little time at both these steps, and you should be golden. Even for me not really taking any additional steps, I was probably within a 1/16" of center to center between the worst two holes (bottom left, top right) for alignment relative to each other's ideal. Is the whiteboard any good? Yea. It's got a metal back for magnets, but the magnets need to be strong to also have enough strength through the layer of glass. Magnetic strength drops off fast relative to distance away, so layer of glass means powerful magnets are needed. As long as you're aware of that, great. The stock Quartet stuff works good. If you get aftermarket magnets, just look for higher strength stuff. That's it. The glass is of course nice to write on, so it's too functions well. It's hard to complain about a glass surface, aka why I bought this one. The slight 3D effect from the glass layer and the white backing is neat/interesting. Good or bad? I don't know. The whiteboard still functions well. The hardware that came with the whiteboard is certainly decent enough for the price point. I would not expect more, so it's perfectly acceptable for the price and ultimately looks good and a little upscale. The packaging is ok. There was plenty of use of foam on all sides and in the corners. The glass whiteboard arrived in good shape. I can't say if it'd ever take a real fall or toss, but the outer carton is clearly labeled "glass," so hopefully it's handled well enough. Mine was. Nothing was missing on arrival. Instructions were simple enough to follow and had enough information to where I was not questioning anything. I'm a poor use case though. I'm already pretty handy, so this is kind of eyes closed stuff for me. But the key bits of information like what drill bit size was readily found in seconds. No complaints.
M**T
33" hole spacing??? really??
Just why? The board is great... once you get it on the wall... I got the 36 x 24in board and it is unnessesarily difficult to install. I just had to install it for a second time/ was just reminded how horible this thing is to get right on the wall as I just moved and had to reinstalled it... You have about 1/8th of an inch of wiggle room accross all of your wall mounts due to them using bolts that fill up the entire holes and I just haven't seem to ever get it right. They also designed it to have 33" hole spacing.... I.E. you're on, at best, the edge of 2 studs if you're lucky to install it on an exterior wall... Just why... Add clearance and use washers to give us more room and move the holes on the glass in 1in total so it actually lines up with studs. BTW, I have all the bells and wistles and do plenty of DIY, have hung up much more difficult items (or atleast should be harder than something as simple as this). Idk, I have little to no patience for such poor design on a literal flat piece of glass.
M**E
Looks nice. Magnetic? Not sure and not easy to Install
I bought this product to dual as White Board and Magnetic Board. It looks very nice on my wall. But 2 issues: (1) Installation was difficult. It was very heavy so holding it up long enough to mark the holes not possible if you want it straight, and the Paper Template Provided to place on the wall did not even include the measurements of the holes, or square lines to follow on the wall. Therefore, it requires pretty precise measurements if want it to not only be straight but square with the hole requirements. Luckily, I measured every step of the way but there is not a lot of forgiveness in placement of the holes in your wall and the anchors are large, so it won't be fun if you put them in the wrong spot. (2) Magnetic? That is very questionable, I bought this specifically to use magnets for project management, however not all magnets work, it appears you have to have very specific strength of magnet to work. This is very frustrating. I did not think to check it before putting it on my wall so now that I have very specific large holes in my wall, I be creating a work around. As mentioned, it does look nice, better than a standard white board on a wall. I like the frameless look.
L**S
Highly recommend this board
I purchased nine Quartet Infinity Magnetic Glass Marker Boards, 36x24, white G3624W on March 5, 2015. Package contains: * One Magnetic Glass board * One tray for markers/eraser * Two magnets * One black marker Pros: a) Beautiful, clear flat surface for writing. I note this because this replaces another board, that I purchased, that rippled and waved which I have also reviewed on Amazon. b) My Quartet Infinity is mounted vertically as the area of my old board would not support the weight of the Quartet Infinity and the new open area was too small to mount horizontally. The marker/eraser tray is 23 ½ inches so it fits perfectly along the bottom vertical edge of board. c) It wipes clean with the only the dust from the marker remaining. Very nice. No ghosting. d) A black or blue marker shows really well but stay away from green as it blends with the board. e) I ordered 1/2 x1/8 inch Neodymium magnets disc N48. I reviewed these magnets in regards to usage with my old board and they were great. With this new board the glass is thick and one of these same magnets is still capable of holding up an 8x11 inch card stock but that is about the limit. I would recommend a larger neodymium magnet with this board. As a side note the two magnets that come with the board are a high quality and very strong. f) So it doesn't feel slighted, the black marker is also very nice and smooth to write with. Now stop pouting Mr. Marker. Cons: a) None. It is as stated. Conclusion: The board is mounted using four screws that hold four dry erase boars. Once the boars are attached you gently screw in the caps leaving each one loose until all the caps are installed then hand tighten. The carpenters' that installed these had a brilliant idea, they made a template of the cardboard package by cutting a rectangle the exact size of the board and marked four screw holes. I don't recommend you trying to install board by yourself as they are bulky. I highly recommend this board. Purchase with confidence, install and let your writing juices flow.
P**Z
Excelente compra
Muy bonito diseño, es perfecto para espacios pequeños y fácil de limpiar.
R**N
Good product
Quality was good and not difficult to mount. Happy with the purchase.
J**X
Great looking board
Great looking boards, except that my 24x18" arrived with a few easthetical glitches (some white paint missing in spots on the bottom left side and one of the screw caps from the mounting hardware had corrosion/burns spots on), but Amazon solved the issue quickly. As for the 3x2', it arrived in perfect condition. I love the look of this board and the size is great for my home office. It was pretty easy to install (they recommend doing it with another person and understandably considering that it is in glass and pretty heavy, but I nonetheless was able to install it on my own from A to Z, using drywall anchors to be safer instead of using Quartet's supplied hardware. It is sturdy and nicely manufactured. The only downside is that NO other magnet than the ultra strong magnets suggested by Quartet seem to work on this glass board. :(
M**L
Algo pequeño para el precio
Las medidas reales son 90x60 cm. El material es de buena calidad. Se necesitan de dos personas para colocarlo. También necesitas taladro y si lo vas a colocar en concreto tienes comprar tus taquetes porque el pizarrón viene con taquetes expansivos. Para notas o escribir algo pequeño está bien pero para dar clases en línea no es muy adecuado porque es muy pequeño y refleja mucho la luz.
A**R
So damn Eligent
Damn! This is so beautiful eligent. Flawless it's so perfect. Worth each and every penny
Trustpilot
1 month ago
2 weeks ago