


✨ Sparkle Your World with Every Application! ✨
The Darice Rhinestone Setter Heat Applicator Wand is a 9-piece set designed for easy application of hot-fix rhinestones on various fabrics. It features an ergonomic handle, a lighted on/off switch, and a sturdy support stand, making it perfect for DIY enthusiasts looking to add a touch of glamour to their everyday items.


| ASIN | B002I6XKWE |
| Best Sellers Rank | #1,084,573 in Arts, Crafts & Sewing ( See Top 100 in Arts, Crafts & Sewing ) #8,252 in Rhinestone & Sequin Embellishments |
| Brand | Darice |
| Brand Name | Darice |
| Color | Multicolor |
| Compatible Material | Fabric |
| Customer Reviews | 4.3 out of 5 stars 1,351 Reviews |
| Global Trade Identification Number | 00046932191485, 00082676623035 |
| Included Components | 1 Hot Fix tool gun |
| Item Form | Pen, Strip |
| Item Package Quantity | 1 |
| Item Type Name | Darice Rhinestone Setter Heat Applicator Wand – 9-Piece Rhinestone Setter Set, Affix Hot-Fix Crystals and Stones to Cotton, Denim and More, Includes Wand, Support Stand and 7 Hot-Fix Tips |
| Item Weight | 0.3 Pounds |
| Manufacturer | Darice |
| Material | Plastic |
| Material Type | Plastic |
| Model | 2704-01 |
| Number of Pieces | 1 |
| Other Special Features of the Product | Adjustable |
| Part Number | 2704-01 |
| Special Feature | Adjustable |
| UPC | 046932191485 885918829932 885937467108 885777568379 046943192419 707004341916 779170140365 082676623035 885496242239 018717087559 046923392259 885448504880 885813423693 |
| Unit Count | 1.0 Count |
| Volume | 36 Cubic Inches |
| Water Resistance Level | Not Water Resistant |
D**S
Easy to use!
At first this was kind of hard to get a hang of, but then the stones started going down super fast. I started with lace and then moved onto a hairstick. works wonderfully, im going to see what else the stones will stick to when i get a chance. i think that the brass tip stone holders might need a little bit of the glue from the stones to kind of start working properly. at first they either didnt want to pick up right, or they didnt want to come out, but after about 30 minutes of messing with it they would come up and go down just as the instructions described. i kept a thumbtack to the side so that if they got stuck i could give them a bit of help to get out, and its also easy to give the stone a bit of a tap to push down. a thumbtack works nice as it has that little piece at the top to hold onto and it doesnt get hot there like a needle would. but once you get the hang of it you can use the edge of the wand tip to push it down, on the very top of the stone, when you have dropped the stone out onto your project. the wand will get hot though at the front from the vented edge down, so keep your fingers above that. i have been waiting to get one of these for about 10 years now, but when the stone setters first came out they were about 1000$. Its taken till now for them to be affordable, and even though most of them arent very pricey i did do some research as i didnt want to go through a bunch of them to find a good one. this one had the best reviews, it was easy to use, and the price was about the least expensive. All in all you cant go wrong with the Darice Setter. give it a bit of time to play with before making a snap decision, and definatly buy a big bag, or bags, of stones in a bunch of sizes you will want to play with them all when you are rolling along finally. im probably going to buy a couple more just so that i dont have to change the tips off when i want to switch sizes, this is inexpensive enough to do that. Get this one for sure though, you wont be disappointed!
N**E
My HACK to make this easier!!
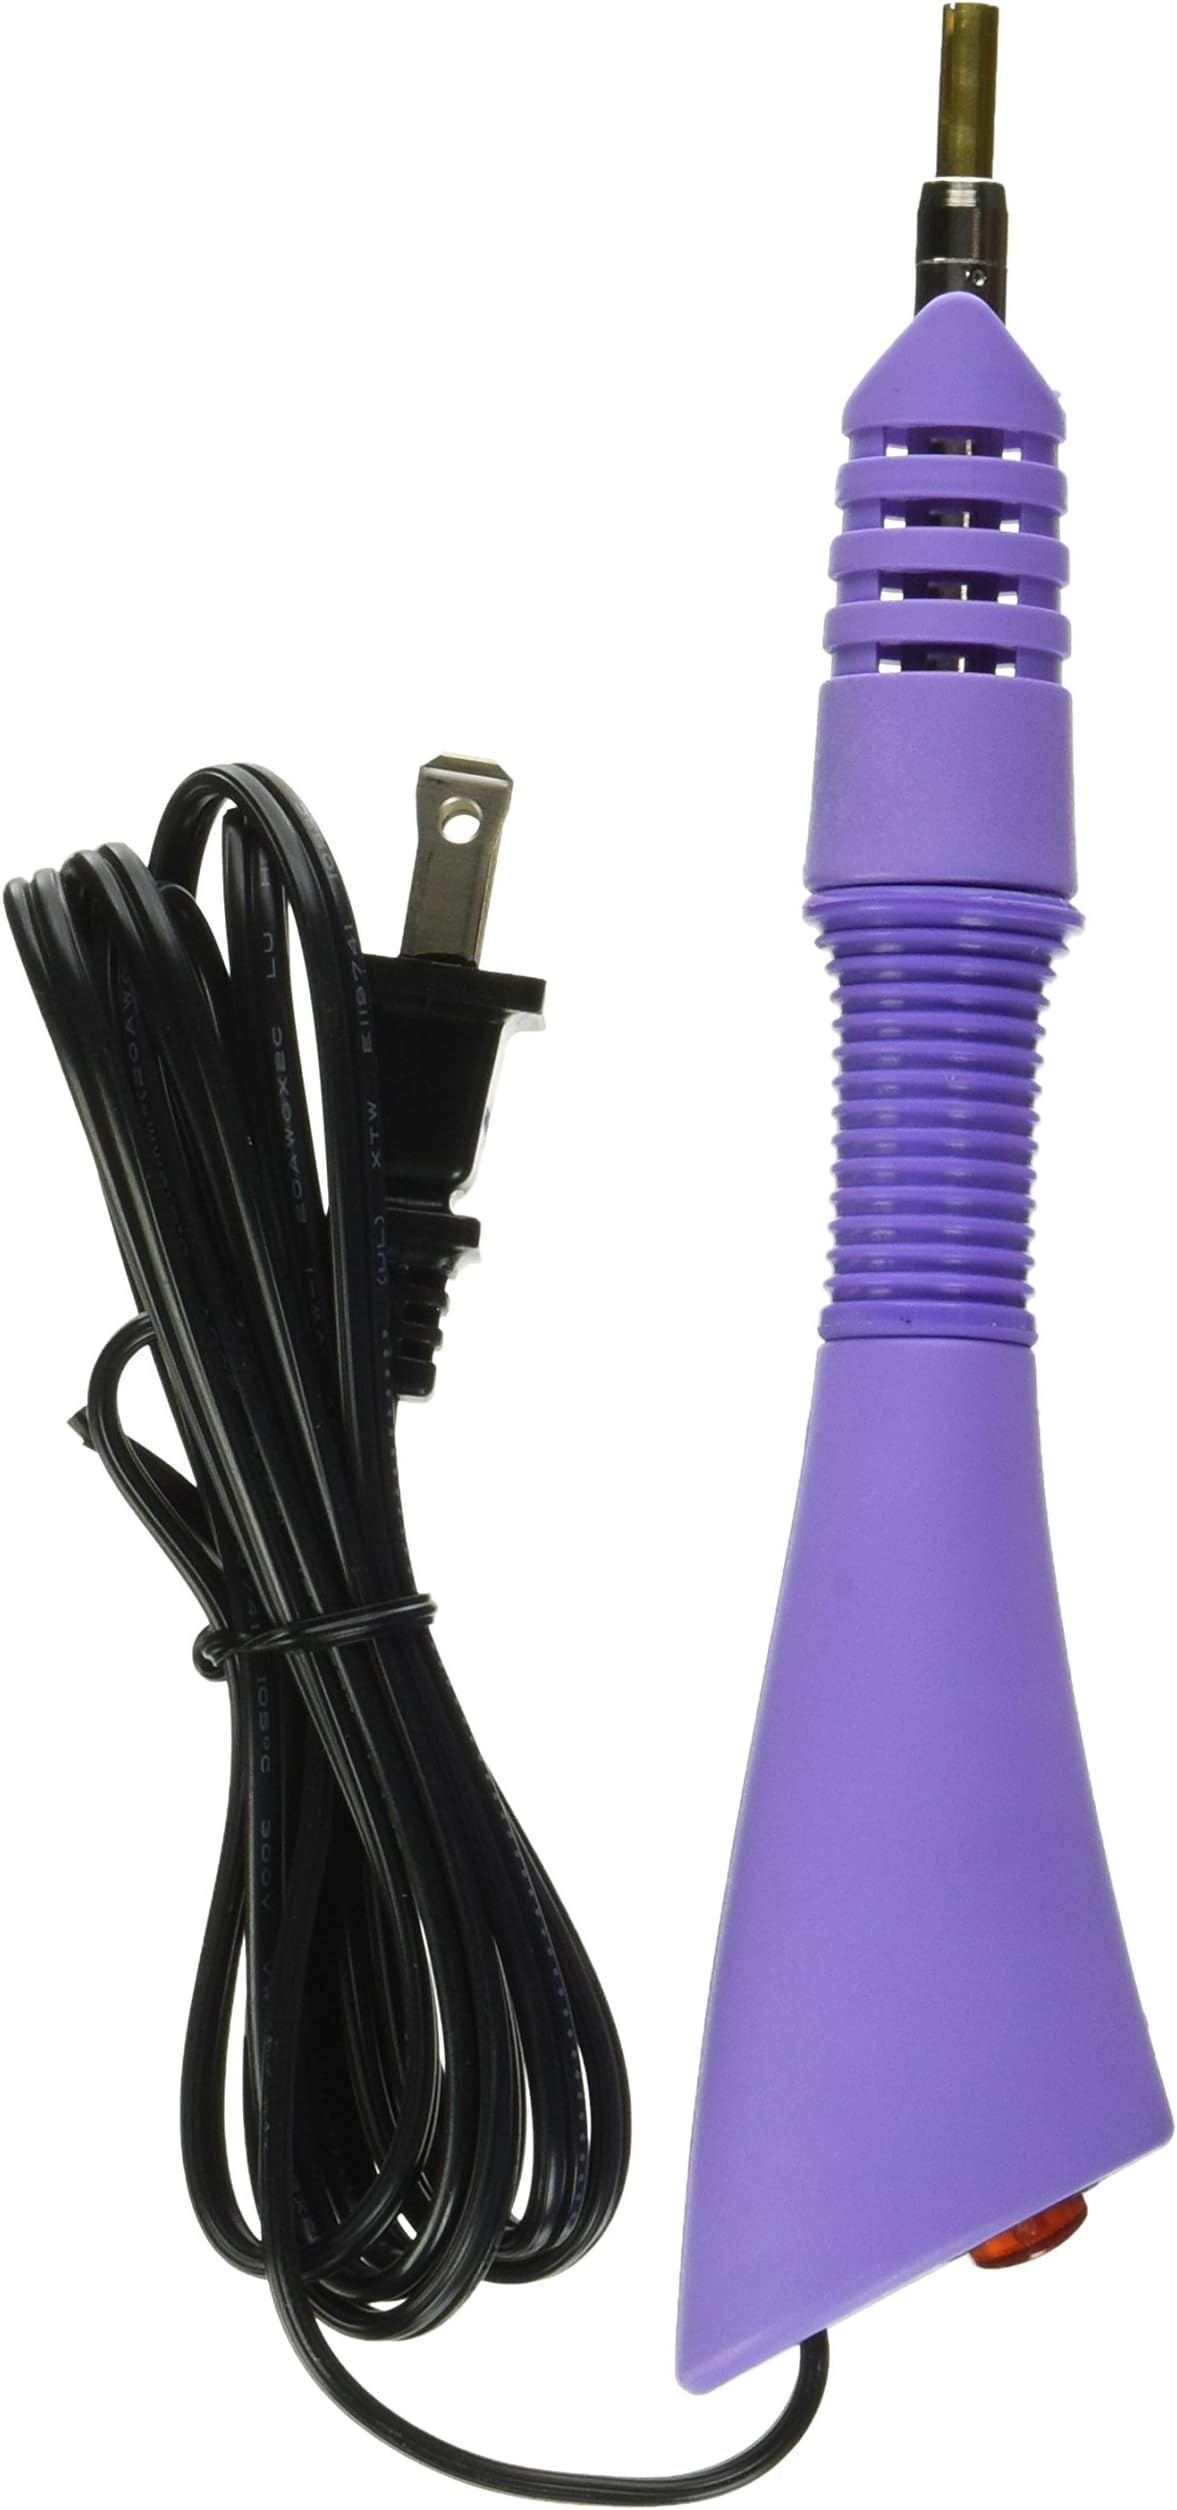
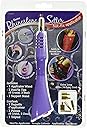
I never used a tool like this before and was a little nervous that it would be difficult, messy, or simply wouldn't work well. I got some hotfix crystals and wanted to attach them to a tshirt. I made it even MORE complicated by wanting to put the crystals over an iron on type design on the shirt. The shirt wasn't expensive, so I figured I would give it a shot. I read the directions and figured I would practice on a piece of paper so I could get used to the tool first. I didn't really like holding the crystal until the glue melted and then trying to move it to my desired location. Here and there a crystal would fall out of the holder on the way. I also had a few get stuck in the tool (probably from the glue not being perfect on the crystal to begin with.) There is a little slot in the tip so you can slide a pin in there to help some of them come out. I found it a little tricky to pick up a crystal, wait 5-10 seconds (depends on the size of your crystal), move it and keep it in there, poke it out with a pin, then pick up tweezers to press and hold it in place a few seconds until it was set. I didn't seem to have enough hands to keep track of all those little tools. But I figured it out!!! Here is my fast method that made putting on over a thousand (I did two t-shirts) quickly. No burns, no mistakes. 1. Sort of have an idea of your pattern. You don't want to be deciding where you are going to place the crystal after it is hot and ready. 2. (This is the weird part) TAPE a pin to your index finger so it is sticking out. I just used scotch tape (I used a longer pin that came with a corsage. I always save those..but any pin can work, even a bent safety pin.) 3. Find the metal tip that is the next size little smaller than the one in the tool you are using for your crystals. TAPE it to your middle finger. The kit comes with different tips. They are concave so you can "cup" your little crystal in it. You are going to use this to push a little on your just-set crystal so it stays in place. If you are using the smallest size, you can use the flat "stud" setter. 4. Get over looking a little like Edward Scissorhands (ha ha!!) 5. I put the pin and tip on my left hand because I am left handed. I wanted the precision with the pin with my dominant hand. I used my right hand to hold the heat tool on the crystal already in its place. No lifting and moving, just stick it right on there. 6. Count to 10 (or less with smaller crystals) so that the glue melts and the crystal sticks 7. Use your finger with the pin to push the crystal out (yours may not need this, most of mine did. Maybe because I was doing it on an iron on decal. It didn't get messed up, btw even with the hot tool) 8. Use your finger with the metal tip taped on to press and hold the crystal in place a few seconds.The smaller size won't go all the way around your crystal, so it pushes on top instead. I used my ring finger to slide the next crystal into the approximate place. You can still slide them a second before they start to stick. You also have about a second after your lift the tool and use your "tip" finger to move them slightly if you need to. Just slightly though, so be close. That's it!! It really went quick this way and I avoided the temptation to push the hot crystals with my fingers (yeah, i did it a few times when I was practicing before I figured out the tape thing. They are HOT!!! Ouch!) This taping is awesome so you don't have to fuss around finding your pin, picking it up, putting it down, finding the tweezers, pushing the crystal, putting the tweezers down, etc. etc. Your pin-to-poke and tip-to-press tools are there and ready every single time because they are right there on your fingers. I even used the pin to help make a row straighter. I attached a little video so you could see my taped-finger technique. It really did make it so much easier. Hope it helps someone!
T**M
Easy to Use - Even Kids Can Use This
I bought this after a failed experiment with the BeDazzler - my poor niece was so excited to bling out her wardrobe, but even I couldn't make the BeDazzler work :( So, I shipped it back to Amazon and ordered this, instead. It's pretty basic - just the hotfix tool, three rhinestone tips and three stud tips, and a cheap metal stand - but it gets the job done well. It took us 30 seconds to set it up and start adhering rhinestones to stuff. In less than an hour, we blinged out a dress, a t-shirt and two pairs of sneakers. After showing my 9-year-old niece how to use is and reinforcing never to touch the copper tip, I let her have a go. She successfully "crystallized" a handful of hairbows in less than 20 minutes with little help from me. She was thrilled with the results and declared me the best aunt ever - score! I loved it so much, I promptly ordered a second one for myself. The best part? Two of these + the hotfix crystals I ordered still cost less than one BeDazzler. I've ordered the Swarovski hotfix crystals and the Thread Art-brand crystals. The Swarovski crystals are notably prettier and have more sparkle, but the Thread Art ones are nice and a half the price for a helluva lot more bling. I haven't tried the Darice brand rhinestones, but the tool works equally well with the other two brands. I have noticed that when using the Thread Art crystals, I have to use tweezers to release the stone every 4-5th time. This is pretty easy to do; I watched a YouTube video to learn the technique. This seems more like a flaw on the part of the crystal than the hotfix tool, though. I've never used a hotfix applicator tool before and I was able to bling out 1/3 of my wardrobe within minutes of opening the package. If I - and my 9-year-old niece - can do this, just about anyone can!
L**Y
Darice Rhinestone setter.
I cannot compare this to any other similar device but this one is working well. I have not perfected the technique yet so I am not an expert. It seems to do what it was intended to do, adhering hot fix crystals to items. About every ten crystals, a crystal would get stuck and not come off. I had to use a straight pin to pick it out. I also had to wipe with a thick cloth as the glue seems to build up inside the tip possibly causing the stones to get stuck. It gets very hot. I only tried a Darice Brand of stones so it may be the stones and not the setter. I do not recommend this for children under 12 as the tip will cause a bad burn if touched accidentally. Mine came with an assortment of tips which is great! Many setters do not. Nothing else to buy other than a whole lot of stones.
D**E
So easy to use!
I have never used anything like this before. I have always just used super glue to adhere all of my rhinestones and never even knew what "hot-fix" was until I ordered some rhinestones with the hot-fix backing. So I ordered the Darice Rhinestone Setter since it was fairly cheap and sounded easy to use. First time using it, I waited the recommended time to let the tip heat up and tried it with a rhinestone on a painted wood bench that I made for a doll. It worked great and the rhinestone seems to be very well adhered to the surface! You do have to hold the applicator very still while "setting" the rhinestone onto the intended surface as it can slide and you can see where the backing has slid. Also make sure that the rhinestone is exactly where you want it when you remove the applicator as the rhinestone is permanently set into place seconds after lifting the applicator off of the rhinestone. Overall, it really makes setting rhinestones so much easier and less messy than messing around with super glue. I love it and really recommend it!
U**2
It could be better
I have used this rhinestone setter a few times since receiving it. The instructions were easy to read and follow. The item itself heated to the proper temperature quickly, under 2 minutes. It was easy to pick up the rhinestones with the wand and the glue on the back of the rhinestones was heated quickly. However, when I tried to adhere the rhinestone to the project, it was difficult to get it to release from the Darice rhinestone setter. I had to use a toothpick to hold the rhinestone in place while I pulled away the setter. The quality seemed very good. Obviously it's not meant for rough handling but I feel like it will last a long time. The Darice setter comes with several different sized tips for different sized rhinestones. Other than the release difficulty, I found the product satisfactory. It even came with a stand to rest the hot setter on. This was very convenient because it prevents the table from being burned. However, the difficult release is a big issue for me. I felt like my project would have been finished much quicker if I didn't have to waste time using the toothpick to assist me.
D**Y
Great tool at a great price!!!!
I was able to use this as a first-time user. My project turned out great and I would recommend this to anyone looking to use this method to apply rhinestones. The few rhinestones that I could not pick up was based on the size quality of the rhinestones not the quality of the heat applicator. I noticed that different orders of rhinestones had different quantity and quality of glue. They also heated at different speeds. I included photos of what the glue looked like as it heated. The glue expanded a bit giving it a dome shaped when completely heated. If there was a rhinestone that I could not get out due to glue that I got on the edges, the tip applicator had a slot in it so I was able to put the edge of a tweezer into it to apply pressure from the other side enabling me to place the rhinestone where I wanted it. I thought the design was well thought out especially for an inexpensive tool. I used a clear flat bottom dish to place my rhinestones in so I could pick them up with the heat applicator. Once placed on the fabric, I used the dish to apply pressure to the rhinestone to ensure a good fusion of the glue to the fabric. The clear dish also enabled me to see the rhinestone as I did this just to make sure that it didn’t move on the fabric or turn over. I made 2 large 28” pillows as Christmas gifts. I saw some beautiful linen with a rhinestone pattern on it but the price was out of my budget. I was able to get some fabric that coordinated with the bed set at a really low price and I applied my own rhinestones. After purchasing the fabric, the tool, and rhinestones, the cost was still half of what the original linen fabric with rhinestones was. On top off that, the few people that I showed this to, wanted a set so I was able to sell them at a profit. I would recommend this to anyone wanting to apply rhinestones to fabric.
M**E
Great product, great price.
This product works quite nicely. I've had a couple of crystals get stuck, but I managed to get them out with a pin, and it doesn't happen much. You just have to be careful to pick them up straight on. For some reason the ss6 sized tip doesn't pick up the crystals, but I haven't found it to be a problem. I just place the crystal directly on the surface I'm hot-fixing it to, and then use the tip over it right there. The instructions say that when you put down the stones, you should then press them down with tweezers or heat-proof gloves, but that made me feel like I was trying to juggle too many tools, and I find that using the edge of the applicator tip itself works well for that purpose. It's not an intended use, but I've also had success using the flat tips to fuse small dabs of seam glue and fusible web to secure edges.
B**E
Bien lire le descriptif.
Attention! Cet appareil est incompatible avec les prises standard françaises et nécessite un convertisseur 230V-110V. Il faut bien lire le descriptif, ce que je n'ai pas fait...
H**S
Très pratique
Excellent et facile à utiliser
A**R
I liked it very much and it serves it purpose
I liked it very much and it serves it purpose. I was just expecting it to have an on and off switch, but it doesn't. Other than that is very good.
K**N
It works great, except for the smallest sized stones
It works great, except for the smallest sized stones. They get stuck and you have to be really careful putting them on. Any other size is super easy to put on. It heats up fast, and I love that it has an on off button.
M**Y
Heats up quick
Excellent item. Heats up quickly and sets crystals with no issues
Trustpilot
1 day ago
2 weeks ago