Desertcart purchases this item on your behalf and handles shipping, customs, and support to USA.
🏡 Elevate your doorstep game — shelter in style, rain or shine!
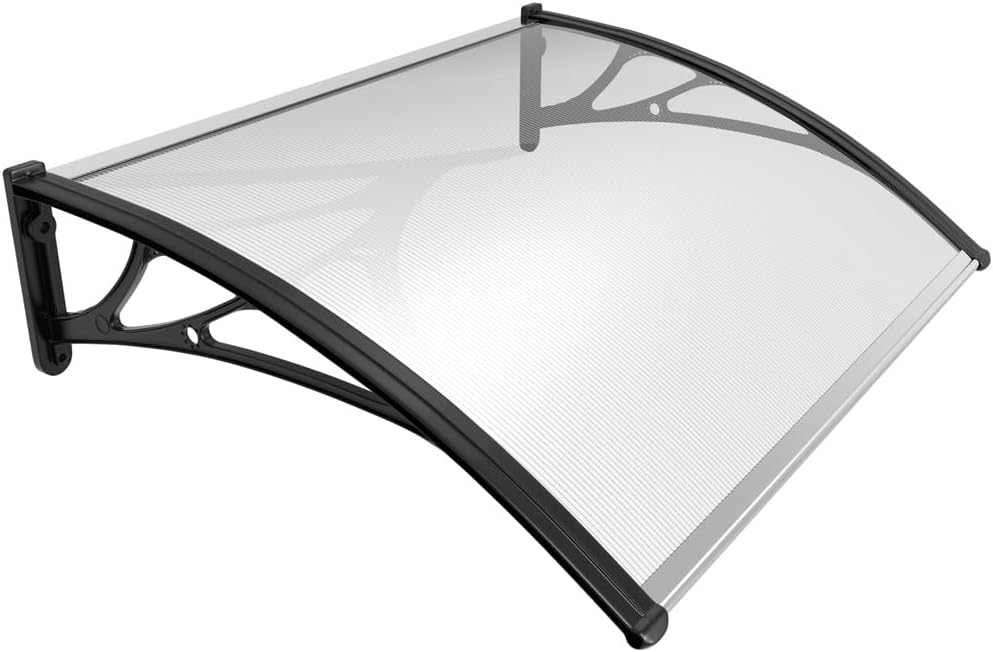
The VOUNOT Door Canopy (120x80cm) combines robust 6mm polycarbonate roofing with a rust-free aluminum frame and ABS supports to deliver durable, weather-resistant protection for your entrance. Lightweight yet sturdy, it installs easily with included hardware and enhances your home's exterior with a sleek black modern design. Engineered to withstand harsh weather from -40°C to 120°C, it’s the perfect blend of function and style for any front or back door, balcony, or porch.


| Asin | B0CLV25LRM |
| Best Sellers Rank | 9,289 in DIY & Tools (See Top 100 in DIY & Tools) 2 in Roofing Canopies |
| Brand Name | VOUNOT |
| Colour | Black |
| Customer Reviews | 4.4 4.4 out of 5 stars (5,371) 4.4 out of 5 stars |
| Fabric Type | Polycarbonate |
| Is Assembly Required | Yes |
| Item Dimensions D X W X H | 80D x 120W x 23H centimetres |
| Item Type Name | Canopy for front door 120 x 80 cm, black |
| Item Weight | 2.7 Kilograms |
| Manufacturer | VOUNOT |
| Manufacturer Part Number | 8695708025181 |
| Material Type | Polycarbonate Aluminium |
| Model Number | 8695708025181 |
| Number Of Items | 1 |
| Number Of Packs | 1 |
| Operation Mode | Manual |
| Pattern | Solid |
| Projection Distance | 120 Centimeters |
| Size | 120x80 cm |
| Style Name | Modern |
| Unit Count | 1.0 count |
User
Easy to fit, cut to size, solid and a great price
Having bought this without the forethought of “will this actually fit between my annoyingly placed drainpipes?”, I discovered pretty quickly that, no, no it won’t. Having said that, looking at it was nothing a tape measure a scalpel and a hacksaw couldn’t fix. It took roughly 20 minutes of cutting and assembly to get the finished item (more like 5 minutes without the cutting to size), and putting it up was a simple affair as it weighs next to nothing (I did require another pair of hands to mark the holes for drilling, but this took seconds). Not a fan of the supplied bolts so I opted for some hefty wall plugs and screws I have laying around. Stability wise it feels solid as a rock, I will update its wind resistance should anything unfortunate happen but am confident it will withstand some serious punishment. I like the way it looks, nothing too flashy but wouldn’t look out of place over most doors. Happy with this spur of the moment (due to the horrific downpours we’ve had recently) purchase. Quick and easy to put up, cheap, looks good, can’t really ask for more.
User
Good buy
Brilliant. Does what it is meant to
User
Nice product
I think it looks really nice up, covers where the wife parks her bike at the back of the house and covers the side door.As said looks good on the wall, its getting it there. Its not hard but definitely something that gets better with practice. A single unit, yeah, doddle. As long as you drill the holes in the right place, depending on your brickwork i would recommend buying some proper m8 rawl bolt fixings as the supplied ones are at best, sufficient.Fitting multiples, the one i put up has 4 sections done solo. You need to pick a centre section with an arm each side and fit that, then work out on each side, clear panel and arm. Offer up the panel and put the outer round end in and work in, then put in the fixings. approx 96mm centres for the holes.A laser line helps a lot too.
User
A good easy to install, fiddly to assemble, canopy great when fitted
This canopy is good value despite being all plastic construction the support frame is very rigid and light. Assembly is easy but here is the only problem I found especially if you don`t have an assistant to help you.I put up the centre support and assembled each of the end ones onto the perspex roof and secured them using the supplied screws in the ends, the plan was then to slide eachg side onto the already mounted centre support and secure in the holes I had already drilled, this was when the problem began. I bent the roofing material into the support but everytime I went to move the outer end it would pop back out again and again before I could secure the first bolt, so I took down the centre support assembled the whole canopy on the ground and drilled in 4 stainless steel self tapping screws (see photos) through the centre support to joint the two half together. After doing this the whole canopy was one piece and fairly strong, but a little bendy. I put the whole thing back up using the centre support first then each end in turn it was very easy once the canopy was in one and wasn`t constantly popping apart. Also the additional two screws I think will give added procetion to the joint in even the strongest of winds.The anchor bolts that come with it are sturdy but I was fixing into a timber structure so opted for coach bolts instead but the supplied fixings look like quality anchor bolts.As for strength well winter is coming and so will the winds I shall have to see how it fairs, that being said I think it will stand a pounding by strong winds - will let you know next summer.All in all for the price a sturdy, well made peice of kit.It is December now and we have had some 70mph plus gale force winds and the canopy has with stood them no problem at all.
User
Patio Door canopy that is very good quality and reasonably priced.
I am very impressed with this door canopy as it covers my patio doors and it was relatively easy to assemble too. I paid just under £60 and I believe it is very good value for money.It is very sturdy once installed properly on the wall with provided anchors. I used my Bosch GBH 2 26F SDS drill machine and Bosch Expert SDS 10mm bit and it was easy to drill into bricks. I did have a piece of wooden batten length leftover from my Trellis so I marked the holes on wood while the assembled canopy stayed on ground and then drilled through the wooden batten to create a template. Once all the holes lined up on Batten, it was easy to mark up the exact location of 6 holes needed to mount it on the wall.Used a mallet to drive the anchors in the wall starting from the middle bar of the canopy. I used my Amazon Umi Spanner rachet set to tighten the bolts. After that just put those plastic caps provided to hide the bolts. Job done in an hour not including the hour for assembly. So for two hours of DIY, I have a very stylish and sturdy canopy sheltering my patio doors from rain and snow, what more you want.I would definitely buy more for my windows in few weeks time.
User
Porch construction seems ok? Fixings rubbish!
I put the porch canopy together fairly easily, yes its a little fiddly getting the polycarbonate roof to bend to the slot into the curved side support's, easier with a helper, but once constructed seems to be strong… seems to be, as not yet fitted/tested… the low stars were given for the poor fixings, which have caused me no end of trouble!!!Unfortunately I didn’t spot this prior to attempting the fitting…, you will note (in the items pictures) the bolts expand from the far end, i.e. the bolts screw into the end ‘nut’ which is drawn up, expanding the tube shaft as it tightens… great in theory,… I drilled a hole into my wall the length of the bolt sleeve to sink it flush, the fixing bolt is fractionally longer, and there is the problem. The bolt is about 2-3cm too short when you take in the thickness of the canopy support arms, so the bolt will not reach the nut, so will not tighten.As i had started, i tried tightening up the bolts, without the canopy in place, to draw the nut forward, but could not bring it forward enough for the bolt to reach the nut when the canopy supports are in place. Trying to bring the nut far enough forward, snapped one of the bolts, not just stripped the thread, actually snapped the bolt! Now i have the expansions shafts stuck in my wall, with bolts that will not tighten!I can only get around my issue by hopefully finding longer bolts with the same thread, and using a standard large wall plug for the broken one… or drilling 4 new 10mm holes, with 4 new fixings?My advice to you, is buy suitable fixings that are long enough to also take the thickness of the support arms.Construction and fitting it will be a lot easier with two people and two steps. Offer up the constructed canopy to mark the holes for drilling. A spirit level is useful.The instructions are basic diagrams only, and do not give much advice/help on the fitting of the canopy, so i hope the above helps and saves you the headache i now have!
User
Great Canopy for the Money
Actually I am very pleased with the product. The only point to make is I changed the supplied fixing for 8mm Rawlbolts as it is sited in an exposed position to the winter windsIt's dead easy to assemble and I installed alone without helpCracking item at the price
User
Get your own parts before installation
Screws and accessories that came with the package won't be of the best quality - you better get your own before starting the installation process, otherwise the PVC part and the bracket quite alright.
User
Goed en stevig product
Inmiddels hangt het boven mijn voordeur voor enkele jaren en nog steeds prima. Goed product
User
Quasi perfetta
ho acquistato e montato 2 pensiline (1 da 1 mt e 1 da 2 mt) a protezione di 2 porte di accesso a locali esterni. le pensiline sono belle e molto leggere anche perchè lo spessore del policarbonato è solo 4 mm (ma questo mi va bene per il servizio che mi deve dare). la leggerezza aiuta decisamente a montare le pensiline senza tanti sforzi fisici ma è comunque consigliato un aiuto da una seconda persona per il montaggio. unico punto negativo (per il quale non ho dato le 5 stelle nella facilità di montaggio) sono i tasselli allegati alle pensiline che sono molto robusti, lunghi e di un buon diametro ma che hanno 2 difetti considerando l'utilizzo per il quale sono forniti: sono di metallo (vanno bene nei muri pieni ma non vanno bene nei muri con mattoni forati perchè il metallo frantuma il mattone ed il tassello non tiene) e sono del tipo con bullone inserito nel tassello che quindi quando sono inseriti nel muro non si possono più togliere. questo comporta che è necessario inserire i tasselli nella pensilina e poi montare la pensilina con i 4 tasselli attaccati in un solo colpo (prima segnare i punti da forare, poi eseguire i fori, poi montare tutti i tasselli attaccati alla pensilina in un solo colpo = fatica immane senza possibilità di errore). consiglio il fornitore di utilizzare in futuro tasselli con barra filettata in modo che quando il tassello è fissato al muro la barra filettata rimane esterna rendendo molto comodo il posizionamento della pensilina nelle barre filettate per poi fissarla con gli appositi dadi. questo consentirebbe di poter togliere e rimettere la pensilina per pulizia o sostituzione senza dover rifare i fori per i fissaggi mentre con il sistema adottato ora se togli la pensilina devi rifare tutto il lavoro.
User
لا شي
ممتازه
User
Dübel könnten besser sein.
Dieser Artikel gefällt mir sehr! Für wenig Geld! Sehr stabil und sieht sehr gut aus!
User
Buen producto. Buenos materiales
Producto muy bueno. Viene con todo lo necesario para el montaje. Se ve robusto. Ahora habrá que ver el paso del tiempo. Recomendación: sellar con silicona la junta entre el toldo y la pared para que no filtre el agua por la junta.
Trustpilot
2 months ago
1 day ago