Desertcart purchases this item on your behalf and handles shipping, customs, and support to USA.
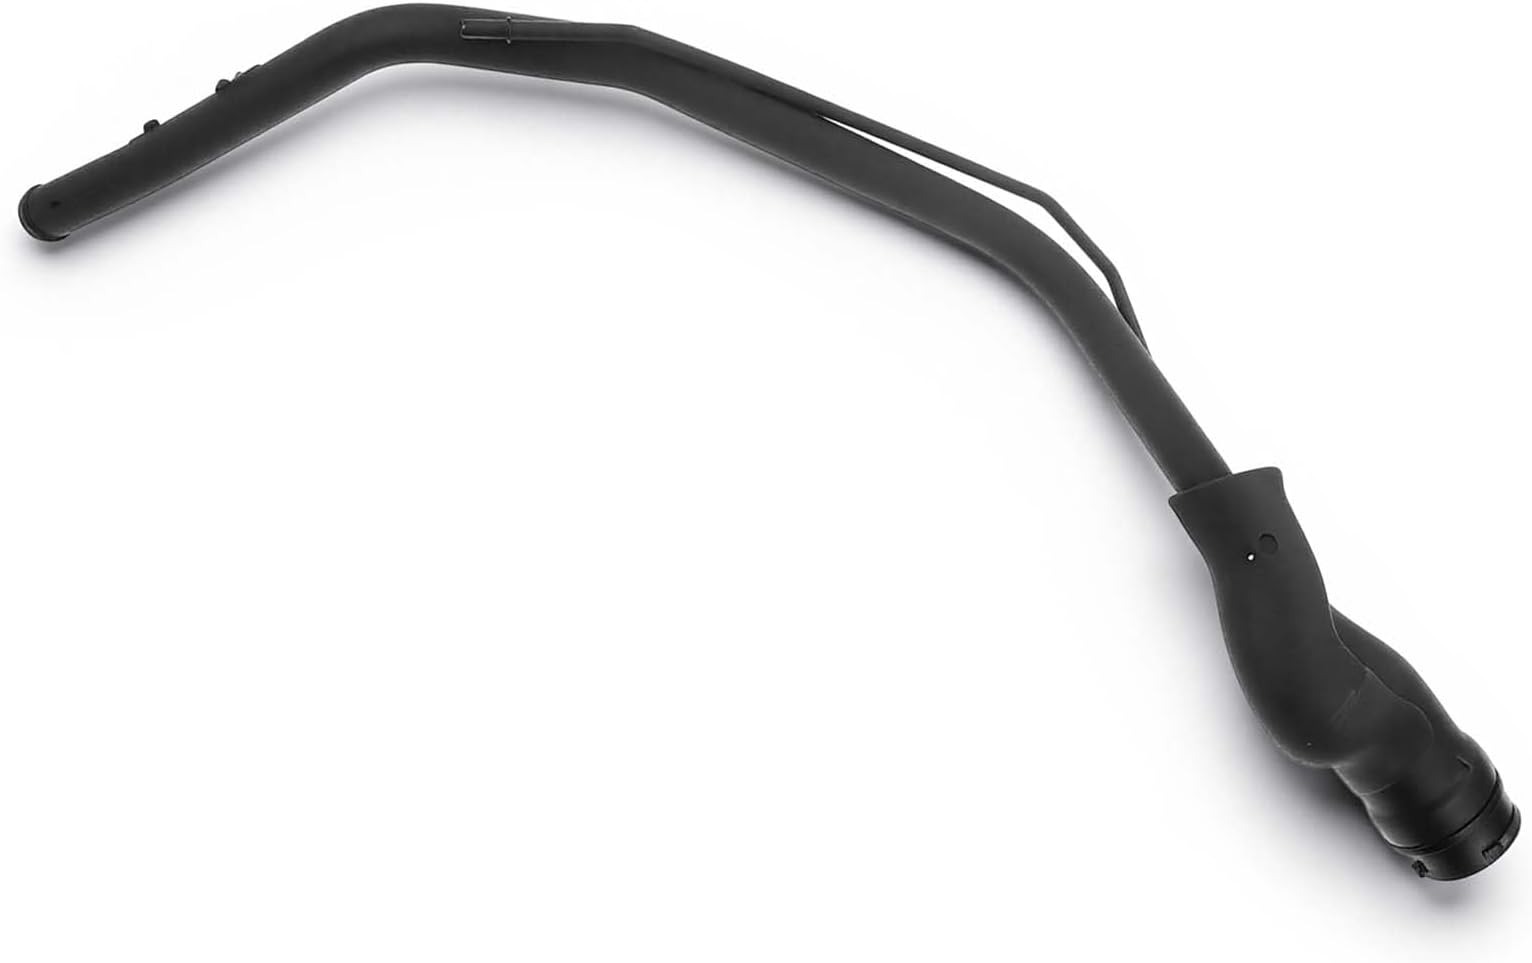
⛽ Upgrade your Mustang’s fuel flow with precision and durability!
The A-Premium Fuel Tank Filler Neck Pipe Hose is a corrosion-resistant, stainless steel replacement part engineered specifically for Ford Mustang models from 2010 to 2014. Measuring 39 inches in length with a 1-inch diameter, it meets or exceeds OEM specifications and comes with a one-year unlimited-mileage warranty, ensuring reliable performance and a perfect fit for your vehicle.


| ASIN | B0B1VB79CR |
| Brand | A-Premium |
| Brand Name | A-Premium |
| Color | Black |
| Colour | Black |
| Customer Reviews | 4.4 out of 5 stars 15 Reviews |
| Item Dimensions L x W | 99.1L x 2.5W centimeters |
| Item Length | 39 Inches |
| Item Weight | 1.97 Kilograms |
| Item weight | 1.97 Kilograms |
| Manufacturer | PremiumpartsWhosale |
| Material | Stainless Steel |
| Material Type | Stainless Steel |
| Outside Diameter | 1 Inches |
| Outside diameter | 1 Inches |
| Product dimensions | 99.1L x 2.5W centimeters |
| Unit Count | 1.0 Count |
V**K
Test before you install, evap monitor pass now. P0442 P0457 EVAP SMALL LEAK, CHECK GAS CAP FIXED
DO NOT use power tools, fuel vapor is flammable! As another reviewer also said, test the new filler neck with incense, cigarette, vape, etc before installing. Make sure to block the smaller fuel vapor line hose while testing. You could also test it by blowing through the big hole and blocking the small metal fuel vapor line with your finger. After removing my evap purge solenoid at the front of the engine (2 8mm) and confirming that air DID NOT blow through (means good). I bought the next common failure with these capless mustangs, the fuel filler neck. An easy way to test before installing is blocking the small vapor line tube with your finger and blow through the large hole, you shouldn’t be able to blow as any air leaking will cause you to fail EVAP for smog. Next on my 2011 Mustang GT, I had to drop the exhaust at the mid pipe (2 15mm), and the exhaust at the rear exhaust tip area (few 13mm) and I just let it hang. Along with the stabilizer bar (2 15mm parallel to the ground, I just bent it downwards for clearance and bent it back up to install. It should have taken me around an hour and a half for everything but I was trying to remove nothing and that bit me in the a. There’s 2 small hose clamps securing the fuel tank white plastic hose (revealed when you take off the rubber hose to the fuel tank) to the fuel filler neck hose (2 7mm) and a (13mm) bolt for the fuel filler neck bracket to the body of the car. To disconnect the fuel vapor line from the old filler neck, the blue locking tab must be removed first, be careful not to break it, I broke mine and just didn’t put it back, the next step is to push downwards towards you if you’re on your back, on the white plastic “button” on the side opposite of the blue locking tab, push hard and then use your other hand to pull the rubber vapor line hose from the metal vapor line side.
E**K
Bon
Très satisfait j ai modifié pour installer sur 2008 ( qui n est plus disponible) légère modification Je recommande
M**N
Fuel Filler Neck
It fit perfectly on my '13 mustang and cleared my check engine light so it could pass emissions testing.
A**R
It is
It worked
A**C
Worked Well for 6 Months now Have to Baby It
10/22/25 update: so during our Mexico trip in September it had no issue and now the past couple weeks it's been fine. I think you have to baby it. It doesn't like you moving the pump around while gassing up to get the last bit of juice. I now tap the pump with my hand to do that and so not much extra gets everywhere when I take it out. Will see how much longer till I get another light, but so far so good for awhile. Thank you. 6/26/25 update: yeah so as of 6 months after install there’s intermittent issues with “check fuel inlet” and “large evaporation leak” because of this inlet. Doesn’t happen every day but twice a week or so. Probably should’ve gotten the OEM inlet but didn’t want to pay the extra $100. Oh well nothing much I can do now already paid a shop $400 to do the job :( 5/16/25 update: 4 stars for now. Gassed up yesterday and still no issue. Not sure what happened. Not willing to give 5 stars just yet. Thank you. 5/13/25 afternoon update: The alert finally went away. Will see how long it lasts. If all I had to do was lube around the flap, I’m good. Up 1 star to 3 for now. Thank you. 5/9/25 Update: So 6 and 1/2 months after my professional install of 10/22/24 my "Check Fuel Inlet" light comes back on. Not happy at all! I gassed up at Chevron the afternoon before. It happened on my way to work early in the morning. Later on I tried canned air to clean it off and sprayed WD-40 in the hinge area moving it around as well. Taking off from work later it still happened. Yesterday afternoon I lubricated the door edge with transmission fluid as it has worked well for me in the past on other things. I saw online that that might help. Will see what happens, but a fuel inlet should last longer, especially since I spent around $400 for the install. I imagined it would last 9 years like the OEM one. Or at least 5-7! Will see what happens, but for now not happy at all! 5/2/25 Update: And still doing well! Now it's been 6 months, 1 week, and 4 days! I just gassed up today too no issues! Great product. Thank you. Update: 12/14/24, 1.75 months after install and still operating well no issues! :) Update: 11/1/24, 1 week and 3 days after professional shop install. I wanted to wait till the 2 week mark, but my car has never gone over 1 week without the EVAP leak engine code light popping up. I’m pretty sure the issue is now resolved. This code can also be caused by the Canister Purge Valve. My original valve was probably fine, but I replaced it anyway because I didn’t know what the real issue was at the time. So don’t overfill your tank and treat your equipment without too much physical force, and everything should be good. Always test new items before installing. That’s my advice. Thank you. Original review: Made of plastic instead of metal, but maybe that’s a good thing. Sporty cars like to be lighter. Also, no rust. The old one had rust, probably what caused part of the EVAP leak issue. This has the auto close flap, but it doesn’t auto lock. If you have a locking cap for your old one, it works with this one, just a tighter fit. I tested vapor escape with incense before I had the shop do the work. Looks like someone else who bought this had a faulty one. Test it first. Will find out how it goes just on first day. I have a 2014 Ford Mustang V6 base.. with a few add ons :))
Trustpilot
2 days ago
2 months ago