๐ฟ Elevate your snack game with vintage vibes and modern convenience!
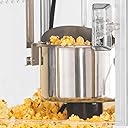
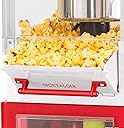
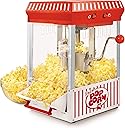
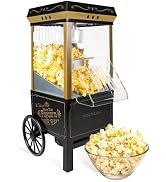
The Nostalgia KPM200CART is a 110cm tall vintage-style popcorn cart that pops up to 10 cups per batch using a 2.5-ounce stainless steel kettle with built-in stirring. Featuring dual-hinged lids, a tilt door for easy serving, a lighted interior, and a pull handle for mobility, it combines classic design with practical functionality for home or office use.






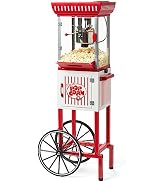


| ASIN | B00EFW7HPK |
| Brand | Nostalgia |
| Brand Name | Nostalgia |
| Capacity | 71 g |
| Color | Red & White Stripe |
| Colour | Red & White Stripe |
| Customer Reviews | 4.2 out of 5 stars 1,168 Reviews |
| Global Trade Identification Number | 00082677713162 |
| Included Components | Cart, Kettle, Popcorn Maker |
| Is Electric | Yes |
| Item Dimensions L x W x H | 41.9L x 30.5W x 114.3H centimeters |
| Item Type Name | 2.5 Oz Kettle Makes 10 Cups, Vintage Movie Theater Popcorn Machine with Interior Light, Measuring Spoons and Scoop |
| Item Weight | 16 Pounds |
| Manufacturer | EMG East, Inc. (direct order) |
| Material | Alloy Steel |
| Model Number | KPM200CART |
| Number of Items | 1 |
| Part Number | KPM200CART |
| Product dimensions | 41.9L x 30.5W x 114.3H centimeters |
| Special Features | Lighted Interior |
| Special features | Lighted Interior |
| UPC | 082677713162 |
| Unit Count | 1.00 Count |
P**A
Excelente
Me encanto y es tal cual se muestra aunque a decir verdad creo que lo esperaba mas grande peeero se ve muy buena y cumple con su funcionalidad, todo muy bien. Llego dentro del tiempo que se dijo. Ahora si a comer!
T**S
You should get one of these.
looks cool makes good popcorn with no hassle kind of forces me to eat popcorn without salt and butter which is healthier what more could you ask for in a popcorn maker instructions written in tiny print with tiny illustrations - not so good for an old boy like me lots of tiny screws involved in putting it together but patience paid off I would definitely recommend this popcorn maker.
B**N
Patience is required to get a great result
My wife bought this for me as an early Christmas present. We love how it looks in our kitchen and it does a good job of popping the corn. To clean out the kettle of anything stuck inside, my wife placed a bowl underneath, then tilted the popper and wiped out the inside with a slightly damp paper towel. This way there wonโt be anything inside to burn when you preheat the popper for the next batch of popcorn. Putting it together is another story. I have never seen directions that are so poor or lacking in detail. I will offer a few of my suggestions. First remove the kettle from inside the main unit. Kettle is packed in Styrofoam. Only way to get the kettle out is to pull the kettle straight up and out of the Styrofoam. It is tight. You really have to pull. The Styrofoam can now be titled and taken out. Wipe out the inside of the main unit and the kettle itself. Assembly: Inside the box are 2 basic wrenches and 1 quality screwdriver for assembly. Be aware that the two washers, nuts and screws will be fastened together in the package for the handle. They are not separate pieces to find. You will have extra #4 screws. In Step 1 the bottom plate is solid and the flat side will face up. The top cover has two pieces. Once the top cover is screwed on the other piece snaps in place. During this step I tilted the Compartment G on its side to make it easier to find the holes in the cover plates. The screwdriver supplied will work but it's a tight fit and the screws are very small so it's easier to tilt it on its side to find the holes and put the screws in. Also realize that you have to apply pressure to put the screws in. Some screws will not work so I believe that is why you get extra. In Step 3 make sure the edges of the outside of the door are over compartment G before you fasten the door at the top and bottom with screws. In Step 4 make sure the bar is attached to the inside of the wheel. In Step 4 find the end of the support bar with the small hole and slide it over the push pin on the rod that is now attached to the wheel. In Step 9 it will take 2 people to slide the assembled storage compartment G over the 4 rods. Push it all the way down until the support bars touch the top cover plate. Place the main unit on top of the storage compartment and then flip the 2 spring loaded rods underneath the main unit and it will 'lock' into place. After you plug the electric cord to the kettle it is easier to place the kettle inside the unit by tilting it and placing the left side in its slot first. Attach the crank handle knowing that the handle is screwed in counterclockwise. There is a push button on the door to the main compartment. To keep the front fold out door closed you must push it in first and then close the main door. Finally you are ready to enjoy your popcorn.
R**S
Articulo para jugar
Es un buena articulo, pero es para uso en casa, Se compro con la intencion de rentarlo, pero para eso no sirve, es un articulo para uso personal. De todos modos quedan muy ricas las palomitas.
L**S
great machine, 5 stars
Shipping was fast,great machine , 5 stars
Trustpilot
3 days ago
2 weeks ago