Desertcart purchases this item on your behalf and handles shipping, customs, and support to USA.
💅 Elevate your mani game—glamour that sticks around!
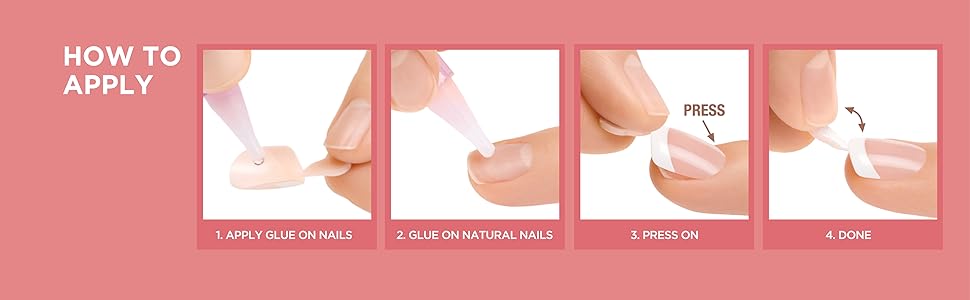
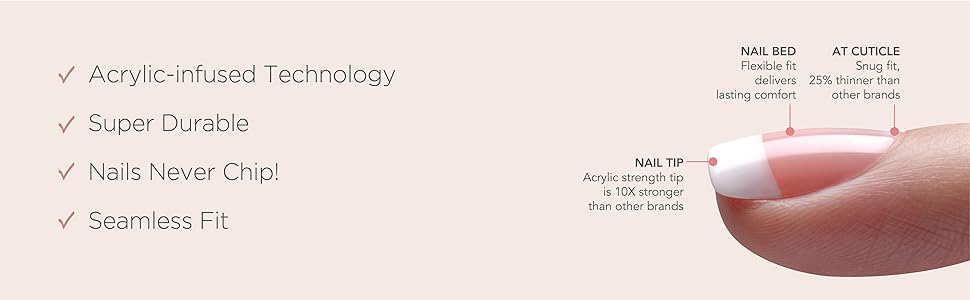
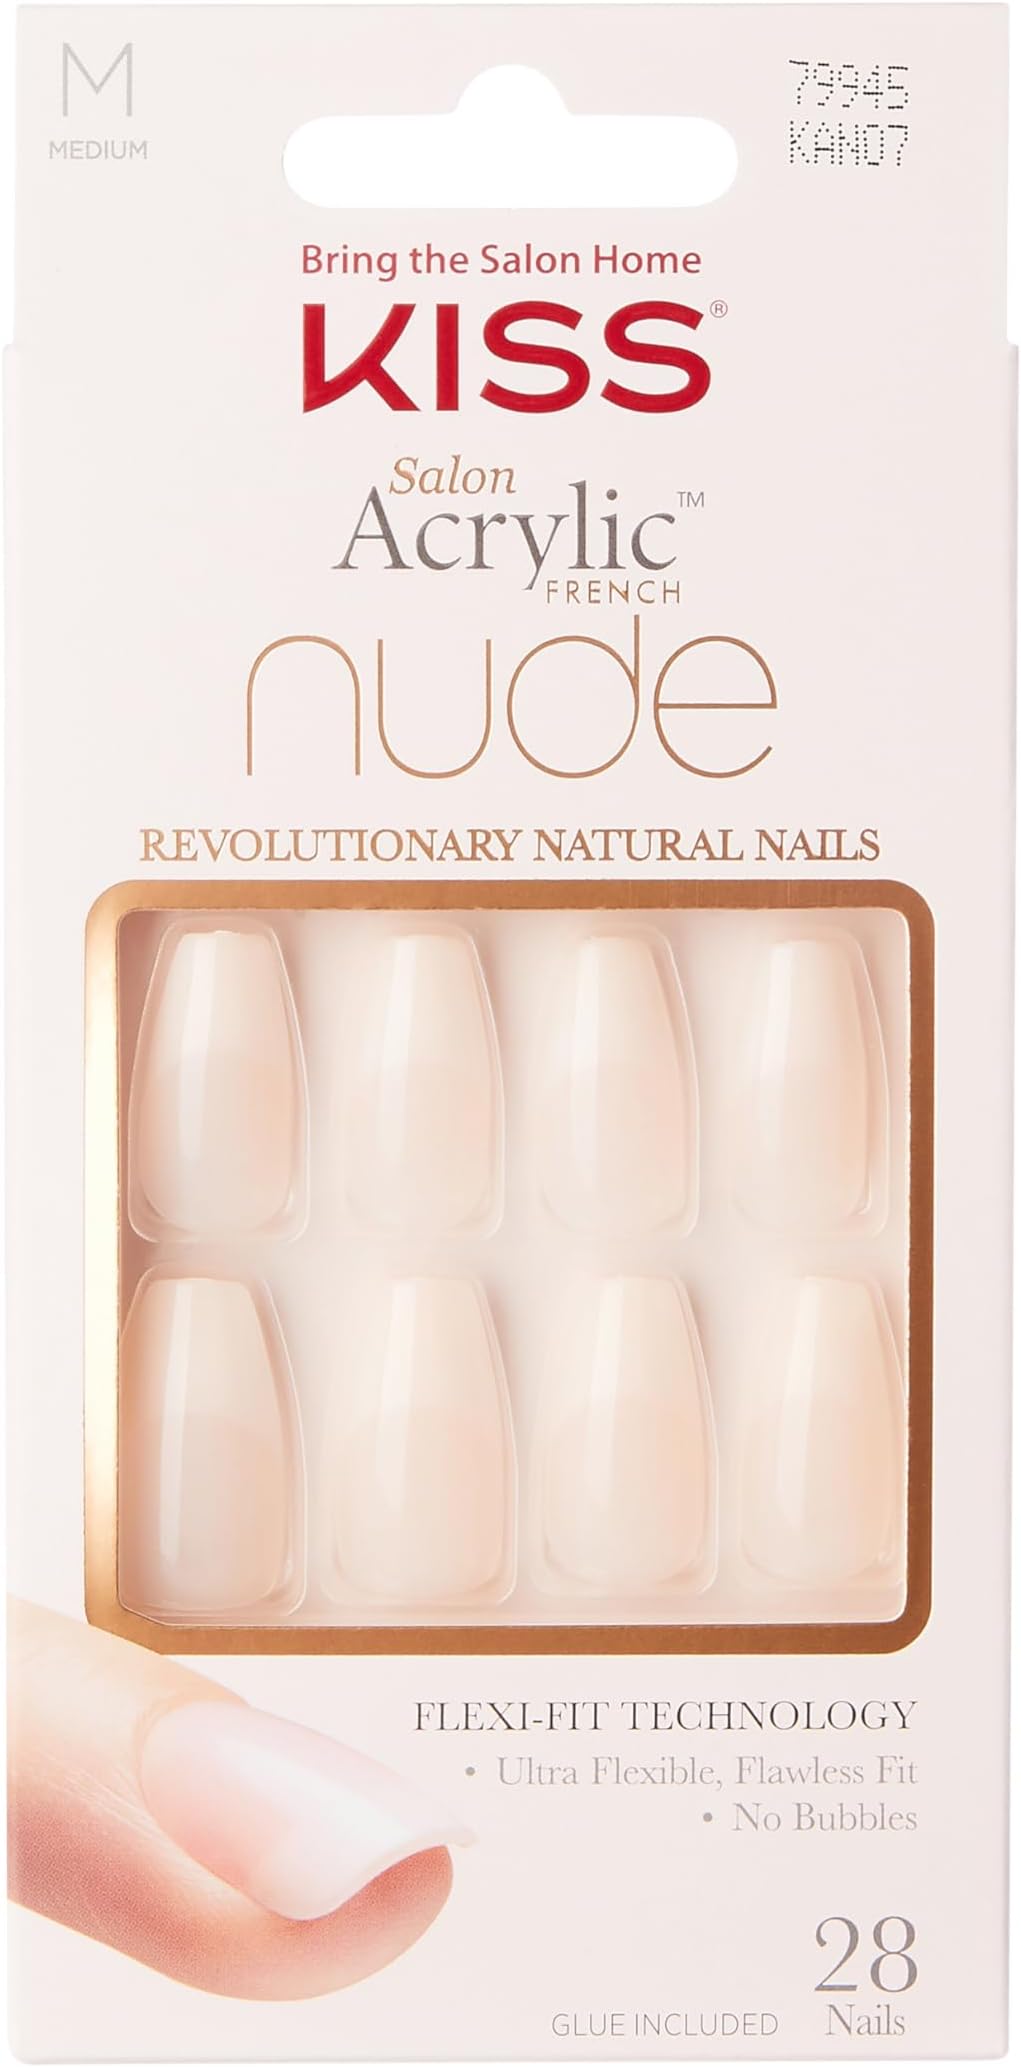
The KISS Salon Acrylic French Manicure Set ‘Leilani’ offers 28 medium-length nude square press-on nails with acrylic-infused technology for superior strength and a seamless fit. Waterproof and smudge-proof, this 31-piece kit includes pink gel nail glue, a mini file, and manicure stick, delivering salon-quality French manicures in minutes without damaging natural nails.


| ASIN | B08D8Z98CD |
| Best Sellers Rank | #15,196 in Beauty & Personal Care ( See Top 100 in Beauty & Personal Care ) #151 in Press On False Nails |
| Brand | KISS |
| Brand Name | KISS |
| Color | Leilani |
| Coverage | Full Well Tips |
| Customer Reviews | 4.4 out of 5 stars 26,994 Reviews |
| Finish Types | Glossy |
| Global Trade Identification Number | 00731509799453 |
| Included Components | 28 fake nails, pink gel nail glue, mini nail file, manicure stick |
| Item Form | False Nails" or "Press-On Nails |
| Item Shape | Square |
| Item Type Name | fake nails with nail glue |
| Item Weight | 1.1 ounces |
| Manufacturer | KISS Products, Inc. |
| Manufacturer Part Number | KAN07C |
| Material | Acrylic |
| Material Type | Acrylic |
| Model Number | KAN07 |
| Number of Items | 1 |
| Number of Pieces | 28 |
| Pattern | Solid |
| Product Style | Leilani |
| Size | Medium (28 Count, Pack of 1) |
| Special Features | Not Tested On Animals, Travel Size, Unscented |
| Style | Leilani |
| Target Audience | Girls, Teens, Unisex Adult, Women |
| Theme | Classic |
| UPC | 731509799453 |
| Unit Count | 1 Count |
A**E
Not too shabby
I’ve been doing my nails myself usually using builder gel or full cover tips but have also used acrylic and polygel before. I haven’t had the time or energy to do a full set myself lately so after watching LongHairPrettyNail’s Kiss review on these, I decided to pick up some. They’re much more sturdier than regular press ons and don’t have much (if any) give to them in the extension parts. The nail bed portion is flexible. The length is a nice medium, I’m usually a long/xlong girl but these are work appropriate and easy to handle. Sizing: I had a little issue with sizing since my nail beds are wider than my cuticles meaning that since the nail is tapered in early on, my natural nail would be exposed unless I cut them to nail biting length. I used a 2 for my thumbs, 6 for pointers, 5 for middles, 4 for rings, and 12 for pinkies. I had to file every single cuticle to fit my nail since my cuticles are rounded and the nails had a square shaped cuticle. I did the least filing on my pinkies and thumbs but had to heavily file the ring finger cuticles and sidewalls to make that 4 look decent. Application: I am keen on long lasting nails and usually have trouble with cuticle lifting when my full cover tips grow out and stop molding to my nail shape. Here’s how I prepped to really make them stay. I buffed my natural nails. Wiped with isopropyl alcohol. Applied a dehydrator, max pro bond, and primer. Put on a thin layer of gel base coat, cured, then wiped with isopropyl alcohol. I buffed the base coat lightly then applied dehydrator to it. After filing and prepping the nail, I flicked off any dust. I applied dehydrator to the inside of the nail bed. I applied the nail glue to my natural nail covering everything accept the cuticle and not putting heavy amounts on the side wall to avoid leakage. I applied nail glue to the false nail’s cuticle area. I applied by sliding down the false nail from the middle of my own nail which makes sure that the glue does not flood the cuticle and fully coats the entire nail. It also allows you to find the perfect resting spot for the false nail. I then held down the middle and cuticle for a few seconds then pinched in the sidewalls to avoid gapping and bubbles. After this, I let them rest for a few seconds then filed and shaped them better to my nails and finally wiped them Well with the isopropyl alcohol. I’m not a pro at glue on nails anymore but I know sometimes they didn’t feel the most secure with just the glue. The base gel allows you to fill any gaps from the nail not fully fitting your nail bed that you’d otherwise do with nail glue. Right now they feel like they’re apart of me and I can slam my hand into my counter and they won’t budge. Additionally, the base gel protects your natural nail from the nail glue! Cons: I couldn’t really glue and go with these, they needed a lot of cuticle alterations since my nail beds are rounded. Otherwise, the price can’t be and they honestly look like I got them done at a salon. I absolutely recommend as long as you’re ready to put in a little work to make them look their best Additionally, these are also nice because you could buff the shine off the surface and change the color of the nails with your own polish if you’re not into the French style (which I plan to do when I get tired of the look) or even just add one or two accent nails or apply rhinestones or stickers.
M**N
I will never use another brand!!!
I am KISS's biggest fan. I have been using their press ons for many years and am always impressed with the quality and durability. The acrylic french set are a bit thicker than their normal design press ons in my opinion, but they look great on and just like what you get done for $60+ at a salon! They come with many sizes so you can find the right fit for your nails. I have used this set as is and have also painted over it with regular nail polish before (the photo of the red nails are actually this set painted with regular polish!). I follow the application instructions and these nails consistently last 10-14 days for me: 1. Nail prep: you don't need to do anything over the top here, but pushing back your cuticles (and trimming them if you want) will help give you a clean surface for application. I don't usually scuff the surface of my nails at all, but that is recommended to help the nails adhere (just a little scruff goes a long way!) 2. Choose your nails: Finding the right fit for your nail is SO IMPORTANT to the durability! A nail that is too small or too big will pop off earlier. Sometimes that means I need to file down the edges of a nail that is slightly too large (two of my fingers are very close to the same size but the sets only come with 1 of each size) but it is always worth the extra few seconds to get a good fit. I always go through and layout all 10 nails in order that I will use to make sure I have the best fit possible, and if I need to adjust anything I can do that before I begin to apply. 3. Prep your nails part 2: AFTER you have done all the trying on for size and other prep (incl. scuffing if you choose to do that), I use an alcohol wipe to clean off the surface of my nails to make sure they're as oil-free as possible. I then wait a few seconds for that to dry and take care to not touch the surface of my nail again. These alcohol wipes are usually included with the imPress nails (Kiss sister brand with glue sticker tabs instead of glue) but aren't included with the glue-only sets for some reason (but you can get a bulk pack for <$10 on amazon) or DIY it with rubbing alcohol and a cotton ball at home). 4. Apply: I usually start from my pinky and work in. I usually leave my index and thumb for last. I am right handed so I do left pinky, left ring, left middle, right pinky, right ring, right middle, right index, right thumb, left index, left thumb. I don't think it really matters, but that gives me the best control. I use the glue provided and apply a dot to the center of my natural nail. Then I press down the press on at a slight angle to make sure the glue spreads out under the nail completely (but try not to use so much glue that it spills over the side!). Then PRESS AND HOLD while the glue dries - I usually aim for at least 10-15 seconds per nail, but I think 30-60 seconds is recommended. 15 seconds can feel like a long time when applying but this is SO IMPORTANT!! 5. Clean up anything you want: there is usually a small tab in the middle of the nail from production - it's not really noticeable but I usually file it down a bit just to completely smooth it out for the salon-quality. This is more prevalent on almond shaped nails, less on oval and square. When I file, I do try to hold the nail down as I file just to help the glue hold on. I have also used many KISS nails that are longer than I prefer, so after I apply I clip them with normal nail clippers and then file down (the edges can be sharper if you clip them!). I would recommend getting a salon-quality file if you choose to do this. You CAN file the nails into a new shape with the file provided, but it is MUCH easier with a bigger and stronger file.
C**Y
Love these Artificial Fingernails
I love these artificial fingernails. All the accessories are in the package. Color and length is what I was looking for.
A**S
GOAT of Natural- Looking Nails!!!
The photos really can't do these justice. I stopped using these and the short square versions for a while because I struggle extra with adhesion issues- and therefore, near constant greenies infections- but I've found a fabulous solution and now I buy boxes of both styles at a time!!! Firstly though please note that I installed these nails 2 days ago, and did quite a lot of filing to make them look this way. With my method though, they look almost sculpted when viewed from the side. I'll detail everything below. What I used: * Custom acrylic powder mix of Young Nails Speed Clear and Makartt Pink Silk, fifty- fifty ratio. * Young Nails Low Odor monomer. * Size 10 Kolinsky brush. * TPO/HEMA free etc top coat. * E file. * 180 grit hand file. * Flame bit. * Standard barrel bit with 180 band. * Cuticle nippers. * Young Nails Protein Bond. * Acetone nail polish remover. * 70% rubbing alcohol. Obviously I used the Leilani nails. Before anything, I fully washed then sanitized my hands and tools with alcohol. I gave myself a cuticle remover treatment, pushed back my cuticles, then gave myself a Russian manicure. Yes, some say that's bad but I promise you, they're incredibly healthy and beautiful when done well and carefully. I've been doing them for years and as long as I'm gentile, there's no issue or risk of infection or injury. Nail Career Education has a great video about this method on her YouTube now. Anyways... After that, I thoroughly cleaned my nails with the polish remover, let them dry, then finished them with an alcohol wipe before applying primer. I chose the nails for my fingers, leaving enough estimated room for the acrylic that would go under them and ensuring that I chose a size a little bigger than my nail beds to give my nail beds a slightly elongated look when finished, where possible. Then, with the hand file, I shaped each nail at the cuticle area to match my cuticle shape as closely as possible. Time to apply the acrylic! To get a natural, light pink base that would blend seamlessly with the press ons' pink, I mixed my new custom pink. Makartt has fantastic colors but the adhesion on me hasn't been great in the past, so I now mix their powders with the clear from Young Nails. It is flawless. I apply to the whole of my nail bed and extend it a little past my nail free edge, let it set for about 5-10 seconds, and when our starts to look matte or firm, I install the press on by laying the cuticle edge down first and pushing it firmly back into it meets my cuticle edge, pushing it until it's almost under the cuticle fold. This is what makes it look like it's really my nail, growing out of my hand. The angle is about 45° as I lay the nail down onto the rest of the acrylic, which starts thin at the cuticle lounge and gets thicker towards the finger tip, as this creates an apex where otherwise there really isn't much of one to speak of, and ensures that I get even coverage for the entire pink part of the press on, which avoids the awkward delineation for it to be seen where my fingertip actually ends under the press on nail. If you use clear gel or glue on extended nail bed French tips, you know exactly what I'm talking about lol! Once this is done, I gently press all angles and make sure I'm happy with the apex height, and double check that the whole nail is secured. Then I clean up any spillage of acrylic around the nail and move on to repeat the process with the next nail. After all the nails on that hand are done, I go back to the first nail of that hand that I did, and grab my hand file. On the under edges of the sides, I file until from the root to the free edge, the angle is straight or slightly up, like what you are in my third photo with my thumb. You'll notice that all the nails have down turned side edges. I find that ugly, sloppy and unsophisticated personally, so I give all my nails that more European under shape instead. So, once that's done, I grab my drill with the sanding band and carve down my cuticle area. This way, I can get it very thin, which means I'll barely notice it when it grows out, and my hair won't get caught. It also helps prevent lifting, which is great for me, since I'm prone to lifting and greenies. This step additionally helps me define the apex a bit, too. I finish this step by using my flame bit to finish carving out my final cuticle line shape- for me, that's rather oval as opposed to the more soft square shape these nails tend to come with. The last major step is that I use the sanding band bit to trim and carve the side walls areas right by my cuticle areas. This gets rid of extra acrylic and press on nail material that I might have missed, and guarantees that I walk away with the perfect, crisp cuticle and side line fit and shape, like I really just spent a few hours in a salon chair getting sculpted acrylics. You can see up close on my right index finger the results of my filing and cuticle routine. When all of that is finished, I've spent about 30 minutes of my life, and there's very little left to do. I use the hand file to remove the manufacturer plastic usually left at the free edge of each nail, then wipe each nail and fingertip down thoroughly and carefully with my rubbing alcohol on a lint free hand towel. After my nails and fingers dry, I head over to my finishing station, where I've got my nail charms, top coats etc and my lamp. I, for this set, chose to wear them glossy, so I painted my pinky, being very, very mindful of my cuticle area and shape. I baked it for 60 seconds, then repeated with a second coat. I did the same for the rest of my fingers after, one by one completing them. Doing it this way greatly reduces exposure time and risk to raw gel products, which can be very dangerous, and it gives my nails extra volume, making them look even more plush, inviting and professional- since most press on nails are too thin where they shouldn't be and too thick where they needn't be. This way, I also am sure that my top coat applications stay just where I want them, no more rushing to clean up running gel after I paint another finger, or messing up the top coat because I bumped it on something. When all of the sealing and plumping with my top coat is done, if I want to wear them matte, I'll grab my buffing block and go to town on them. Doing this, I achieve a flawless bare, natural nail look and over the years, dozens of strangers have stopped me to ask how tf I grew such perfect, natural, strong, opaque nails. Sometimes I add charms like for this set. Pro Tip: apply charms with brush on glue only because then you can use the brush on Makartt nail remover to gently remove the charms and use them again!!! Phew. There you have it! Oh yeah, another thing to consider is that using my method gets me easily 2-3 weeks of this set before I need a fill. That's one big benefit of the Russian manicure. With this method, too, you can absolutely do an acrylic fill. You just need to file down the grown out edge, clean up your Russian manicure, sanitize the finger, then apply primer and fill with acrylic as usual, making sure to give yourself great apexes to rebalance the nail structure and avoid breakage later. The Leilani tips are fantastic for filling because when they grow out, you'll get a more dramatic, elongated oval nail bed appearance, which looks like the European preference in sculpted nail bed shapes. It's sexy and dramatic, but if you don't wanna wait, just adhere your Leilani nail up higher on your nail with acrylic and process like you're doing a fill right from the install. I do this sometimes when I want to make even more of a statement with them. Aside from all that though, I seriously hope that one day, KISS makes a whole line of these nails in different shapes and lengths, with extended nail beds and also nail bed lengths for shorter nail beds, and some with oval or round cuticle shapes, like the Dashing Diva Magic Press Long Coffin nails, or the Kiara Sky Gelly tips. I think they'd make bank. I would buy hundreds of dollars' worth in them alone!
V**P
Will Last with Proper Application
Yes in every timeline! Purchase a Salley Hensen nail glue though, I use Maximum Strength with the teal top. These are my favorite press-one! Tips for longevity: Buffer natural nail AND bottom half of press on to help seal the glue and bind the nail. This prevents water and hair strands from sliding in between the natural nail and press-on nail Use cuticle oil after washing off buff particles after applying nails for a natural appearance; it’ll look more polished than not. The nails are softly sheer; I’d say 60% opaque and look super pretty when tapping the phone screen; it looks dreamy! This is THE most affordable nail. I only buy these! Have fun!
A**R
shape is more coffin style
this brand is my go-to favorite! This is first time trying this one. The clear is a bit rough to see what you're doing. The shape is sort of coffin style and unfortunately they don't fit my nails right. The quality is good but most likely won't get again
C**A
Yes!
As a nail biter these are a nice length that doesn't feel like too much of a hindrance. Pink glue is nice. Just put them on though so can't speak to durability yet. They feel secure despite my too short nails. 4 day update... Well... I almost don't want to add to the review because I absolutely love these (and want them to stay available). I put these on Sunday night. It's now Thursday night. One pinky came off Monday but filed my nail and the inside of the one that came off and glued it back and it hasn't budged. Prep is everything. Cleaned up all cuticle, chose nail size that was just shy of the skin around my nail so there wouldn't be pressure on the sides of the acrylic when it was glued, filed on the tops of my nail to roughen and scraped the underside of the kiss nail to give the glue a better hold. There's been a large work event, billiards, a five year old and two year old with a lightsabers war with me and my man, a 75lb pitbull, and administrative work... These are my new favorite things in the world. I've never had glue on nails last more than a day without popping off (same exact brand but five years ago) but these ones I just cut an eighth of an inch off the tips so I didn't have to worry about the tips hitting when I do minutes on the keyboard. Even with my natural nail barely half the length of the acrylic nail it's held! Really getting that jump on quitting the nail biting and they are beautiful. They look natural and sleek. Roughing up the bottom of the acrylic nail does slightly show after it's glued but not without really focusing at it. The hold is worth the slightly less pristine look though it still looks very natural.
M**Y
Great nails
Life these nails.. Durable and wears well... Great price
A**O
súper lindas y fáciles de poner!
me encantaron! apenas llevo 1 día entero con ellas pero la verdad se sienten duraderas y de buena calidad, incluso fui al gym con ellas y todo perfecto👌🏼 serán mi nueva obsesión jiji
G**T
Best
Vraiment les poses Kiss sont les meilleurs Manicures et pedicure avec une bonne prep elles me durent 1 mois facile (avec ménage intensif etc) La colle est vraiment la meilleure
A**E
DIE BESTEN
Ich nutze Press On Nails mittlerweile schon seit mehr als 11 Jahren. Ich hatte zwischendrin mal Pausen, um mich durch Nagelstudios durch zu probieren, war aber immer unzufrieden. Entweder wurde nicht sauber gearbeitet oder es ist relativ schnell ein Nagel oder Farbe abgebrochen und dann hat es Tage gedauert um einen neuen Termin zu bekommen um den Nagel neu aufgebaut zu bekommen. Aber wenn ich eins sagen kann, dann das hier : Diese hier sind mit Abstand die Besten Press on Nails. Ich habe mich durch diverse Marken, Längen und Formen probiert um die Besten und stabilsten zu finden und mit einer perfekten Nail Prep und dem KISS Maximum Speed Nailglue, halten die hier viel besser als jedes Gel oder Acryl in den Nagelstudios. Die halten bei mir minimum 4 Wochen ohne Risse, Biegen und brechen und werden von Alltag mit Hund, Arbeit, Haushalt strapaziert. Selbst nach mehrfachen Lackieren und Ablackieren mit Nagellack Entferner (Acetonfrei und mit Aceton) immernoch ein stabiler Halt. Liftings an der Nagelhaut sind nach 2-3 Wochen normal aber durch meine inzwischen gesammelten Erfahrung und der daraus perfektionierten Nail Prep nur Minimal, d.H. meine Haare bleiben daran selbst nach 4 Wochen nicht hängen. Da es sich hierbei immernoch um "Plastiknägel" handelt, verformen sie sich und werden vorne je nach strapazen rund. Aber auch das ist selbstredend absolut logisch, da sie sich "abnutzen". Ich wechsle ab und zu mal die Längen und Formen oder Motive jeden Monat gerne mal ab, sofern was neues kommt, aber für einen perfekt naturellen Look, Back to the Roots oder einfach für etwas entspannt schönes gehe ich immer wieder zu diesen hier zurück. Absolut empfehlenswert 10/10. 100/100 und 1000/1000.
S**N
Best nails ever
Kiss are the best nails available. They stay on for 4 plus weeks if you use kiss nail glue. I love all the kiss range
N**S
Si , Lo volvería a comprar
Excelente producto
Trustpilot
2 weeks ago
2 months ago