Desertcart purchases this item on your behalf and handles shipping, customs, and support to USA.
๐ฅ Light up your kitchen game with genuine precision!
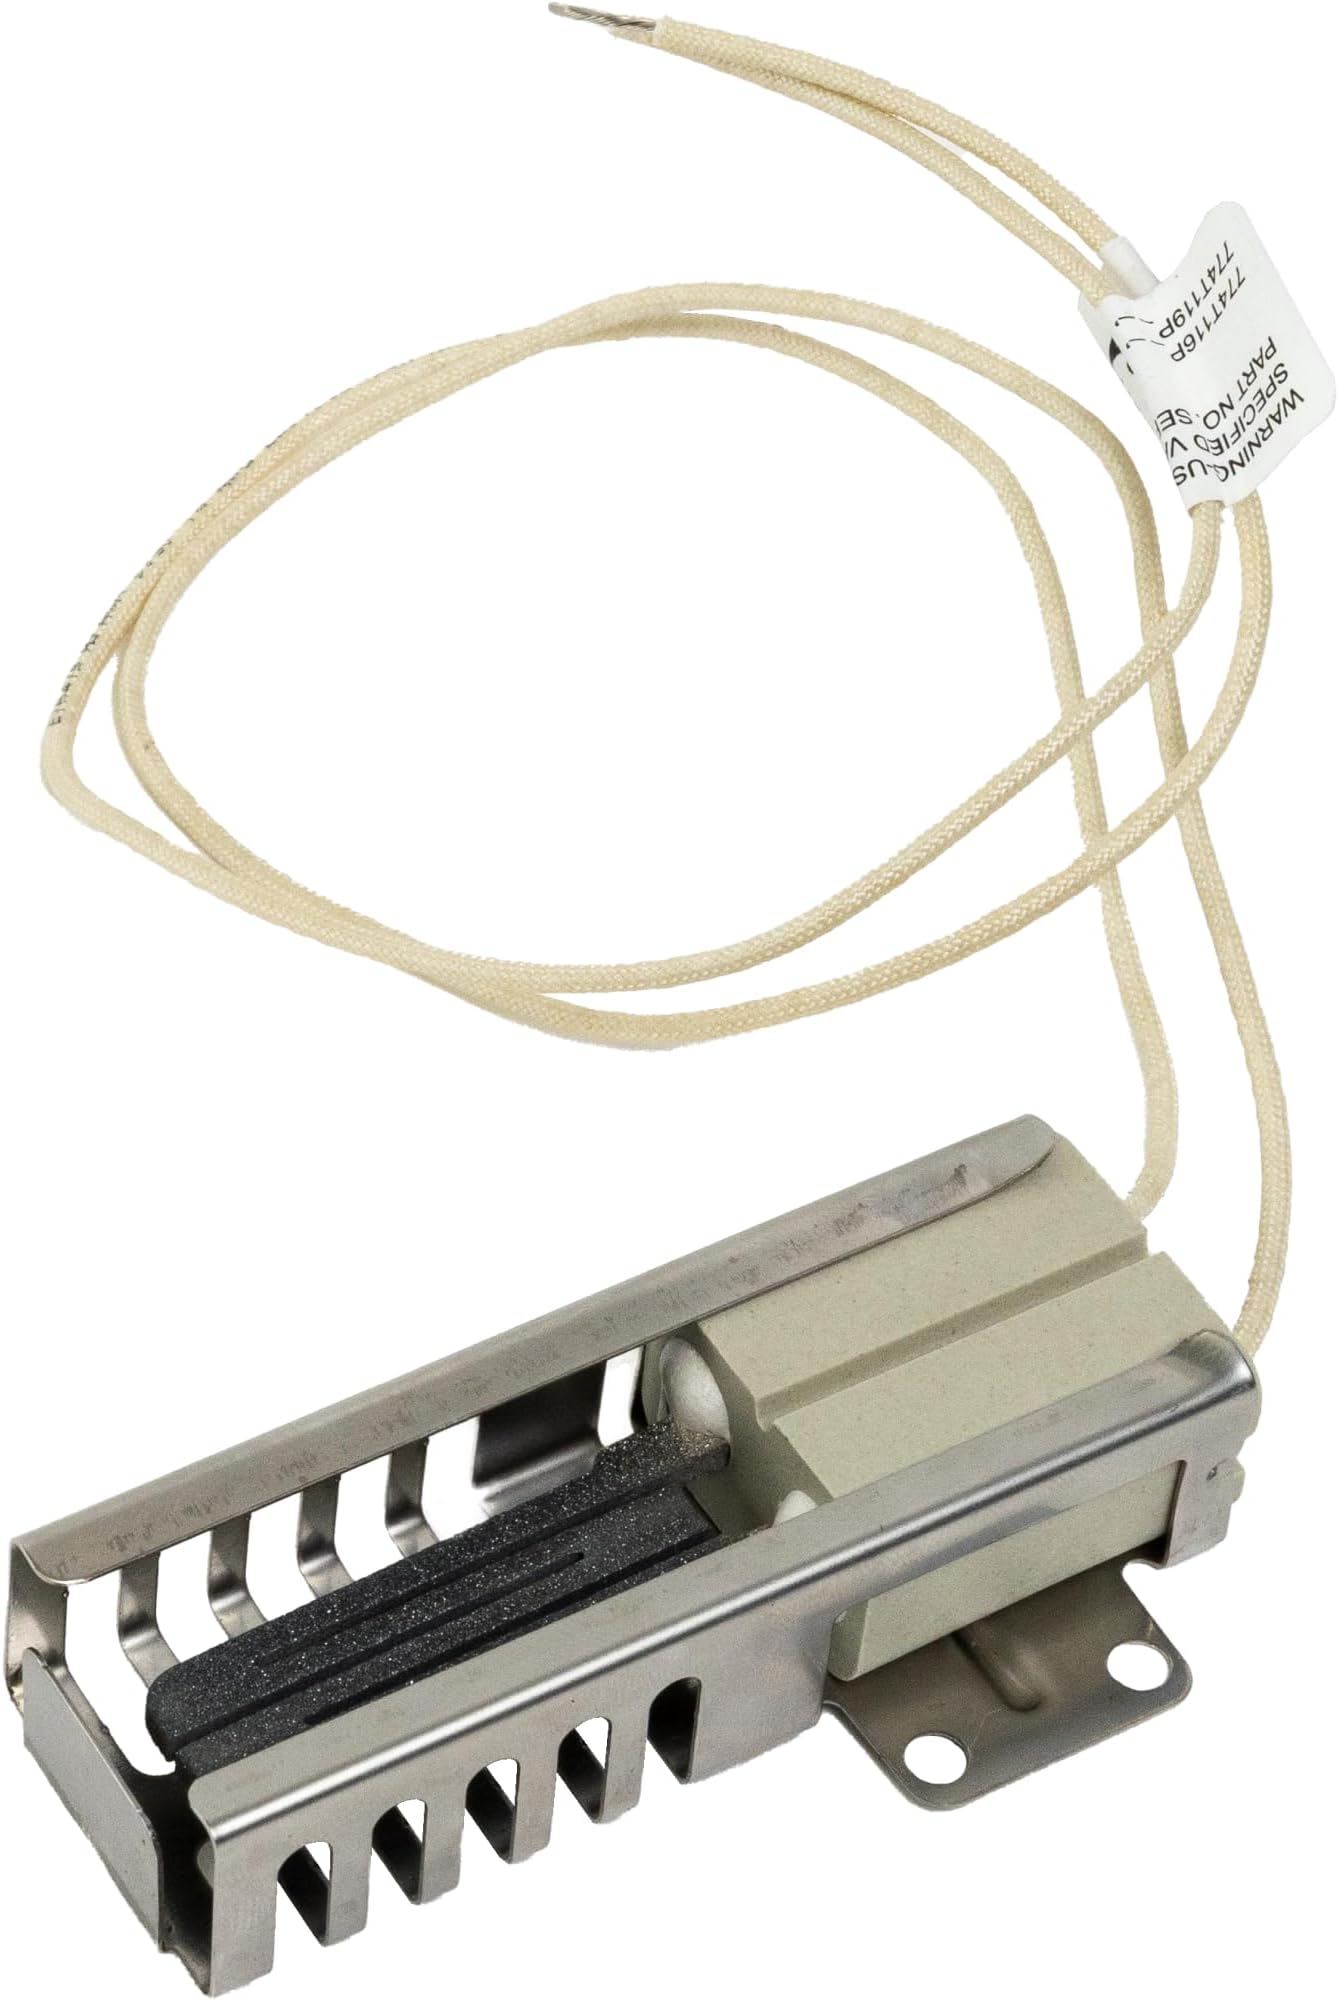
The Frigidaire 5303935066 Burner Igniter is a genuine, high-quality replacement part designed to restore optimal ignition performance in compatible Frigidaire ovens. Engineered to exact specifications, it fits a broad range of models and includes ceramic wire nuts for secure electrical connections, ensuring durability and reliable heating efficiency.

| ASIN | B00ZFS3OQ4 |
| Best Sellers Rank | #13,857 in Tools & Home Improvement ( See Top 100 in Tools & Home Improvement ) #37 in Range Accessories |
| Brand | Frigidaire |
| Brand Name | Frigidaire |
| Color | Black |
| Customer Reviews | 4.6 out of 5 stars 4,281 Reviews |
| Door Orientation | Reversible |
| Finish Type | Brushed |
| Finish Types | Brushed |
| Fuel Type | Natural Gas |
| Global Trade Identification Number | 00048172041766, 00202938665607, 06507075511768, 07436828712192 |
| Heating Method | Convection |
| Included Components | Includes 2 ceramic wire nuts |
| Installation Type | Built-In |
| Item Dimensions D x W x H | 30"D x 8"W x 6"H |
| Item Part Number | 5303935066 |
| Item Type Name | 6 Igniter for Range |
| Item Weight | 1 Pounds |
| Manufacturer | Standard Plumbing Supply |
| Manufacturer Part Number | 5303935066 |
| Material Type | Ceramic |
| Model Name | Frigidaire |
| Model Number | 5303935066 |
| Size | 1 |
| Timer Function | Timer Function Not Available |
| UPC | 202938665607 012505451089 005303935066 048172041766 784497789050 637769163099 732233411796 088308266540 |
| Unit Count | 1.0 Count |
M**.
Genuine part, Easy to replace, here are the instructions. Fixed my issue!
This fixed my Tappan TGB557CES2 gas wall oven. The part was a genuine Elextrolux/Frigidaire/Tappan part and did come with 2 ceramic wire nuts. This is everything needed for this repair. My oven was taking longer and longer to get up to temperature. After trying to live with it for a while, it got to where it took 2 hours to reach 350F. Time to attempt a repair. It was pretty easy to do this repair. All the instructions tell you to turn off the breaker or unplug the oven and also to turn off the gas. I did neither of these but this isn't recommended. I have experience with electrical repairs and I had all the tolls and equipment to keep me safe in that regard. If you are doing this repair, it will be safer for you to follow the recommendations about this. I removed the broiler drawer first. Using a flashlight/work light, look on the back wall of the oven in the space where the drawer was. On the left side of the back wall, you will see a white plastic plug with two white wires coming out of it. Press down on the tab on top of this plug and pull it straight out to unplug it. Push the wires and the plug up through the round hole in the metal of the oven body. This will be useful in a moment. Open the actual oven door, remove the oven racks, and remove the cover over the bottom of the oven. There is a silver metal tab on the back edge of the cover. If the screw that holds this tab to the back of the cover isn't too tight. you can just pull upward on the tab. It will slide straight up, allowing you to then slide the entire cover forward toward you. This will allow the whole cover to come off. If the screw is too tight, first try to grip the top edge of the silver tab with pliers and gently slide the tab upward. If that doesn't work, you will probably have to use pliers/vice grips to loosen the screw just a bit. There isn't room to get a screwdriver into this screw (unless you have one of those 90-degree right-angle Phillips screwdrivers), but it isn't necessary to completely remove the screw anyway. It just needs to be loosened so that the tab will slide upward, allowing the cover to then be slid toward you. Under the cover, there is a heat shield. There is one nut right in the center. Remove this nut. This will let you remove this heat shield. Just lift it straight up. Under here you will see the igniter. It is held onto a bracket near the back side of the oven next to the gas burner. There is one screw that holds the igniter to the burner. All you need to do is remove this screw. Once that is done, the old igniter can be removed. The old igniter will have those two white wires and the white plastic connector on the end of the wires connected. This is where the step of pushing the wires/plug up through the round hole behind the broiler drawer pays off. The wires/plug should just come out with the old igniter. I measured the length of the wires coming out of the old igniter. The wires on the new igniter are longer. I cut a bit off of the new wires so they are closer in length to the old wires. Straighten the wires on the old igniter. Mark one of the wires as being the "top" wire (you need to connect the correct wire to the plug and not get them crossed.) Look at the new igniter and mark this same wire on the new igniter. Now it will be obvious to you which wires should be connected together when you connect the old plug to the new igniter in a few minutes. Then, cut the wires off of the old igniter so that you can reuse the plug. The new igniter does not come with a plug. That's why it comes with ceramic wire nuts. Strip some of the white insulation off of the old wires, just enough to twist the wires together to connect them. Make sure you connect the wire you marked on the new connector to the wire you marked on the plug-end wire from the old igniter. Connect each wire, twist the stripped wiring together, and use the ceramic wire nuts to cover the exposed wire ends. The new igniter should now be connected to the old plug. Push the plug down through the space that you pulled the old wires up through earlier. Look in the back of the broiler area to see if you can see the plug/wires coming through. If you cannot see it, shine your flashlight through the narrow space between the broiler area and the main oven to see if you can see the plug/wires in there. This happened to me. The plug/wires wanted to go into the space above where they needed to go. Just gently pull the wires/plug back up and try it again until the plug can be seen in the broiler area. Gently pull the plug down so the much of the wires are in the broiler area and plug in the plug to its socket that you originally unplugged it from. Make sure the ceramic wire nuts are still in place and didn't get dislodged when routing the wire. I then mounted the igniter back on its bracket with the one screw. Make sure you do not tough the black element inside the igniter while doing this. It is fine to touch the outer metal part of the igniter. If you want to be extra safe, wear gloves while mounting the igniter back to its bracket. Then, put the heat shield back on and replace the nut that holds it down. Replace the cover over the oven "floor". Hold the sliding tab on the back of the cover up, angle the front of the cover so that it engages the "lip" on the bottom of the oven, then set the rear of the cover down and push the silver tab back into its slot. I did not bother re-tightening the screw holding the tab since gravity will hold the tab in place, but you can re-tighten the screw if you wish. Put the racks back in the oven. The angled part of the racks go toward the back of the oven and face upward. If you get mixed up and try to put the racks in backwards, they will not slide all the way in. Replace the broiler drawer. Time to test your repaired oven! Mine got up to 350F in 5-6 minutes instead of the 2 hours it was taking before replacing this igniter. Success!
A**R
Gas oven 110 volt igniter
Installed it, and it works great
A**R
Youโll have to cut and cap the wires but itโs easy
Worked perfect
D**M
Back to Baking!
Worked perfectly in our Frigidaire Gallery gas oven. The OEM did have the shield like this one but itโs a perfect fit. This was a pretty easy repair for someone with average skills, just be sure to check for gas leaks due to pulling the stove out. Saved us a ton of money. OEM lasted 15 years, time will tell with this one.
E**E
Works well, but missing nut
So ever since we moved into our hose, the gas oven (Kenmore) was very, very slow to preheat, and sometimes we would catch wiffs of gas. Finally it started really smelling badly like gas. After doing some research I removed the bottom oven pans and watched as my ignitor bar glowed a weak orange and saw that it took more than 3 minutes to ignite the gas, which then was a very weak flame. I ordered this replacement part, as the "actual" part from sears is literally triple the price and still doesn't come with the connectors. As others have said, this replacement is as easy as follows: 1) Remove the various covers on the bottom of your oven (simply remove a few screws) 2) Remove the warming drawer (so you can get to the ignitor connectors) 3) Unplug all of the various connectors that come from the ignitor bar. It helps if you take a picture before hand so you know what connections go to what. 4) Unscrew the gas tube and remove the whole assembly (gas tube + ignitor bar + wires). This technically isn't required but I found that it made things easier. 5) Unscrew the ignitor bar from the gas tube (I had to actually hacksaw off one of the screws because the threads were completely stripped, but that doesn't have anything to do with this product) 6) Clip off both wires coming from the ignitor - clip them a couple of inches from the ignitor - having extra wire doesn't hurt. Make note of which wire went to which connection on the ignitor so you can match it up with the new one. 7) Strip ~3/8" off of the ends of the wires you just cut. 8) Use the provided ceramic wire nuts to twist the old wires/connectors to the new wires on the new ignitor. Note - this is why I gave this product only 4 stars. The ceramic NUT that I had was loose in with the bubble wrap and the other ceramic nut was no where in sight, so I ended up using electrical tape good to 220 degrees for that connection since ceramic wire nuts are not readily available at stores and I wanted to see if the ignitor bar was even the problem. 9) Screw the ignitor bar back on the gas tube 10) Feed all the wires and connectors back through the bottom of the oven and reconnect 11) Reinstall the gas tubes. Turn on the oven and watch to match sure it's all working properly. Mine did! My oven that used to take 30+ minutes to preheat now heats up to 400 degrees in less than 10, and now lights in approximately 30 seconds (instead of 3+ minutes, like before). 12) Reinstall the covers on the bottom of the oven, and you're done. Enjoy your new ignitor bar (and grumble about the fact that you received only one nut)
R**T
OEM Part
Oh how nice is it to get an OEM part at a reasonable price. Being an OEM part, it matched right up to the burner. Easy install, all parts provided and easy to read instructions. Oven fired right up after installation.
G**R
Good Qualify PARTS
Original brand and 100% compatibility as a replacement part. Easy installation
K**E
Durable Product and Easy to Install Yourself and Save $$$ vs Repairman
This is a life saver!! Seems that everyone's oven igniter craps out right before a holiday where yo are hosting. I paid a repairman almost $300 on at least two occasions to replace my igniter. The igniter itself cost around $30 and with some basic wiring knowledge, I replace it in under 1 hour. Worth the expense. I keep an extra, just in case! Gingers crossed LOL.
K**R
Oven problem
Fixed the oven problem. Very easy to change
R**D
fits my maytag gas range model #mgr4450adw
This fit my gas range perfectly and was simple to install. I removed the bottom of the range by pulling the two tabs located at the back, then lifted up, it swivels at the front. Removed one thumb screw holding the heat shield. Now you can see the ignitor. Remove two 8mm/5/16" hex screws and snipped the two wires...chuck the old ignitor. At the back of the stove is the small panel that is at the bottom left. It has been cut except for two short spots that if you wiggle it back and force will break. Flip it over and it will fit back with the addition of one screw. After removing the previous panel, cut the two red wires that lead the the ignitor connector and chuck the connector. Strip the two red wires back 3/8" and connect to the new ignitor wires with the supplied ceramic marrets. Frigidaire 5303935066 Gas Oven Ignitor
M**R
Does the job as promised
Easy to install and will use this product again in the future.
S**T
Worked
It worked with a wiring modification on my oven. Good universal part
G**E
Good fit
Great replacement
Trustpilot
2 months ago
2 weeks ago