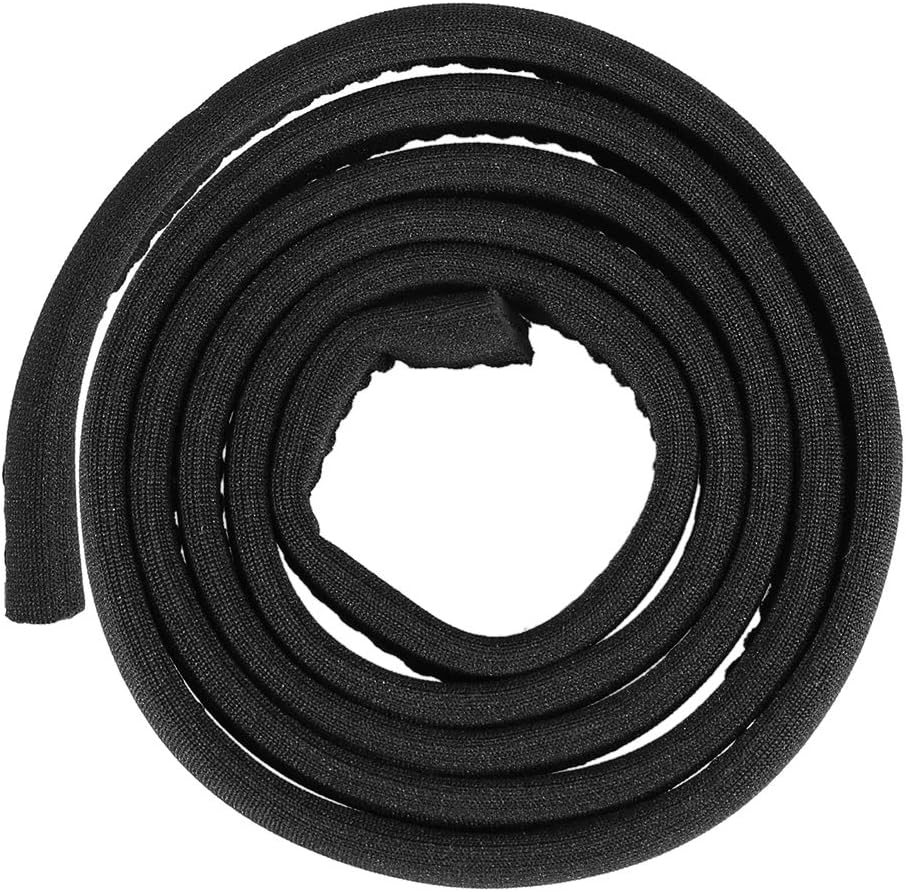
Water Bladder Tube Cover Hydration Tube Sleeve Insulation Hose Cover Thermal Drink Tube Sleeve Cover
Product ID: 180170328
🎨Multiple color options
🧩Flexible, easy installation
❄️Superior thermal insulation
Desertcart purchases this item on your behalf and handles shipping, customs, and support to USA.
❄️ Keep your hydration chill and your edge sharper than ever!
The Lixada Water Bladder Tube Cover is a 36-inch SBR fabric sleeve designed to thermally insulate hydration tubes up to 10mm diameter. Lightweight and flexible, it offers easy installation and comes in five versatile colors, making it the perfect upgrade for outdoor enthusiasts seeking to keep their water refreshingly cool on every trek.


| ASIN | B07KC8812X |
| Best Sellers Rank | #53,505 in Sports & Outdoors ( See Top 100 in Sports & Outdoors ) #241 in Hydration Packs |
| Brand Name | Lixada |
| Color | Black |
| Customer Reviews | 4.0 4.0 out of 5 stars (812) |
| Date First Available | November 8, 2018 |
| Item Dimensions LxWxH | 4.53 x 2.76 x 0.79 inches |
| Item Package Dimensions L x W x H | 3.66 x 3.39 x 0.94 inches |
| Item Weight | 4.54 g |
| Manufacturer | Lixada |
| Material | Sbr Fabric |
| Package Weight | 0.01 kg |
| Part Number | 1 |
M**A
Compatible with osprey
Bought this for an osprey hydration pack. As other reviews say the sleeve is tight fitting. Here is how I fitted it: Remove the mouth piece from the water tube, ensure the water tube is outside of any other clips. Put a chopstick in the end of the water tube, pull the sleeve over the chopstick and start pushing it along the water tube. Hold the chopstick where it meets the water tube, bunch up the material at that point, then pull it down the water tube, repeat. At the end, you can tug on the end of the insulation at the connecting point of the tube. Perfect length!
M**K
Patience will get you there.
I have not verified the performance of the sleeve, but I'm confident the neoprene-like material will help to keep the water in the tube cool, and eliminate that initial pull of warm water we all hate to experience. I am using an Ozark Trail backpack with a water bottle. I did end up cutting the tube at the base of the mouthpiece, because I was not able to separate the two- plus the flared end may have made for a more difficult installation. I did what others mentioned, and pushed/bunched the sleeve a little at a time until I was able to work the sleeve all the way to the end of the bladder. I did notice that after (inadvertently) getting sleeve wet that portion was the most difficult to slide down the tube. My recommendation is for a dry installation, push a little at a time and continue working the sleeve until it is fully installed. Unless it has no insulation properties, I would recommend this sleeve. There are bladders with the tube already insulated for the same price as the sleeve alone, but I had no need for an additional, uninsulated bladder.
J**S
Reasonably well-constructed…
When they say this fits a 10mm tube, they mean it! The sleeve wouldn’t fit over my tube’s bladder coupler (which may be why they say it doesn’t work with Camelbak tubes). Mine isn’t a Camelbak but the manufacturer said it has a 10mm tube so I went for it. One of the stitches popped while I was trying to force the sleeve over the coupler so I carefully cut the tubing and removed it. I’m docking a star for the popped stitch but it was partly my fault for thinking the material would be able to stretch more than it can. The other end is perfectly fine. I found it helpful to push a Sharpie marker through the sleeve (to get it into a round shape) before putting it over the tube. Just make sure to put it in cap first. Installation was a breeze once the coupler was out of the way. Getting it back on was the tricky part. It took me three tries before I got it but it’s perfect now. The sleeve feels great and neoprene is durable stuff so I expect this to outlast the bladder. The camera makes the color seem more “off” than it actually is. It looks really good (not that it matters). Haven’t been out of the house with it yet but the neoprene seems thick and dense enough to keep the tube cool in the sun. High temps this weekend should be in the 80’s so we’ll see…
K**N
Don’t buy this
Even with using hot water, soap, etc, I could only get this insulated sleeve approximately 7” onto the tube. As soon as I tried to grip the sleeve with needle nosed pliers, the sleeve stitching ripped. Bottom line, the sleeve diameter is the same as the camelback tube and there’s too much friction to fully slide the sleeve all the way on.
B**S
Helps keep water in hose cooler
I was hesitant to buy due to installation however I read some reviews about getting it wet to install. I tried it and it went on in under a minute. Quick and easy. I used it on one hike so far and I noticed a difference. The water in the line stayed cooler. I was in shade a lot of this hike, so I still need to test it being in direct sun. But even when I hiked in the shade before, the water in the hose got warm/hot prior to this hose cover. This time it didn't. I am so glad I took a chance and bought it. It made a difference.
K**A
Works. Easy to get on once you figure it out
The product works. Added it to my camelback and have gone skiing a few times in sub-freezing temps and it’s held up and kept the water from freezing in the tube. This thing was impossible to get on at first and after a 1/2 hr I was about ready to give up and call it a loss. Then I tried a method and got it on easily in 5 minutes. Slide a chopstick into the end of the tube to give it firmness and slide the cover over the tube. Using grippy neoprene garden gloves (this is key for grip), push the cover over the chopstick part multiple times until it’s all bunched up where you can’t push. Then pull it straight down the tube until there’s no slack. Push, bunch up, pull. Repeat, takes 5 minutes.
G**M
could not get it to fit
very tight fit for camelback tube. no matter how hard i tried it would not go on .
E**L
The plastic bag method
I obviously didn't read that this is NOT designed for a CamelBak. I tried ll the suggestions here: hot water, soap, freeze, brute force, but nothing worked, I was ready to give up, until I put the pipe inside a plastic bag and then threaded the insulation over the plastic bag, boom, in 5 minutes of work I got the entire insulation installed and then 1 minute of extra time to remove the plastic bag. I now need to test the insulation in hot and cold weather.
G**E
Seems to be perfect.
I only just installed this insulator but it seems very good. At first I thought it was too tight, it takes a small amount of effort to install, but I quickly realized it is exactly the right size.
R**R
Don’t cheap out this won’t work
Too small to fit a standard hose. Super thin and will not prevent water from freezing in the hose.
C**N
Good quality
Hard to get on but managed it in less than 30 min. Seller should include the maximum allowable tube diameter to avoid unhappy customers. Did not fray or unravel while wrestling with it
A**E
Ok
Works fairly well.
C**S
Thin, useless, do not buy
Not worth the price, terrible
Trustpilot
3 weeks ago
5 days ago