

My Scheming Blackhead Acne Removal Activated Carbon Mask Set
Product ID: 14376137
💧Deep pore hydration
🖤Activated carbon power
⚙️3-step targeted system
🖤 Unlock flawless pores with the ultimate activated carbon ritual — don’t let blackheads steal your glow!
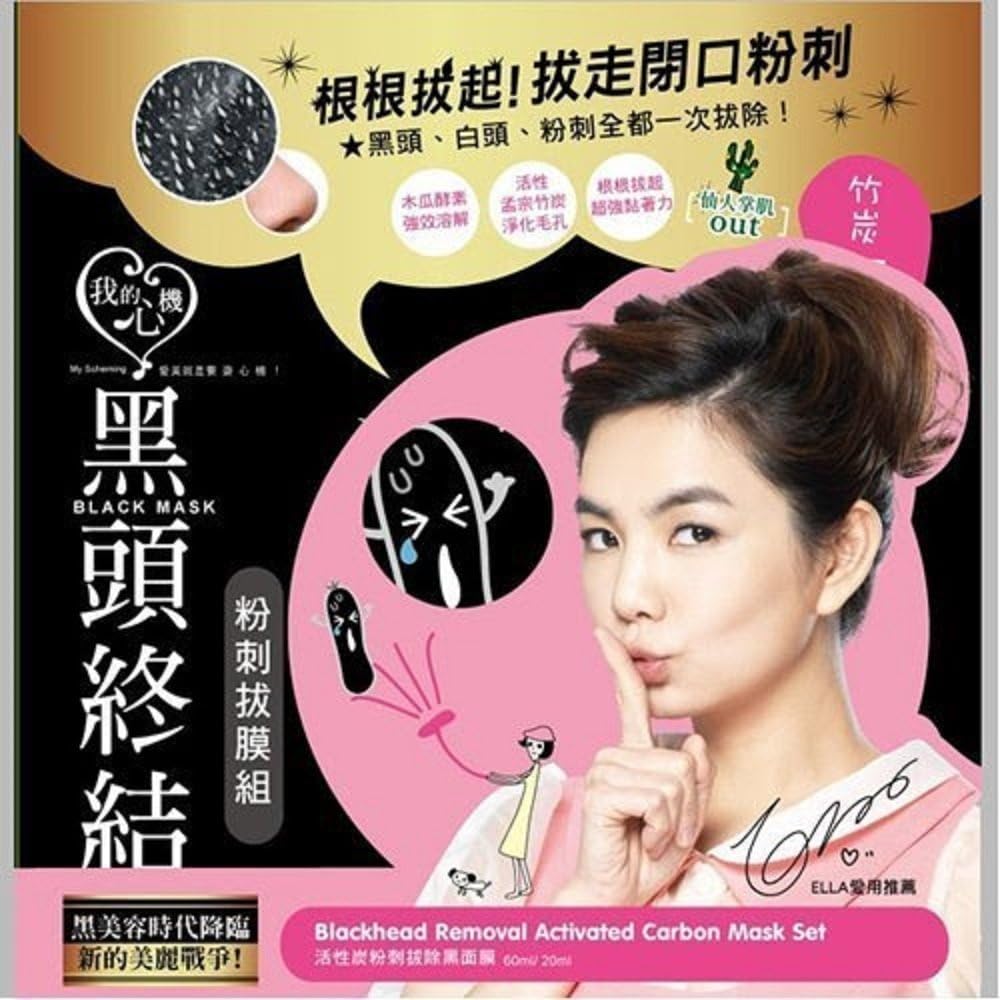
My Scheming Blackhead Acne Removal Activated Carbon Mask Set is a 3-step skincare system designed to deeply cleanse, extract blackheads, and tighten pores. Featuring a 60ml activated carbon mask, a 20ml deep pore softener, and a 20ml sebum clarifying essence, it targets acne-prone skin with a lemongrass scent. This set offers a professional-grade, stepwise treatment that hydrates, detoxifies, and refines pores for a visibly clearer complexion.
| ASIN | B00WRHUWJ8 |
| Brand Name | My Scheming |
| Customer Reviews | 3.6 out of 5 stars 992 Reviews |
| Item Height | 1.5 inches |
| Item Weight | 0.4 Pounds |
| Manufacturer | My Scheming |
| Number of Items | 1 |
| Recommended Uses For Product | Nose,Acne |
| Scent Name | Lemongrass |
| Skin Tone | All |
| Skin Type | Acne Prone |
| Unit Count | 1 Count |
J**S
Newfound favorite!
*I purchased this product at full price and with my own money. As always, this will be a thorough and honest review of my experiences with this product. If you have any questions, please don't hesitate to ask! I would be more than happy to answer them to the best of my ability. If you find this review helpful, I would very much appreciate it if you could click that 'helpful' button right below to let me know. :) Thank you! I absolutely LOVE this mask. Definitely the best pore cleaner that I have ever used, and blackheads and large pores have been an issue with my skin for well over a decade, so I have tried many a stip in my day. I have played around with this mask a lot over the last couple of months that I have had it and I have found an order of doing things which always seems to get great results. Every time. I have a friend who also has this mask and had tried it a couple of times and didn't really get good results so she stopped using it. I asked her if she would be willing to try it again but do it this way and she agreed. It pulled so much nasty out of her face the first time that she used it this way that it made her feel a little bit sick just looking at the mask afterwards. Are there other ways to use this set and have it work? I'm positive that there are. There are even other ways that are less steps that I have used when I'm shorter on time. While they usually technically work (because ultimately this *is* a good mask in-and-of itself), it just wasn't nearly as effective as it could have been. Right below this is a step-by-step in which I sort of help explain what is going with each step and why it's important. If you are looking for a more bare-bones version, there is a TL;DR version at the bottom just for you. :) Happy hunting! How to use this system most effectively: - Cleanse face (using it just out of the shower will also work best, but is absolutely not necessary). - Use Step 1 by putting some of the liquid (which has a near water consistency) on the areas that you will be using the mask on. I carefully put a bit on my finger and spread it over an area, then get a little more and do the same with the next section. This stuff spreads really well, so a little will go a lot farther than you expect it to! - Once you have finished putting on the Step 1 solution, set a timer for ten minutes. - Massage the Step 1 solution into the treatment areas for a good two or three minutes (once you have set the timer, this is the beginning two or three minutes of that timed set). The solution soaks in incredibly quickly, so most if not all of this section of the timer is spent *lightly* massaging your treatment areas themselves, as opposed to rubbing in the treatment. (You are helping the solution to penetrate deeper, as well as stimulating the skin and moving the pores around. This is helping to open up the pores and make sure that the solution is able to get down in and around those clogged areas. This will probably seem kind of silly to you and will feel like it's been a long time, but it is an important step - just make sure that you are giving the areas a light massage and not simply rubbing the skin, which wouldn't be helpful [and may in fact become irritating]). - Let the solution sit on your face. - When you have about 90 seconds left on the timer, give the areas one last good little massage while time runs out. The treated areas should feel softer than they did before, and almost more supple than the areas around it (if you chose to spot-treat instead of doing your whole face). For this last massage step, it is *incredibly important* to make sure that you aren't rubbing against the skin as that could cause micro tearing or other irritation that the mask could really exacerbate. - Once time is up, rinse the Step 1 solution off of the treatment areas with warm water (which will also help to open up the pores). DO NOT SKIP THIS STEP. - Steam your freshly rinsed face to finish opening the pores. This could mean anything from using an actual face steamer, to putting a towel over your head while you [carefully!] lean over a pot of water that was very recently boiling, all the way to something simple (which is what I usually do) like holding a hot towel [carefully!] to the treatment areas for thirty seconds to a minute or so. - If treatment areas are not already wet from the steaming step, lightly dampen those areas with warm water. (Think along the lines of a biore pore strip.) - Apply Step 2 (charcoal mask) to damp treatment areas in a decent coat (something fairly even, and thick enough to be able to grab and peel off once dry) - Leave Step 2 to dry. Depending on your current conditions (both your skin, and the environment that you are in) as well as how thick the mask is on your face, it will take anywhere from about twenty minutes to an hour or more to completely dry. The mask goes more matte when it's dry (pictures attached), so for me at least it was fairly easy to tell which parts were dry and which weren't ready yet. - Once the mask is completely dry, find a starting place and start peeling the mask off. ** Try as much as possible to pull from the from your chin up toward your forehead and from your ears in toward your nose, NOT from your forehead down toward your chin! - Rinse off any bits of mask residue still left on your face. I found that these easily wash off with a little bit of water and my fingers. - Smooth the Step 3 solution on the treatment area/s as quickly as possible after you have removed the mask and cleared your face from any leftover mask debris. This solution is meant to help close your pores back up, so the longer you wait after the removal of the mask, the more time your pores are deeply exposed to pollutants and contaminants. (The Step 3 solution is the same consistency as the first step fluid, and is put on in much the same way.) - Let the Step 3 solution completely soak into the skin and dry before moving on any further in your skincare regimen. (Leave Step 3 on the skin, you do not wash this step off afterwards as we did with the first step.) TL;DR - how to: 1.) Cleanse face. 2.) Apply step one to treatment area. (Consistency is like water, but it spreads like crazy.) This is something that helps loosen your pores and release the gunk in the clogged bits. 3.) Set a timer for ten minutes. 4.) Spend the first two or three minutes of the timer massaging (not rubbing!) the treatment area/s. Once a couple of minutes have gone by, stop massaging and leave fave alone. 5.) When there are about 90 seconds left on the timer, gently massage treatment areas again, taking great care not to rub the skin. 6.) Carefully (don't rub at or pull on your face too much) rinse the solution off of the treatment areas using water only. DO NOT SKIP THIS STEP. 7.) Steam your face. The deeper the steam the better, but be careful! 8.) Wet the treatment area/s with warm water (think like a biore pore strip) and apply Step 2 (charcoal mask) in an even layer over desired area/s. 9.) Let it naturally (don't sit in front of a fan or something to speed up the process) dry completely. I have attached pictures showing how the mask goes from shiny to matte once dry. 10.) Find a spot toward the bottom and start pulling up toward the top (and from the ears toward the nose, when relevant) 11.) Rinse face with warm water and get any extra bits of mask off before immediately applying a good dose of Step 3 (which has the same consistency as Step 1) to the treatment areas. This helps close your pores back up again. 12.) Allow time for Step 3 to fully sink in and be soaked up before moving on in your skincare regimen. (Do not wash this off as we did with Step 1.) Let me know if this was helpful. I rely heavily on reviews when making my own decisions so I want to be as helpful to those who come after me as I possibly can be. :) Have a great day!
S**N
Doesn't work and makes you feel like your nose has been ripped off.
I have what most people refer to as blackheads, but are technically called sebaceous filaments. Basically, they're blackheads that never go away for more than a week. Normal blackheads don't stay forever, you simply squeeze them and they're gone. Sebaceous filaments, however, will fill up with more sebum again within a week and the whole squeezing process starts all over again. I typically just use my two index fingers to squeeze and empty my "blackheads" on my nose and chin every week or so, but as we all know, this only causes skin problems down the line and will lead to stretched out ugly pores when I'm older. So I've tried a few remedies. Long story short, most things didn't work very well and I ended up buying this product. Now let me tell you, I'm not some girl with a brain the size of a road lizard who can't even follow directions on a box, and yes, I tried slightly different ways of using this product, too. NOTHING WORKED. I steamed my face, I put hot water on my face, I tried using a warm towel. Nothing made a difference. I washed my face beforehand. I used the Step 1 serum for the instructed amount of time (I even took another reviewers advice and tried to leave Step 1 on for 8-10 minutes). I washed Step 1 off. I used Step 2 with a wet face, with a damp face, and with a dry face. I peeled from bottom to top, top to bottom, side to side. No matter what I tried, I couldn't extract more than one or two blackheads. And after peeling Step 2 off, it left my face tingly and itchy. Even after applying Step 3, my face still felt like someone had tried to rip my nose off. It was the most uncomfortable experience I've ever been through. I've tried everything I mentioned and even more. I've tried this product 6 times and nothing has worked. This will definitely be going in the trash and I feel like I've completely wasted my money. Even the DIY Charcoal mask I made from watching a YouTube video worked better than this garbage.
J**E
• perfect for people with large pores and blackheads • not ...
so i've used this a couple of times now and i honestly don't have any large pores but i bought this anyways bc i do have a strawberry nose (a nose with black spots). i've also used this on my husband as well. and overall, it did the job!! but there are some negatives about this product. POSITIVE: • perfect for people with large pores and blackheads • not a strip so you can easily spread this in all your corners and not miss a spot • you can use this in your forehead and chin as well NEGATIVES: • must be a THICK coat for it to peel off well and to pull out any blackheads • not easy to prepare. there are so many steps and it is quite tedious!! • also not easy to apply. i had trouble getting an even amount on my face and it often smudges off when applying on top of previous wet layer (even though you need a thick coat for this work...) • takes forever to dry....like one hour long...and even then the corners of my nose are still not dry all the way sigh • the smell of step one and step three bottle is fragrant. so if you have a sharp nose, it may sting or smell unpleasing. i would best describe the smell as a mix of rubbing alcohol and some kind of floral essential oil (that mostly smells like a cheap perfume) • there have been a few times where i accidentally got step one bottle and step three bottle mixed up. oops. overall, the results are amazing! but i give it only 3 stars bc to get the best results, you have to follow ALL the preprrations and that's a lot of work....(i believe there is about 6 steps). if you're down to have a girls night out or just some time for yourself then this is the product for you. otherwise, if you want a blackhead removal that doesn't require a tedious preparation, then look for a different product.
S**B
Good results, but don't follow the box
I've been hearing about this mask for almost a year now from various sources from Youtube to trusted friends. I finally caved, after months of back and forth, and purchased it a few weeks ago. I have used it, so far, three times and still have plenty of product left so I would say you definitely get your money's worth when it comes to quantity with this one. The instructions do come in English, but I found I had better luck browsing the comments here and doing a google search as the results following the on the box instructions seem to be less successful than the instructions I found on Youtube. If you want this product to work properly you need to invest some time in the process. You'll want to take a long hot shower, as steamy as you can get, or hold a hot compress over your nose or any other place you wish to extract for at least 10 to 15 minutes in order to open the pores and soften the sebum inside. After that you'll want to move on to step 1 (make sure your nose is dry). The box instructions say to apply and let it sit but I found that rubbing the serum in for the full 8 minutes (adding a few drops more as needed) really helped make a difference when it came to successfully pulling out blackheads. After this YOU MUST WASH YOUR FACE. Do not leave your nose wet. You want to apply the next step carefully - it needs to be thin enough to dry but think enough to be able to pull blackheads out. Allow at least 40 minutes for the mask to dry completely (the box only says about 15 minutes). Make sure, once it's dry to pull upwards. After extraction use the final step and then place cold water or ice on your face to help close your pores back up. Overall my experience with this product was good. I had more come out of my pores than regular Biore strips. I'd definitely purchase it again.
H**K
Felt like I was spreading tar on my face
Felt like I was spreading tar on my face. It's hard to put on this product with a wet face even though it is in the directions. Peeling it off was a nightmare. I couldn't get a good lift for a peel so i was scratching at my face till a little corner lifted. Peeled off in multiple chunks. It was like ripping the skin off my face and was so slow and painful. All it removed was my peach fuzz. Pores are an skin are red and irritated and my face didn't calm down until the next day. Not an allergic reaction, just so hurt from peeling this junk off. Ended up trying to rinse off the rest but it was hard to clean off!
M**A
It does work but only if you follow the instructions correctly!!
I wasn't sure what to expect from this after reading mixed reviews, but thought I'd give it a try. My first attempt I applied just to my nose and chin areas before diving in and trying my entire face. I was actually very surprised to see how much got pulled out of my skin, particularly my nose area, which does have a lot of blackheads. It does work, but not everything came out on the first try, so this seems to be one of those products you have to use multiple times to get rid of everything. I have less blackheads on my nose but there are still some there, but each time more of the blackheads come out. One of the reviewers was kind enough to give correct instructions, since the instructions on the box are useless in my opinion. And if you don't follow the instructions thoroughly then this won't work. Every step has to be very precise, and I think this is why so many claim this does not work, because they're following the instructions on the box. A few issues. When I first removed the seal on the mask container it all quickly came oozing out, kind of like you get when you fly on a plane and your containers leak due to air pressure. So the mask went everywhere. After going through the initial steps I then applied the mask to my damp face. It took me a lot longer to apply a thick layer to where my skin was not visible, and I ended up using more of the product than I wanted. The 2nd time using it I made sure my face was damp, but close to dry, as I think too wet and it won't go on very thick the first attempt. This mask gets really messy. After spending several minutes getting a thick application it had dried somewhat on my fingers and nails, which was tough to get out. I had to scrub for a while. And it got all over the sink countertop, so would recommend using a plate or something to put the tube on so the cleanup is easier. My second time trying this I decided to do my entire face. A word of warning to those attempting it... it will hurt when you pull it off. It feels like you're waxing your face! I had no idea how many baby hairs I had on my face until I removed this mask. I found the least painful way of removing it is not to do it slowly, but fairly small and quick motions. Also when attempting to remove the mask I found it easier to use my nails to scratch at the bottom edges (jawline area), literally scratching all the way along the jawline, which helps to lift the mask at the bottom and then helps you to pull it upwards. It is all in the technique. You have to remove the mask upwards. This is really important. It's kind of like when you wax you always pull the strips upwards too, in order to pull the hairs out correctly. It's the same with your face. In my opinion it was tough doing the entire face. I feel like when I concentrated on small specific areas (like just my nose) it worked more effectively because I was able to get the perfect technique with removing the mask. With the entire face you're dealing with more coverage. Maybe the best option would be to do small sections of your face at a time. As others have pointed out, they suffered a bit of redness on their cheeks. I also got this when doing my entire face (just my cheeks went red). I think this is due to the waxing effect it has on the skin as it's painful removing the mask, just in the cheek area, and so afterwards your cheeks will be flushed and warm to the touch for at least 15 mins afterwards, but then it cools down. I think those with pale skin it will be very noticeable. It's not so much an allergic reaction, more a flushed look from having waxed a section of your face. I didn't have any issue with the rest of my face, just slight redness in the cheek area, where most of my baby hairs are. Your face will feel very smooth afterwards, and much cleaner! Just make sure you follow the steps precisely as one wrong step and this won't work. Particularly when you massage step one solution into your skin, which is very essential. Also, make sure to avoid your eyebrows. I ended up getting some of the mask on mine, so I took a wet nail and removed it. Correct Instructions.... Cleanse your face well (face must be very clean) Pat face dry Apply solution 1 - make sure you massage it in for 3 minutes, so you work it into the face well (massage in the area you plan on applying the mask later). Leave on your face for 8-10 minutes. Rinse off solution 1 with warm-hot water. Important! Don't use cold! Keep your face damp, but almost dry Apply the mask to the chosen area. Make sure you apply a thick layer! Must be thick to where you can't see your skin underneath! Leave the mask on your face for 20-30 mins (if mask is still not dry then leave on for longer. Mine dried in 30 mins) Use your nail to peel at the edge of the mask, to loosen it at the bottom and wedge the nail under to then pull it upwards. Important! Must pull the mask upwards! This is how it pulls everything out of your skin! After removing the mask use COLD water, which will close your pores! Really rinse well and pat face dry. Apply solution 2 to the face and leave on (don't rinse off)
C**A
Love It!
Let me just say if you are hesitant about buying this product let me try and persuade you. This product is beyond any drugstore biore product or any other brand! If used correctly it literally pulls out every blackhead and they don't come back for months. I use this mask once every month and a regular face wash for everyday use and my skin where blackheads usually come out is so smooth!. If you follow these steps, trust me this replaces all those other blackhead masks. STEP 1: Wash face and pat dry. STEP 2: Microwave a wet towel for a few seconds and let sit on your face for about a minute to open up all pores. STEP 3: Apply product number 1 and let sit for 8-10 minutes (You should feel it tingling). STEP 4: Rinse Product 1 and leave your face WET STEP 5: Apply a thick layer mask on the areas where you would like to remove black heads (you should not be able to see skin through mask) and let sit for 45 minutes to an hour until COMPLETELY dry. Peel mask, rinse face and pat dry STEP 6: Apply product 3 to close pores.
K**E
Best blackhead puller-outer!
This kit does what is says it does! My daughters and I have bought and tried many different types of patches and goo to use on blackheads on noses. This kit is the only one that not only pulls all the sebaceous filaments and blackheads out but helps shrink up your pores after all the gunk is out. The three part kit includes a liquid to open up pores, a thick mask to pull out the gunk and a second liquid to close up your cleaned out pores. I found the first liquid to work better if you wash the oily residue off that it leaves on your skin before putting on the second mask part of this kit. The second part takes a lot longer to dry than you think it will because you need a THICK coating of it to work really well. But it will clear your pores, so disgusting yet so satisfying! This works really really well. There are a lot of reviews and videos of this kit if you care to look them up. Happy masking!
Trustpilot
1 month ago
5 days ago