


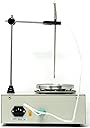

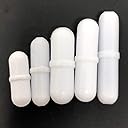
Digital Magnetic Stirrer Heating hot Plate Set,100-2000 RPM stir Speed, rt - 100 c Temp, 250 w Heat, 5 stir Bars - Perfect lab Equipment Supplies for Science lab, Craft Homebrew, Yeast Starter by EK
Product ID: 118081969
Review: Temperature not consistent - Stirrer works fine. Set the temperature and continues to heat well above the set point. Trouble shooting instructions in the manual are different than what is actually displayed. Juggling around with probe connection in the back sometimes gets it to work. The instructions for the heating unit were not correct in the manual that was sent in my unit. Look for the model number on the face plate of of the heating control. Here are the instrutions for the heating unit I received. (translated from Chinese) XMTD-702 series temperature control instrument operation manual 1. Operating Instructions 1. Set temperature: Press SET key to set the temperature, press SET key, the lower row of digital tube data flashes (upper row normal temperature measurement), indicating that the instrument enters the temperature setting state, press △ key to increase the set value, press ▽ key to set The set value decreases. Pressing the increase key or decrease key continuously will quickly change the setting value. Press the SET key again to return to the normal working state. The temperature setting is completed. 2. Correction of sensor error: When confirming that the value displayed by the instrument is not the correct measured value, the displayed value can be corrected. Press the SET key for 3 seconds to enter the inner menu of the instrument. After selecting the parameter SC, cooperate with the △ or ▽ key to modify this parameter. The correction range of the sensor error is 50 to -50. After the correction is completed, press the SET button for 3 seconds to exit. The correction value is 0 when the meter leaves the factory. When using it, it is necessary to prevent the meter with the correct display from being corrected to be incorrect. 3. Start auto-tuning: This product can adapt to most control systems. Only when the control effect is particularly unsatisfactory, auto-tuning can be started. Press SET key for 3 seconds to enter the inner menu of the instrument. At this time, the At indicator starts to blink and the instrument enters the automatic tuning parameter working state. The instrument controls the heating system to fluctuate twice at the set point. When the At lamp is off, the auto tuning ends and the new PID parameters are locked in the chip. 2. Operation process 1. Set temperature: press set key → set temperature → press △ key to increase the set value, press ▽ key to decrease the set value → press the set key again to complete the temperature setting. 2. Set the internal function parameters: press the setting key for 3 seconds to enter the internal menu → modify the internal parameters to adjust the basic functions of the instrument → after the internal parameters are modified, press the setting key to exit the function menu. For the definition of internal function parameters, please refer to "Internal Parameter Table". Note: Generally, the inner layer function parameters cannot be adjusted at will, otherwise it may cause the control system to be disordered. 3. Definition of user's working parameters and "inner parameter table" Press SET key for 3 seconds, the meter enters the inner parameter setting state. Parameter code Parameter meaning Explanation Setting range Factory default AL Upper limit alarm Set the upper limit deviation alarm value 0-50 20 Hy Main output hysteresis Main output action insensitive area 0-50 2 P Proportional band If it is 0, it is position control 1 ℃ -200 ℃ 30 I Integral time constant If it is zero, cancel the integral control function 0-999 seconds 240 d Differential time constant If set to zero, cancel the differential action 0-999 seconds 60 t Proportional cycle Adjust the working period of temperature compensation, that is, the cycle time of output control action 1-200 seconds 20 Sc Measured value offset Sensor error correction -50 ℃ -50 ℃ 0 AT VDF The meter automatically adapts to the overheating of the heating system: 0 is off, 1 is on 0, 1 0 Lck Parameter lock 0: No lock; 1: Lock the parameters except the set value 2: Lock all parameters 0-2 0 Parameter Description: AL: Over-temperature alarm parameter. When the temperature exceeds the AL value, the ALM indicator lights. Example: Set the temperature to 100. AL is adjusted to 10. When the temperature reaches 100 + 10 = 110, the instrument generates an alarm. At this time, the ALM indicator is on and the alarm relay is activated. HY: The main output hysteresis prevents the output relay from frequently acting when the temperature is balanced. P: It is the proportional band, that is, the proportional control value. The instrument is centered on the set value. The P value is distributed on both sides of the set point. Within the P value range, the instrument works in PID mode. Example: Set the temperature to 100 degrees. When P = 30, the automatic control range of the instrument is 85-105 degrees (that is, within the range of 30 degrees). When it is lower than 85 degrees, it will be heated with full power, and when it is higher than 105 degrees, it will be fully cut off. I: It is used to eliminate static error. The actual measured temperature minus the set temperature is called static error. The magnitude of the I value can be understood as the theoretical time corresponding to the elimination of the static difference. The value of I is related to the power and insulation performance of the heating system. Generally I value is too small will cause temperature overshoot, too large will affect the heating rate. Generally it takes 80-360 seconds. D: Overshoot control. When the temperature fluctuates, the meter will respond within the differential time D. The meter calculates the increase or decrease of the control output energy according to the size of the D value combined with the speed of the fluctuating temperature. If the D value is too large, it will cause fluctuations, and if it is too small, the system will react slowly. Generally 10-40 seconds. T: It is the heating output cycle, that is, the working cycle of the relay. If the T value is small, the control effect is good, but if the T value is too small, the relay will reduce the life due to frequent work. The general T value is 20-60 seconds. SC: Error correction. AT: Auto-tuning parameters. After starting auto-tuning, the instrument automatically measures and adapts to the heating system. The auto-tuning instrument controls the heating system to fluctuate twice near the temperature set point, and automatically calculates P, I, and D suitable for this system. Control parameters. After auto-tuning, the instrument controls the controlled system according to the new P, I, D parameters. LCK: parameter lock to prevent misoperation. Fourth, the size of XMTD701 peripheral 72 * 72 * 30 opening 67.5 * 67.5 Five, matters needing attention 1. If the measured temperature is highly correlated with the actual temperature, it is generally caused by the wrong sensor. Please put the sensor in boiling water, the meter should display 100 ℃. Otherwise, check whether the sensor is consistent with the input type of the instrument. 2. The meter display is normal, the temperature is suddenly out of control, and the external load should be checked for short circuit or open circuit. 3. The meter displays HHH when the measured value exceeds the meter range or the thermocouple is disconnected, and LLL indicates that the measured value is below the lower limit of the meter range or the thermocouple is reversed. Review: Has all you want when electroplating. A great machine - Excellent. THE seller sent me the extra fuse that wasn't in the box . Very reliable seller and like all the features that the machine has that others do not have. I hope they sell more as people would be very pleased with it and it is well worth the money.
| Customer Reviews | 3.4 out of 5 stars 2 Reviews |
T**Z
Temperature not consistent
Stirrer works fine. Set the temperature and continues to heat well above the set point. Trouble shooting instructions in the manual are different than what is actually displayed. Juggling around with probe connection in the back sometimes gets it to work. The instructions for the heating unit were not correct in the manual that was sent in my unit. Look for the model number on the face plate of of the heating control. Here are the instrutions for the heating unit I received. (translated from Chinese) XMTD-702 series temperature control instrument operation manual 1. Operating Instructions 1. Set temperature: Press SET key to set the temperature, press SET key, the lower row of digital tube data flashes (upper row normal temperature measurement), indicating that the instrument enters the temperature setting state, press △ key to increase the set value, press ▽ key to set The set value decreases. Pressing the increase key or decrease key continuously will quickly change the setting value. Press the SET key again to return to the normal working state. The temperature setting is completed. 2. Correction of sensor error: When confirming that the value displayed by the instrument is not the correct measured value, the displayed value can be corrected. Press the SET key for 3 seconds to enter the inner menu of the instrument. After selecting the parameter SC, cooperate with the △ or ▽ key to modify this parameter. The correction range of the sensor error is 50 to -50. After the correction is completed, press the SET button for 3 seconds to exit. The correction value is 0 when the meter leaves the factory. When using it, it is necessary to prevent the meter with the correct display from being corrected to be incorrect. 3. Start auto-tuning: This product can adapt to most control systems. Only when the control effect is particularly unsatisfactory, auto-tuning can be started. Press SET key for 3 seconds to enter the inner menu of the instrument. At this time, the At indicator starts to blink and the instrument enters the automatic tuning parameter working state. The instrument controls the heating system to fluctuate twice at the set point. When the At lamp is off, the auto tuning ends and the new PID parameters are locked in the chip. 2. Operation process 1. Set temperature: press set key → set temperature → press △ key to increase the set value, press ▽ key to decrease the set value → press the set key again to complete the temperature setting. 2. Set the internal function parameters: press the setting key for 3 seconds to enter the internal menu → modify the internal parameters to adjust the basic functions of the instrument → after the internal parameters are modified, press the setting key to exit the function menu. For the definition of internal function parameters, please refer to "Internal Parameter Table". Note: Generally, the inner layer function parameters cannot be adjusted at will, otherwise it may cause the control system to be disordered. 3. Definition of user's working parameters and "inner parameter table" Press SET key for 3 seconds, the meter enters the inner parameter setting state. Parameter code Parameter meaning Explanation Setting range Factory default AL Upper limit alarm Set the upper limit deviation alarm value 0-50 20 Hy Main output hysteresis Main output action insensitive area 0-50 2 P Proportional band If it is 0, it is position control 1 ℃ -200 ℃ 30 I Integral time constant If it is zero, cancel the integral control function 0-999 seconds 240 d Differential time constant If set to zero, cancel the differential action 0-999 seconds 60 t Proportional cycle Adjust the working period of temperature compensation, that is, the cycle time of output control action 1-200 seconds 20 Sc Measured value offset Sensor error correction -50 ℃ -50 ℃ 0 AT VDF The meter automatically adapts to the overheating of the heating system: 0 is off, 1 is on 0, 1 0 Lck Parameter lock 0: No lock; 1: Lock the parameters except the set value 2: Lock all parameters 0-2 0 Parameter Description: AL: Over-temperature alarm parameter. When the temperature exceeds the AL value, the ALM indicator lights. Example: Set the temperature to 100. AL is adjusted to 10. When the temperature reaches 100 + 10 = 110, the instrument generates an alarm. At this time, the ALM indicator is on and the alarm relay is activated. HY: The main output hysteresis prevents the output relay from frequently acting when the temperature is balanced. P: It is the proportional band, that is, the proportional control value. The instrument is centered on the set value. The P value is distributed on both sides of the set point. Within the P value range, the instrument works in PID mode. Example: Set the temperature to 100 degrees. When P = 30, the automatic control range of the instrument is 85-105 degrees (that is, within the range of 30 degrees). When it is lower than 85 degrees, it will be heated with full power, and when it is higher than 105 degrees, it will be fully cut off. I: It is used to eliminate static error. The actual measured temperature minus the set temperature is called static error. The magnitude of the I value can be understood as the theoretical time corresponding to the elimination of the static difference. The value of I is related to the power and insulation performance of the heating system. Generally I value is too small will cause temperature overshoot, too large will affect the heating rate. Generally it takes 80-360 seconds. D: Overshoot control. When the temperature fluctuates, the meter will respond within the differential time D. The meter calculates the increase or decrease of the control output energy according to the size of the D value combined with the speed of the fluctuating temperature. If the D value is too large, it will cause fluctuations, and if it is too small, the system will react slowly. Generally 10-40 seconds. T: It is the heating output cycle, that is, the working cycle of the relay. If the T value is small, the control effect is good, but if the T value is too small, the relay will reduce the life due to frequent work. The general T value is 20-60 seconds. SC: Error correction. AT: Auto-tuning parameters. After starting auto-tuning, the instrument automatically measures and adapts to the heating system. The auto-tuning instrument controls the heating system to fluctuate twice near the temperature set point, and automatically calculates P, I, and D suitable for this system. Control parameters. After auto-tuning, the instrument controls the controlled system according to the new P, I, D parameters. LCK: parameter lock to prevent misoperation. Fourth, the size of XMTD701 peripheral 72 * 72 * 30 opening 67.5 * 67.5 Five, matters needing attention 1. If the measured temperature is highly correlated with the actual temperature, it is generally caused by the wrong sensor. Please put the sensor in boiling water, the meter should display 100 ℃. Otherwise, check whether the sensor is consistent with the input type of the instrument. 2. The meter display is normal, the temperature is suddenly out of control, and the external load should be checked for short circuit or open circuit. 3. The meter displays HHH when the measured value exceeds the meter range or the thermocouple is disconnected, and LLL indicates that the measured value is below the lower limit of the meter range or the thermocouple is reversed.
E**E
Has all you want when electroplating. A great machine
Excellent. THE seller sent me the extra fuse that wasn't in the box . Very reliable seller and like all the features that the machine has that others do not have. I hope they sell more as people would be very pleased with it and it is well worth the money.
Trustpilot
1 month ago
2 months ago