


Buy anything from 5,000+ international stores. One checkout price. No surprise fees. Join 2M+ shoppers on Desertcart.
Desertcart purchases this item on your behalf and handles shipping, customs, and support to USA.
🎨 Transform your ideas into stunning, professional-quality decals—because ordinary is overrated!
INKJET CLEAR is a premium 200gsm clear waterslide decal paper designed exclusively for inkjet printers, delivering ultra-high 5760 dpi print quality with superior ink absorption. Its easy DIY soak-and-slide application ensures wrinkle-free, vibrant transfers on ceramics, glass, metal, and plastics. Available in convenient 20 or 100-sheet packs, it’s the go-to choice for creators, hobbyists, and small businesses aiming to craft personalized, professional-grade projects with ease.


| ASIN | B077TMFVL9 |
| Best Sellers Rank | 5,846 in Stationery & Office Supplies ( See Top 100 in Stationery & Office Supplies ) 2 in Water Slide Decal Paper |
| Brand Name | Hayes Paper Co. |
| Colour | transparent |
| Country Of Origin | China |
| Customer Reviews | 4.5 4.5 out of 5 stars (15,800) |
| Item Dimensions L x W | 29.7L x 21W centimetres |
| Item Type Name | Waterslide Decal Paper |
| Item Weight | 0.28 Kilograms |
| Luminanax Lux | 95 |
| Manufacturer | Pup Ted LLC |
| Material Features | Versatile and lightweight |
| Paper Finish | Coated |
| Paper Size | A4 |
| Paper Weight | 15 |
| Sheet Count | 20 |
| UPC | 853662007265 |
| Unit Count | 20.0 count |
B**E
Epson EcoTank Usage
Epson EcoTank Printing Help I've seen a few comments from folks having issues printing to these sheets on an Epson EcoTank printer. I use an EcoTank Pro ET-16685. These were my settings for my first test print, which came over very well indeed. Paper Source : Paper Tray (I did not want the paper to curl too much from using a Cassette Tray) Doc Size : A4 Orientation : Portrait Paper Type : Epson Ultra Glossy (Because of the longer drying time and also ink saturation level) Quality : High (Because it's a slower print and more accurate for quality. Minimal smudging, if any at all) I only printed in Mono, as that's all I needed for Wolf Paws for my Space Wolves (Warhammer 40K). I'm making small transfers/decals for shoulder pads. I posted this info here to help others who may be doing the same for their own miniature modelling projects. You might notice a few traction lines on the page. The first print was quite clear of them, but I reused the sheet a few more times to add more prints, so there would have been extra handling of the paper. You might notice the zoomed in paws don't look crisp and sharp. Well, it is an inkjet printer and we are zoomed in very high. That paw is only about 4.4 mm wide. It's not going to be noticeable on in a wargame unless very model is being scruitinsed with a magnifying glass. To be fair, I'm more worried about the Tyranids :-)
D**B
Much better than cheaper ones.
This is the best waterside paper I've tried. I will be sticking with this brand from now on.
T**L
Make sure you use top quality ink
This product is easy to use
D**W
Easy to use with comprehensive instructions
I looked for this product after seeing it used on TV. I wasn’t sure how well it would work but I was delighted with the results. I did learn one thing though, inkjet printers don’t print white. I suppose this should blinding obvious, the white areas are left transparent, and I will have to find a work around. This is highlighted on the packaging.
K**S
Just what I was looking for.
I build guitars. I was looking for a way to get a black and white image onto the back of a guitar body. After much googling I came across this wet slide transfer/decal method. After converting my A4 image on to A3 I followed the instructions on a test piece first. For my application I found it had to soak for longer, until you can see/feel the decal detaching from the backing. For such a large image as mine it is nigh on impossible to slide it onto your project avoiding ALL wrinkles and air bubbles, the decal is super thin and will tear if you are not very gentle. But, I persevered and it looks good, not brilliant but still good. I imagine the whole process would be infinitely easier on a much smaller project. Give it a go, it's fun.
C**E
Make some people happy!
easy to use, great to make personal items or items with a group logo etc. I do lots of charity fundraising items for two local groups. Do watch a few You tube videos for how to best use and place. there are some great clear demonstrations. Also fill your sheet with various designs, make the most of each sheet
A**R
Acceptable and cheap but not best quality decal paper
Works OK in making decals for scale models but even if well varnished there is a tendency for ink to run after application, so that lettering and shapes appear smudged despite correct inkjet printer ink being used. A good quality of this paper is that it is resistant to silvering if applied to a gloss surface. Overall, not the best decal paper but adequate for many modelling jobs and much cheaper than the best.
M**N
Good but a little thick
I also have the clear transfer paper and the transfer itself is as you would expect. However if you want a white backing you should expect the transfer to feel more like the thickness of a sticker. Which begs the question, would a sticker be just as good? Still, it is useful if a bit expensive.
T**P
Un très bon produit facile à utiliser Résultats des décalcomanies excellent
T**S
Just Perfect!
I**N
Detta dekalpapper fungerar precis som det är tänkt, titta på bilden text och varningstrianglar är gjorda med detta dekalpapper. Har även gjort bilder som sitter på kaffemuggar och de sitter fast som f..n. Viktigt att klarlacka det man har skrivit ut innan man överför bilden.
C**O
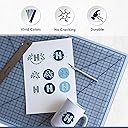
GUIDA ALL'USO PER RISULTATO PERFETTO: - stampare il file immagine che si vuole sulla versione lucida del foglio, le immagini vettoriali avranno una qualità di stampa decisamente superiore. Stampare alla massima qualità indicando il "foglio lucido" nelle impostazioni. - Attendere che l'inchiostro si asciughi bene, io ho atteso 1h circa. - Ho comprato le bombolette acrilico trasparente AMBROSOL (lucido o opaco, dipende dal risultato che si vuol ottenere). Questo marchio ha il beccuccio erogatore con un po di ventaglio perfetto e di facile utilizzo. - Prima mano "veloce" per fissare l'inchiostro. Tenete il pezzo contro luce per poter vedere quanta vernice avete steso e se stesa uniformemente. Attendete 5 minuti e passate la prima mano "grassa", prima nel senso della lunghezza del pezzo e dopo nel senso della larghezza in modo tale da formare un "reticolato", contro luce dovete vedere la vernice lucida omogenea e senza buccia d'arancia. Attendete asciugatura 15 minuti a 20° circa. Per temperature minori, almeno 30min. Controllate che non si sia depositata polvere e procedete con la seconda mano anch'essa grassa ad incrociare. Attendete 12-16h di asciugatura per star tranquilli. SE NON VENGONO EFFETTUATE 3 MANI DI ACRILICO, vi si frantumerá nelle mani quando cercherete di staccarlo! - Ritagliate con forbici la vostra immagine a 3mm dal bordo. - pulite e preparate il supporto dove applicare la vostra decalcomania, non deve esserci polvere o granelli perché faranno spessore dove si accumulerá acqua che non riuscirete a togliere. - immergete in una bacinella per 60 secondi in acqua temperatura ambiente la vostra immagine, tenderà ad arrotolarsi, non abbiate paura è tutto regolare. - uscite dall'acqua la decalcomania e con due dita cercate di "slittare" di qualche millimetro l'immagine ed il supporto bianco di fondo. Appoggiate al supporto la vostra decalcomania dal lato dove la vostra immagine si è staccata e con un dito tenete fermi. TRANQUILLI che il posizionamento/centratura potrà essere effettuata in seguito. Con le unghia iniziate a sfilare il supporto bianco da sotto mentre tenete la vostra decalcomania ferma. - sfilato il supporto bianco, posizionate la decalcomania e con un fazzolettino piegato a metà o in 4 iniziate delicatamente a spingere fuori tutta l'acqua che c'è sotto la decalcomania, è la stessa operazione che effettuate quando pulite i vetri della doccia con lo scopettino. Se non rimuovete l'acqua sotto la decalcomania si asciugherá con delle bollicine visibili e fragili perché non aderenti al supporto. - Tolta l'acqua in eccesso, fate asciugare per 3-4h. Per chi vuole applicare un ulteriore strato protettivo acrilico lucido o opaco, può farlo tranquillamente. Se si vuol passare su tutto il supporto il trasparente acrilico finale, sarebbe meglio applicare un fondo sempre a bomboletta. Fine :)
C**2
These work great in inkjet printers, the print image is sharp, no smudging or streaking. I used rust-oleum clear mat spray paint which worked perfectly. The decals slid off easily and give a good permanent adhesion. I am a model railway modeller and have tried many different brands of decals which purported to be compatible with inkjet printers which failed. These are the best I have used. Highly recommend
Trustpilot
2 weeks ago
2 weeks ago